How to Cut a Picture Mat is a practical skill that allows you to frame photographs and artwork in a way that centers the viewer’s attention and adds a sense of spatial depth. A clean, precisely cut mat can dramatically elevate the presentation of any framed piece; however, professional mat cutting and custom framing often cost more than the artwork itself. By learning to cut your own mats using a few basic tools and materials, you can achieve a fully customized, professional-looking result at a fraction of the cost.
Part 1 Gathering Your Materials
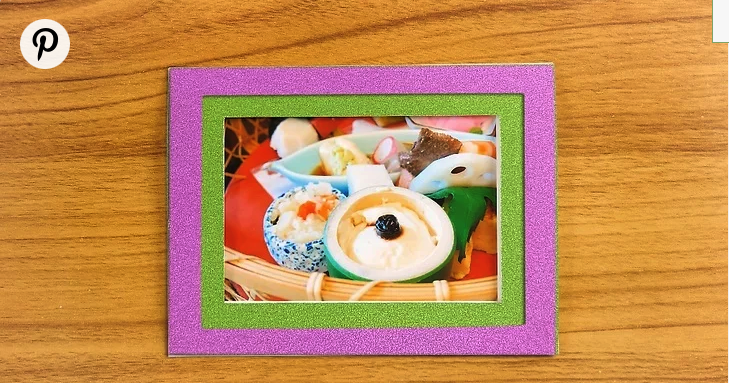
Step 1: Prepare the Picture You Want to Frame
Have the picture you plan to frame ready before you begin. Examine it carefully to determine the appropriate mat and frame size. A finished matting project typically consists of the artwork sandwiched between two identically sized mat boards: one serving as the backing, and the other acting as the front mat with a precisely cut window that reveals the image.
At minimum, you will need two pieces of mat board. Larger works—such as paintings or exhibition pieces—will naturally require larger mats, but the final dimensions also depend on how much mat border you want visible around the image. Taking the time to visualize the final layout at this stage will help ensure accurate measurements later.

Step 2: Decide on a Mat Style
Choose a mat style that complements the picture you are framing. Mat boards are available in a wide range of colors, textures, finishes, and thicknesses. You may opt for a single mat for a clean, minimal look or multiple layered mats to add depth and visual interest.
If you decide to use layered mats, select color and texture combinations that work harmoniously together and enhance the artwork rather than overpower it.
Mat board thickness also plays an important role. Thicker mats create a deeper, more pronounced inner edge (often called the “bevel”), which can add a sense of sophistication. For this reason, thicker mats are often chosen in neutral colors such as white or off-white to keep the beveled edge subtle.
In terms of quality, mat boards generally fall into two categories:
- Standard mat board, suitable for photographs and decorative prints
- Archival mat board, designed for professional display and long-term preservation
Archival mat board is strongly recommended for original artwork or valuable prints, especially those created with artist-grade materials.

Step 3: Choose a Cutting Tool
Select a cutting implement capable of producing clean, straight cuts. A sharp razor blade, utility knife, or X-Acto knife is the most affordable and widely available option. These tools are effective but require careful handling to maintain accuracy and safety.
Alternatively, you may choose a dedicated mat cutter, which slides along a guide rail for consistent cuts. While mat cutters can improve precision, they are more expensive and may require practice to use correctly.
Always exercise caution when working with exposed blades, and replace dull blades frequently to avoid tearing the mat board.
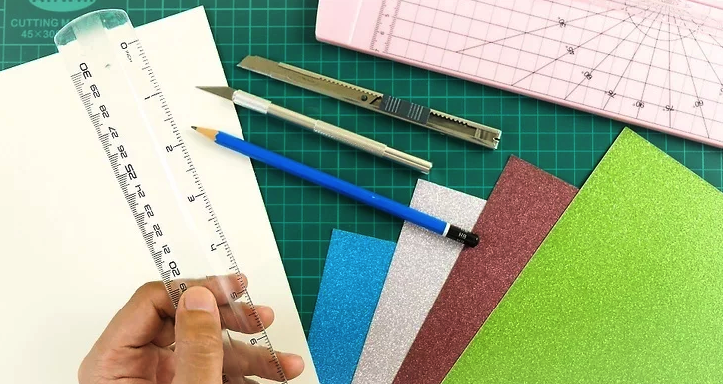
Step 4: Acquire a Ruler or T-Square
A sturdy ruler or T-square is essential for accurate measuring and straight cuts. The ruler allows you to mark precise dimensions, while the T-square helps maintain consistent angles and even borders on all sides of the mat.
Heavy metal rulers are preferable, as their weight helps hold the mat board in place during cutting, and they are resistant to accidental blade damage. Using proper measuring tools will greatly reduce errors and improve the overall finish of your mat.
Outbound Links
- https://www.artistsnetwork.com/art-techniques/framing-artwork/
- https://www.bhphotovideo.com/explora/photography/tips-and-solutions/how-to-mat-and-frame-photos
- https://www.matcutters.com/mat-cutting-basics
- https://www.archivalmethods.com/blog/framing-art-archival-materials
References
- Artist’s Network — Framing Artwork and Choosing Mat Boards
- B&H Photo Video — How to Mat and Frame Photographs
- Logan Graphic Products — Mat Cutting Tools and Techniques
- Archival Methods — Understanding Archival Mat Board and Preservation
Part 2 Measuring to Fit the Mat

Step 1: Measure the Picture
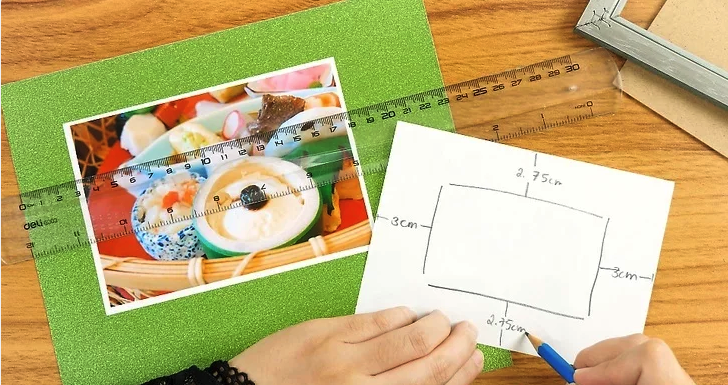
Begin by measuring the picture or artwork you intend to frame. Using a ruler, carefully record both the height and width of the image. The two mat boards you prepare should match the outer dimensions of the picture exactly. However, the inner opening of the front (window) mat must be cut slightly smaller—typically at least half an inch less on each side—to ensure the artwork is held securely in place.
Write down all measurements and set the picture aside once finished. At this stage, you should also decide how wide you want the window mat border to be. If only a specific portion of the image needs to remain visible, a wider mat can help mask non-essential areas and allow you to visually center the focal point more precisely.
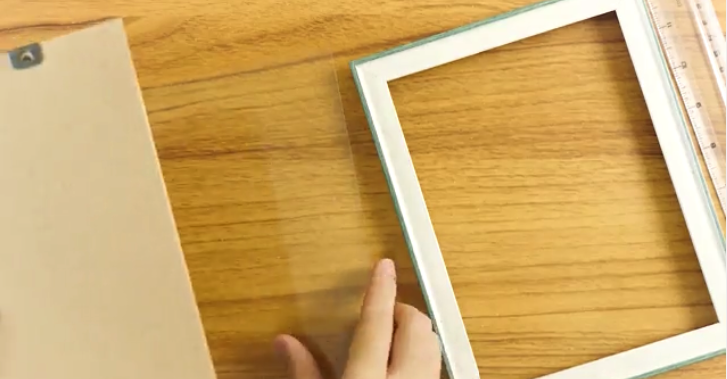
Step 2: Measure the Frame
Next, measure the frame you plan to use. Remove the glass or acrylic panel and take out the backing board. This backing board represents the exact interior space where the mat and picture will sit, making it the most reliable reference for sizing. Measure its height and width carefully, and clearly label each dimension to avoid confusion later.
Even if the frame manufacturer provides size specifications, it is best to disregard them and rely on your own measurements. Small variances are common, and precise sizing is critical to ensure the finished mat fits cleanly and securely within the frame.
Step 3: Choose the Window Mat Size
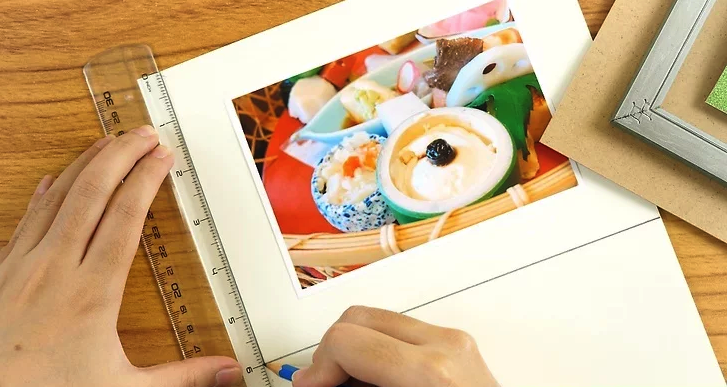
With the picture and frame dimensions established, determine the size of the window opening in the front mat. The window mat should border the image evenly and overlap it slightly without obscuring important details. A well-proportioned window opening enhances the presentation while keeping the viewer’s focus on the artwork itself.
On the back side of the second mat board, lightly mark and trace the area where the window will be cut, using the picture’s dimensions as a guide. For most small to medium-sized photographs or prints, a window mat border width of approximately half an inch to one and a half inches offers a balanced and visually pleasing result.
Outbound Links
- https://www.wikihow.com/Cut-a-Picture-Mat
- https://www.bhphotovideo.com/explora/photography/tips-and-solutions/how-to-mat-and-frame-photos
- https://www.logangraphic.com/mat-cutting-basics
- https://www.archivalmethods.com/blog/how-to-measure-art-for-framing
References
- wikiHow — How to Cut a Picture Mat
- B&H Photo Video — Matting and Framing Techniques
- Logan Graphic Products — Mat Measurement and Cutting Guidelines
- Archival Methods — Measuring Artwork for Proper Framing
Part 3.Cutting the Mats
Step 1: Mark the First Mat for Cutting
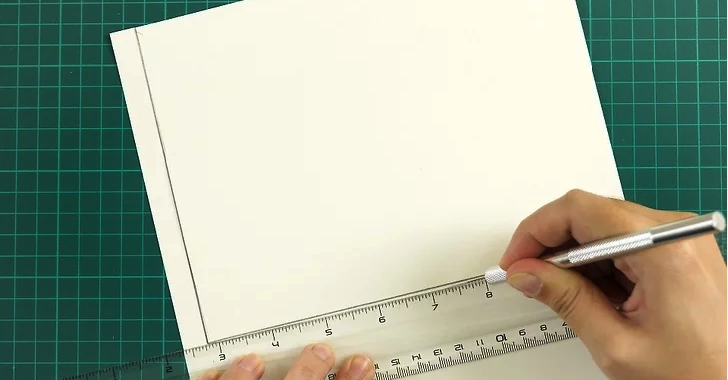
Begin by marking the first mat board according to the dimensions of the frame backing board measured earlier. Place a ruler or T-square along the edge of the mat and, using a pencil, mark the cutting line on the back side of the mat board. Start at the top edge and make small reference marks every few inches. These dotted guide marks help maintain alignment while cutting and allow you to quickly correct the cutting path if the ruler shifts.
Always measure, mark, and cut from the back of the mat. This ensures that any pencil marks or minor imperfections remain hidden once the mat is assembled and displayed.
Step 2: Cut the First (Backing) Mat
Align your cutting tool—whether a razor blade, utility knife, or mat cutter—firmly against the edge of the ruler. The blade should sit flush with the ruler to prevent angled or uneven cuts. If you are using a dedicated mat cutter, rely on its built-in guide rail to maintain a straight line.
Cut using slow, steady strokes while applying even pressure from start to finish. Ideally, aim to cut completely through the mat board in a single pass to achieve the cleanest edge. If the mat is particularly thick, make several lighter passes instead of forcing the blade. Repeat this process on all four sides, confirming each measurement before cutting.
When finishing a partially cut line, press the blade vertically until it breaks through the remaining material, then resume cutting at the correct angle. Always prioritize safety—keep your hands clear of the blade path and work deliberately to avoid injury.
Step 3: Cut the Second (Window Frame) Mat
Cut the second mat board to match the outer dimensions of the backing mat exactly. This mat will serve as the window frame on the front of the picture. If you have chosen a decorative or colored mat, it should be used here, as it will be the most visible element in the finished frame.
Using the ruler as a guide, carefully cut all four outer edges first. Then cut the inner window opening based on the measurements determined earlier. While the outer dimensions must match the backing mat precisely, the size of the window opening is flexible. For most applications, a window border width of approximately half an inch to one and a half inches provides the most balanced appearance.

Step 4: Create Layered Mats (Optional)
To achieve a more sophisticated, dimensional look, you can create layered mats by cutting multiple window mats. Each additional mat should be approximately half an inch to one inch smaller than the previous one. Arrange the mats concentrically so that each layer reveals a consistent border.
Layered mats allow for creative combinations of colors, textures, and finishes, adding visual depth and elegance to the presentation. When working with multiple layers, measure and cut each mat individually, and keep the size differences uniform unless a deliberate design variation is intended.
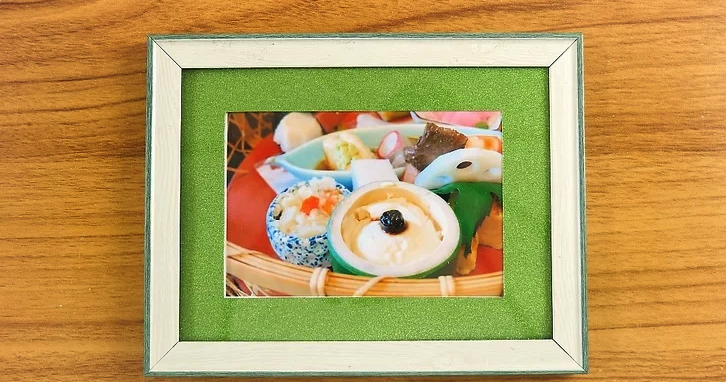
Step 5: Secure the Mats and Artwork
Place the artwork face down against the backing mat, then carefully center the window mat on top. Once aligned, use small pieces of artist’s tape to lightly secure the two mats together at the edges. Flip the assembled piece over and apply tape along the back seams to hold everything in place. After securing the back, remove any temporary tape from the front.
For best results, reduce the tackiness of the tape by pressing it against fabric before applying it to the mat. This helps prevent tearing the mat board or damaging the artwork during removal.
For original or valuable artwork, it is strongly recommended to place the matted piece inside a proper protective frame with glass or acrylic. Leaving artwork exposed, even when matted, increases the risk of smudging, fading, or physical damage.
Outbound Links
- https://www.wikihow.com/Cut-a-Picture-Mat
- https://www.logangraphic.com/mat-cutting-techniques
- https://www.archivalmethods.com/blog/how-to-mat-artwork
- https://www.bhphotovideo.com/explora/photography/tips-and-solutions/how-to-mat-and-frame-photos
References
- wikiHow — How to Cut a Picture Mat
- Logan Graphic Products — Professional Mat Cutting Tools and Methods
- Archival Methods — Best Practices for Matting and Preserving Artwork
- B&H Photo Video — Framing and Matting Artwork and Photographs