How to Make a Screen Print is a straightforward and creative process that allows artists and designers to transfer images onto a wide range of materials with impressive results. Screen printing, also known as silk screening or serigraphy, is valued for its versatility, ease of use, and relatively low cost, making it accessible to beginners and experienced creators alike. This guide is designed to introduce the fundamentals of screen printing and help you take your first steps with confidence.
Method 1 .Using a Screen and Squeegee
Step 1: Create Your Design
Begin by creating a simple design for your print. Sketch your idea onto a sheet of paper, focusing on bold shapes rather than intricate details. At this stage, do not worry about color gradients or shading—the design will be cut out and used as a stencil.
For beginners, simplicity is key. Geometric shapes, circles, and evenly spaced patterns are easier to cut and less likely to tear during the process. Leave enough space between elements to maintain the structural integrity of the paper stencil.

Step 2: Cut Out the Stencil
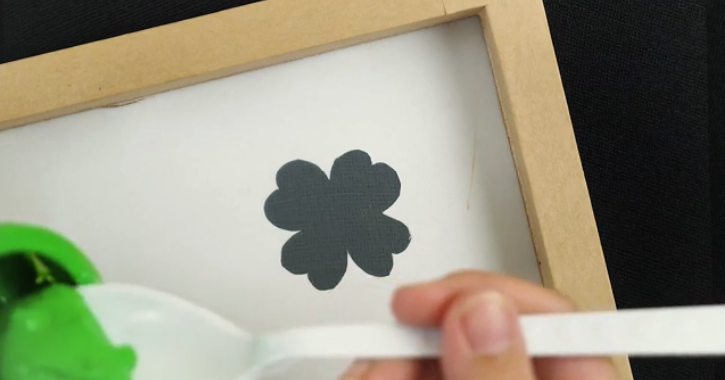
Using a sharp craft knife, carefully cut out all the areas of the design that will receive ink. Keep the surrounding paper intact, as it forms the body of the stencil. Precision is essential; if the stencil tears, it is often best to start over to ensure clean print results.
Before moving on, check that the stencil fits properly on your intended surface, whether it is paper or fabric. If the size is incorrect, resize or redraw the design before proceeding.
Step 3: Position the Stencil and Screen
Place the stencil directly on top of the material you plan to print on, such as paper or a T-shirt. Then position the screen over the stencil so that the mesh rests directly against it, with the frame handles facing upward.
If the stencil does not fully cover the screen opening, apply masking tape to the underside of the screen to block any exposed areas. This prevents ink from seeping through unwanted sections. Be careful not to tape the stencil itself to the mesh, as this may cause it to shift during printing.
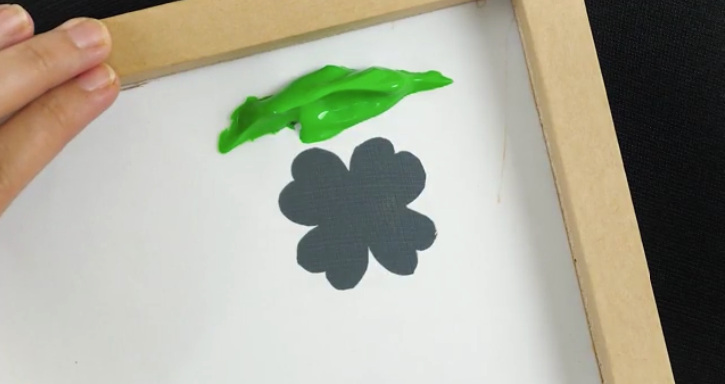
Step 4: Apply the Ink
Spoon a line of ink across the top edge of the screen—the side farthest from you. Avoid placing ink directly on the stencil at this point. Use only as much ink as needed to cover the design during the pull.
This basic method works best with a single color. While multiple colors can be used, they will inevitably blend during the process. If color mixing is acceptable for your design, you may experiment accordingly.
Step 5: Pull the Ink with a Squeegee
Using a squeegee, pull the ink down the screen in a single, smooth motion. Fewer strokes result in a cleaner, more professional finish. Always use vertical strokes; mixing horizontal and vertical movements can cause ink buildup and uneven drying.
Once you reach the bottom of the screen, continue the motion slightly to collect excess ink onto the squeegee handle so it can be reused.
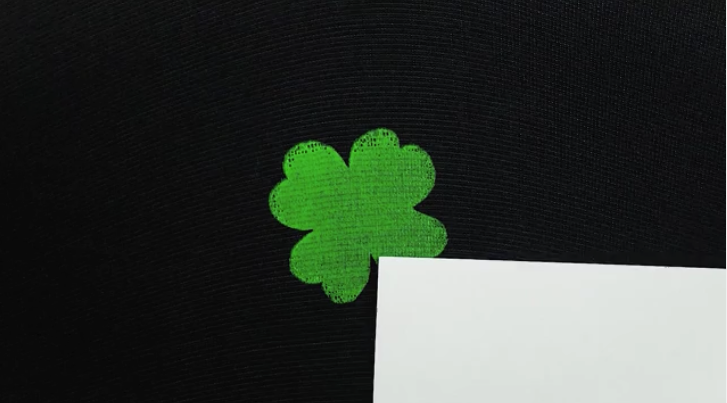
Step 6: Remove the Screen and Cure the Print
Carefully lift the screen and stencil straight up from the material. Avoid dragging or shifting them, as this may smear the ink. Remove each layer slowly and deliberately.
Allow the print to dry thoroughly. When printing on fabric, place a sheet of tracing or greaseproof paper over the dried design and iron it to heat-set the ink. This step seals the print, making it durable, washable, and suitable for regular wear.
Outbound Links
- https://www.wikihow.com/Make-a-Screen-Print
- https://www.printing.org/resources/screen-printing-basics
- https://www.speedballart.com/learning-guides/screen-printing
- https://www.thesprucecrafts.com/screen-printing-for-beginners-4177476
References
- wikiHow — How to Make a Screen Print
- Printing Industries of America — Introduction to Screen Printing
- Speedball Art Products — Screen Printing Techniques and Materials
- The Spruce Crafts — Screen Printing for Beginners
Method 2.Using an Embroidery Hoop
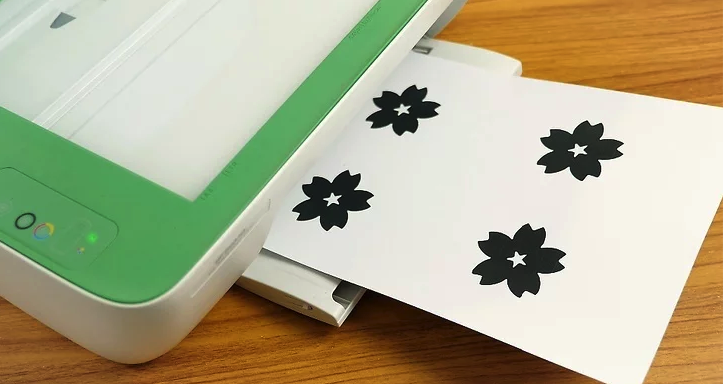
Step 1: Print or Prepare Your Design
Start by printing your design from a computer. Large, bold, and simple images are the easiest to work with, especially for beginners. Print the design in black and white or very dark colors so the pattern remains clearly visible through the screen material. Ensure the design fits comfortably within the dimensions of your embroidery hoop.
If you prefer not to use digital software, you may draw the design by hand. Just be sure it is correctly sized, dark enough to trace, and will not transfer unintentionally onto the screen.

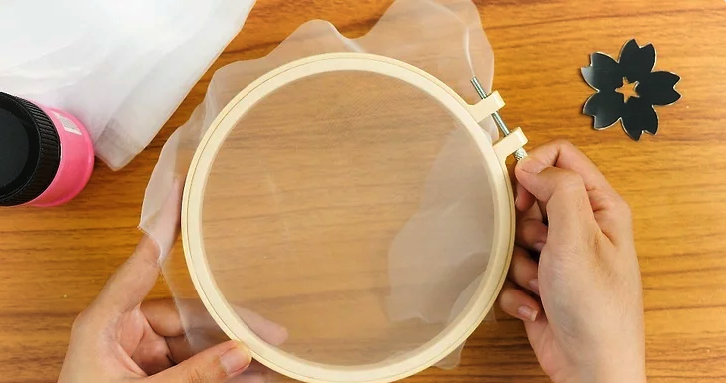
Step 2: Secure the Fabric in an Embroidery Hoop
Place a piece of sheer fabric into an embroidery hoop. Loosen the screw to separate the two rings, stretch the fabric tightly over the inner hoop, then press the outer hoop back on and tighten the screw. The fabric should be taut and wrinkle-free.
Precise centering is not critical, as only the area within the hoop will be used for printing. Sheer curtain fabric works well for this purpose—choose a mesh-like material that is not fully transparent.
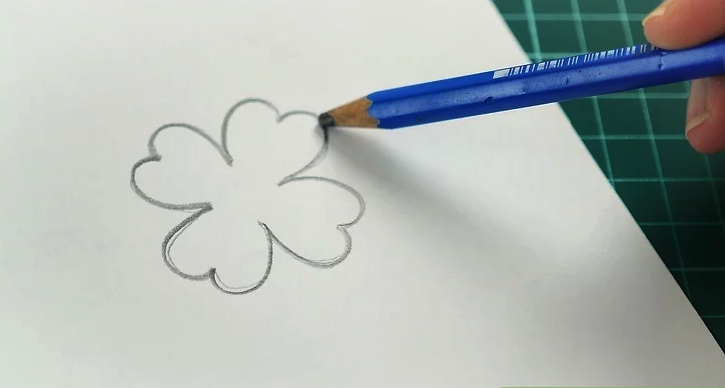
Step 3: Trace the Design onto the Fabric
Lay the embroidery hoop flat on top of your printed design, with the fabric touching the paper. Using a pencil, carefully trace the outline of the image onto the fabric. Focus only on the outlines rather than shading. If a mistake is made, erase and correct it before continuing.
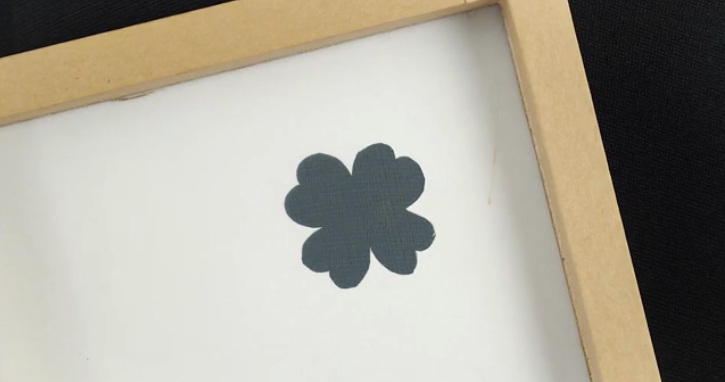
Step 4: Apply Glue to Block Out Non-Printing Areas
Flip the hoop so the fabric side faces upward. Apply a layer of glue around the outside of the traced design, covering all areas that should not receive ink. The glue should not enter the traced lines; it should only surround them. This layer acts as a resist, preventing paint from passing through unwanted sections of the screen.
The glue can be applied liberally outside the design area, but precision is required near the edges of the pattern. Allow the glue to dry completely, which typically takes about fifteen minutes.
Step 5: Position the Screen for Printing
Place the prepared screen over your printing surface. The sheer fabric should be elevated slightly above the material by the depth of the embroidery hoop. Smooth the surface underneath to ensure an even print.
If you have a squeegee, use it to apply and pull the ink across the screen. If not, a sponge brush can be used as an alternative—just be sure to hold the screen firmly in place while applying the paint.
Step 6: Remove the Screen and Cure the Print
Carefully lift the screen straight up from the material to avoid smudging. If the ink is still wet, even slight movement can blur the design. Allow the print to dry undisturbed for at least fifteen minutes.
Once dry, heat-set the design by ironing the fabric according to the instructions provided with your ink or paint. This step helps bond the ink to the fabric, improving durability and wash resistance.
Outbound Links
- https://www.wikihow.com/Make-a-Screen-Print
- https://www.speedballart.com/learning-guides/screen-printing
- https://www.thesprucecrafts.com/screen-printing-for-beginners-4177476
- https://www.printing.org/resources/screen-printing-basics
References
- wikiHow — How to Make a Screen Print
- Speedball Art Products — Beginner Screen Printing Techniques
- The Spruce Crafts — DIY Screen Printing Guide
- Printing Industries of America — Fundamentals of Screen Printing