How to Clear Windows Update Cache and Fix Common Update Issues
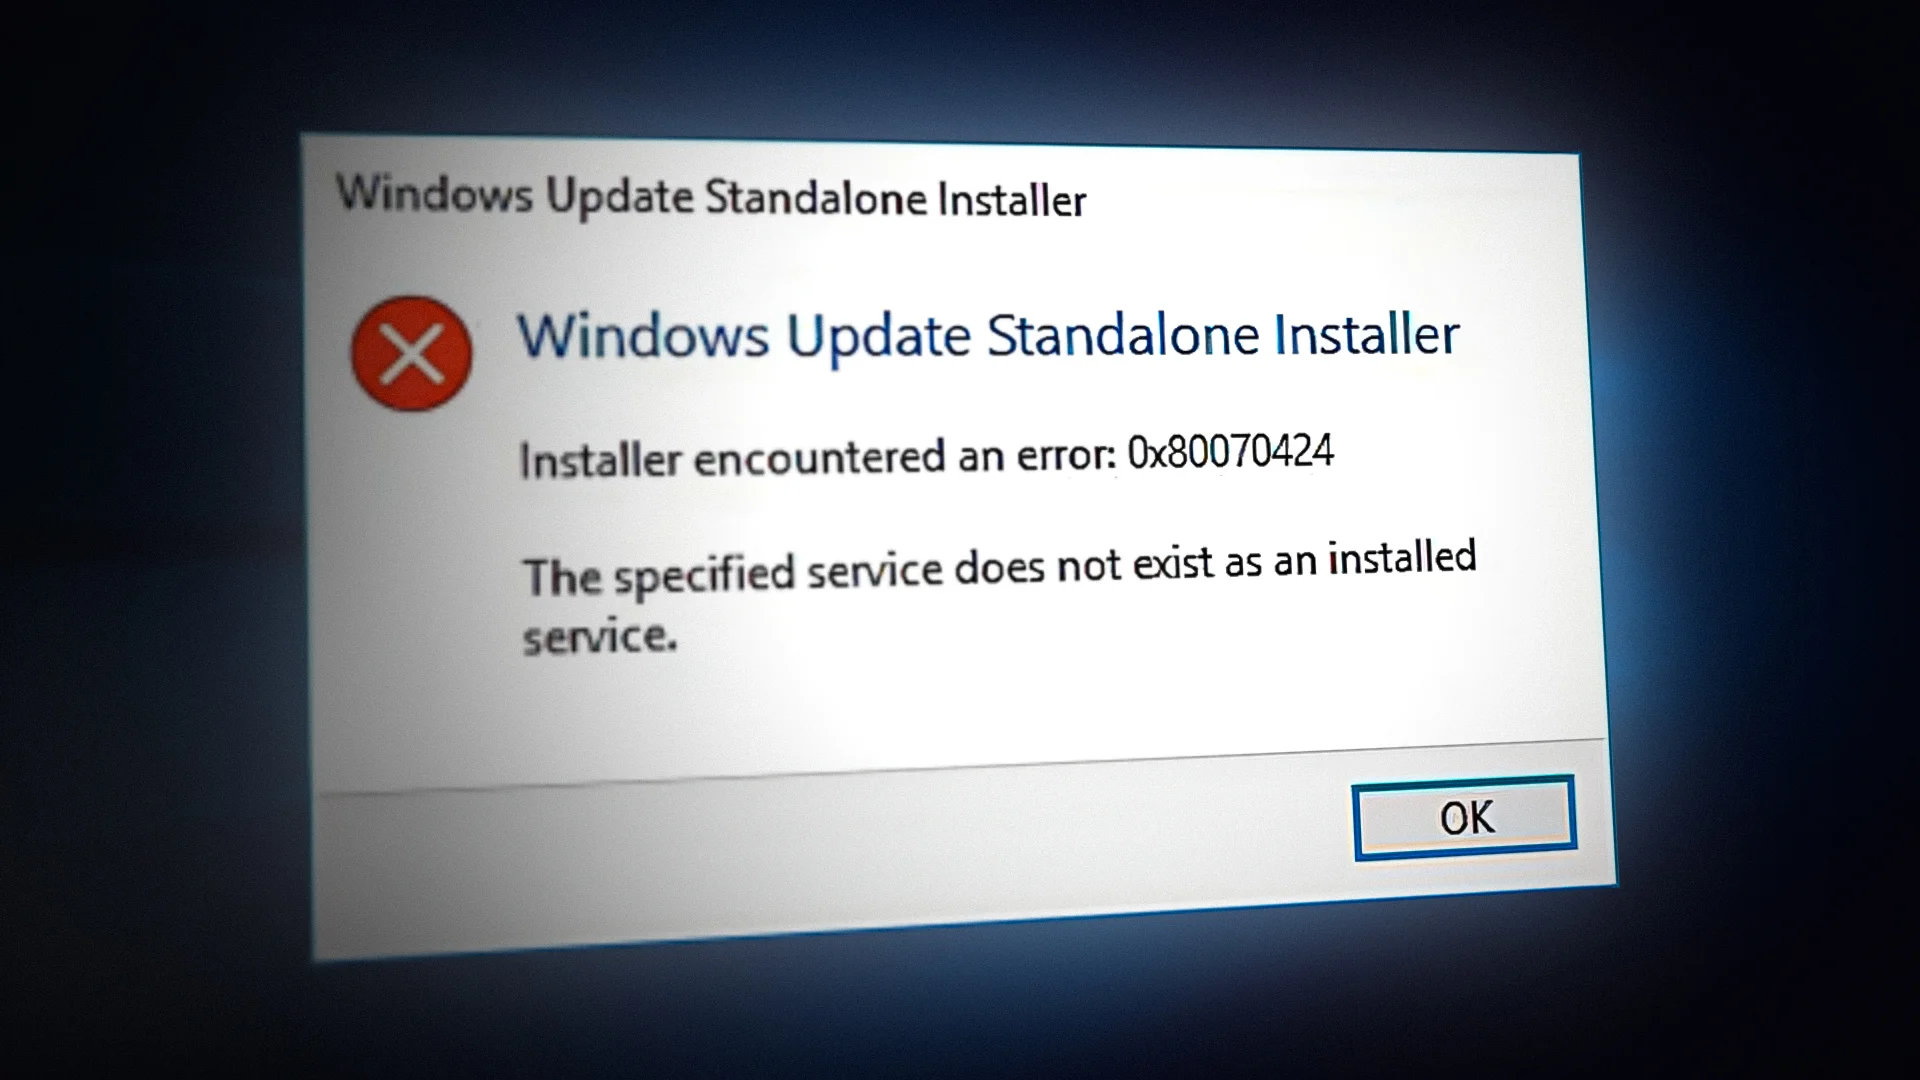
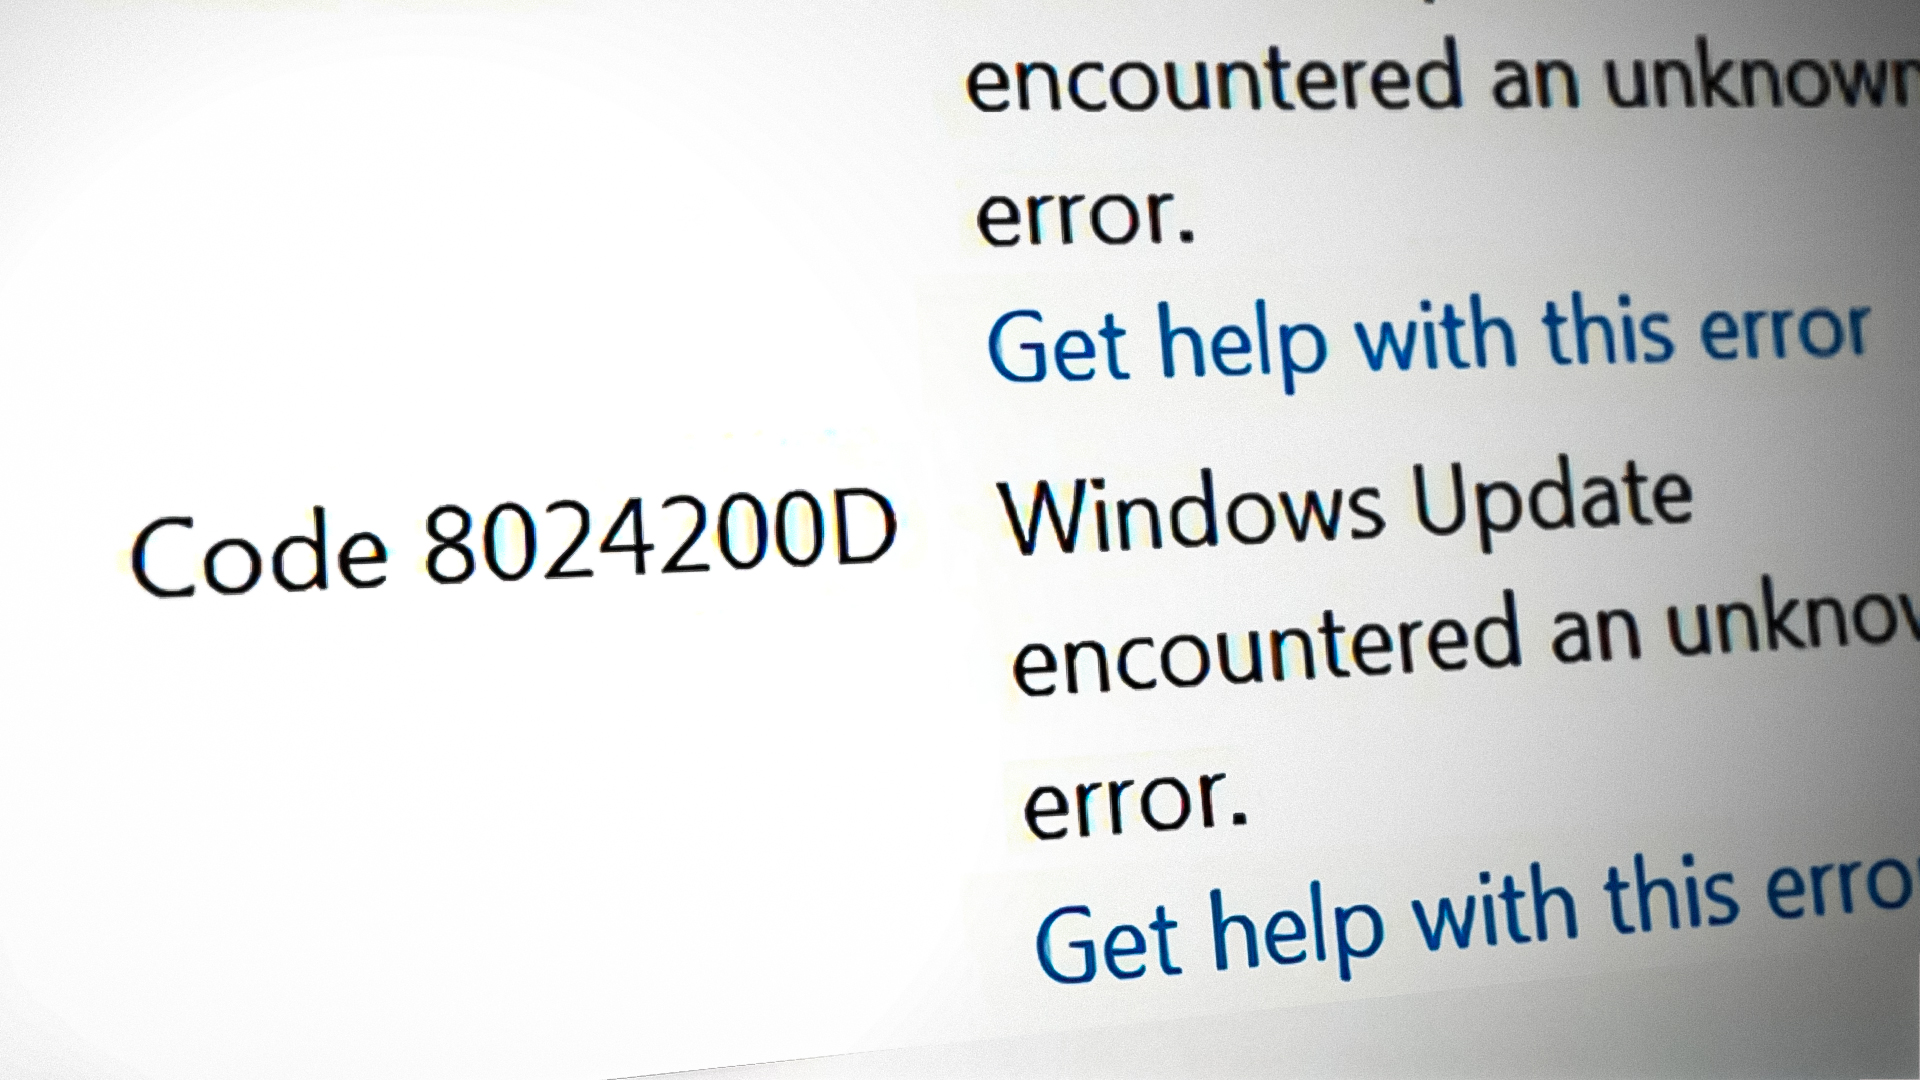
Windows Update is a crucial tool for keeping your computer secure and functioning properly. It provides essential security patches, new features, and performance enhancements. However, there are times when updates get stuck, fail to install, or slow down your system. One common cause of these problems is a cluttered or corrupted Windows Update cache—a collection of temporary files designed to speed up the update process.
Clearing the Windows Update cache can help resolve many common issues, such as updates failing to install or system performance degradation. Below, we’ll guide you through the steps to safely clear this cache and get your updates back on track.
Why Clear the Windows Update Cache?
The Windows Update cache stores temporary files that are used during the update process. Over time, these files can become corrupted or accumulate in large quantities, causing update failures or performance issues. By clearing the cache, you can often resolve problems related to slow updates, update errors, or installation failures.
How to Clear the Windows Update Cache: Step-by-Step
- Stop the Windows Update Service:
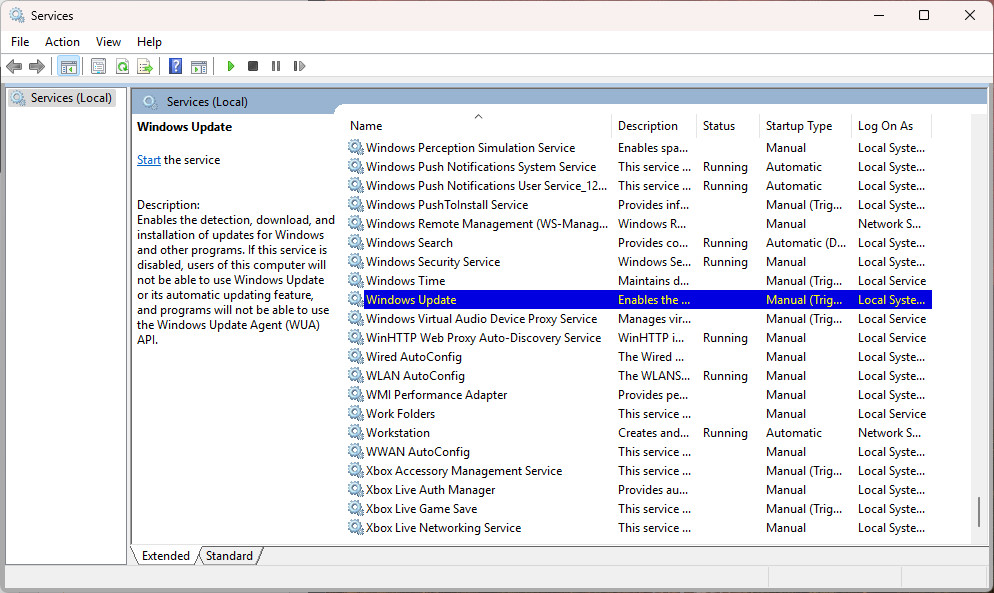
- Press Win + R, type
services.msc, and press Enter. - In the Services window, scroll down and find Windows Update.
- Right-click on it and select Stop. This will temporarily halt the update process.
- Press Win + R, type
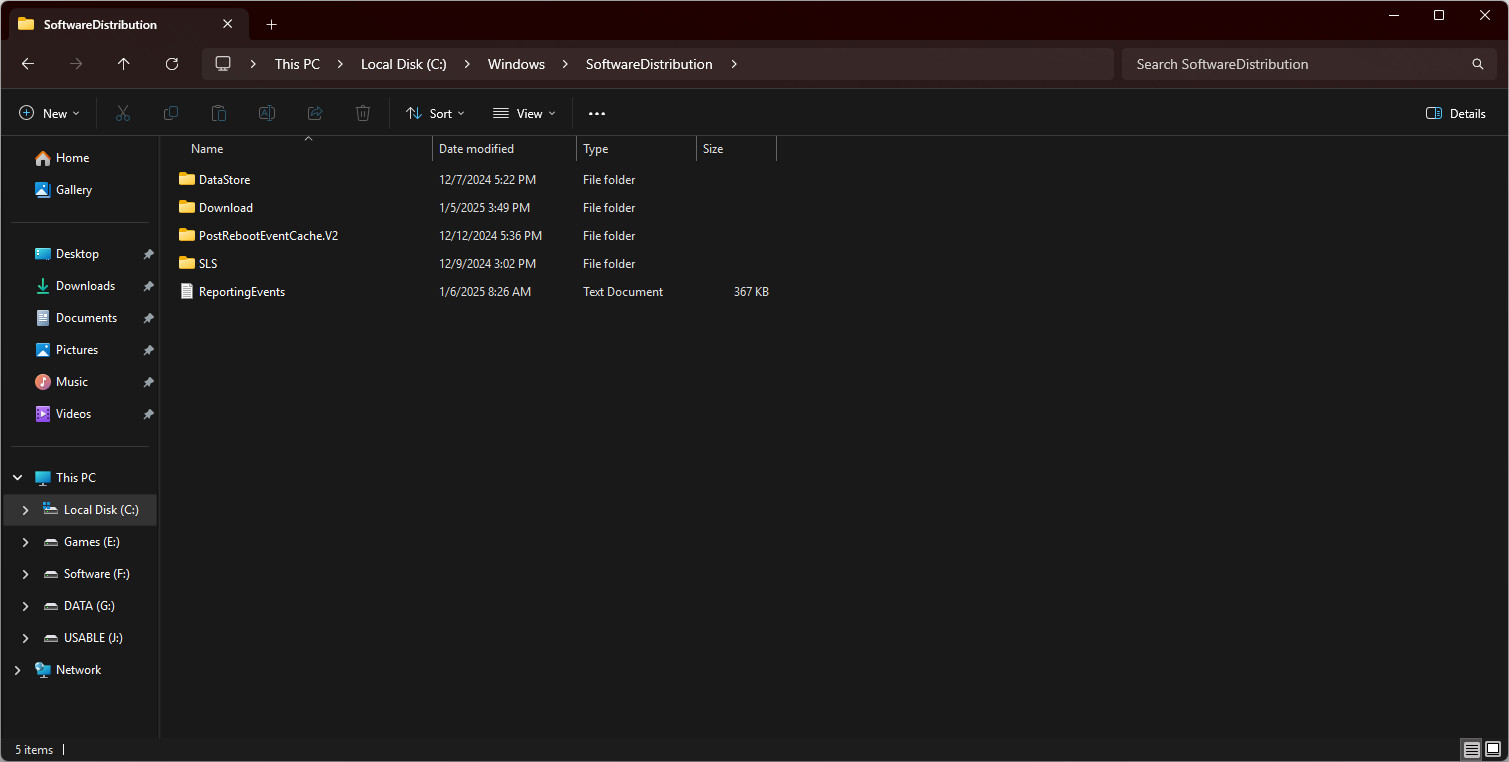
- Navigate to the Update Cache Folder:
- Open File Explorer and go to the following directory:
C:\Windows\SoftwareDistribution\Download - This folder stores all the downloaded update files.
- Open File Explorer and go to the following directory:
- Delete the Contents of the Folder:
- Select all files in the Download folder and delete them. This will remove the corrupted or cluttered update cache files.
- Restart the Windows Update Service:
- Go back to Services and right-click Windows Update.
- Select Start to restart the service.
- Check for Updates Again:
- Open Settings > Update & Security > Windows Update.
- Click Check for Updates to ensure the update process works smoothly.
Additional Troubleshooting Tips
If clearing the cache doesn’t resolve your issues, try these additional steps:
- Run the Windows Update Troubleshooter: Go to Settings > Update & Security > Troubleshoot > Windows Update and run the troubleshooter to fix common problems automatically.
- Use the System File Checker: Run
sfc /scannowin the Command Prompt to scan and repair corrupted system files that may be causing update failures.
Reference Materials and Resources:
- For more information on troubleshooting Windows Update, visit Microsoft’s official support page.
- You can also read How to Fix Windows Update Errors.
By following these steps, you can fix many common Windows Update issues related to the update cache and keep your system up to date and running efficiently.
Why Clear the Windows Update Cache?
The Windows Update cache stores temporary files to prevent the need to re-download updates each time. However, over time, these files can accumulate or become corrupted, potentially preventing new updates from installing. Clearing the cache gives Windows Update a “fresh start,” allowing it to work smoothly without affecting any previously installed updates.
Step 1: Stop Windows Update Services
Before deleting cached files, we need to halt background services. Here’s how:
- Press Windows + S, type Command Prompt, right-click it, and select Run as administrator.
- Copy and paste these commands one by one, pressing Enter after each:
net stop bits
net stop wuauserv
net stop appidsvc
net stop cryptsvc
Don’t worry—these services are only paused temporarily. They’ll restart automatically when you reboot your PC.
Step 2: Delete the SoftwareDistribution Folder
This folder holds the cached update files. Deleting it forces Windows to rebuild the cache from scratch.
- Open File Explorer and go to:
C:\Windows\SoftwareDistribution
- Select all files and folders inside (press Ctrl + A), then hit Shift + Delete to permanently remove them.
- Return to your admin Command Prompt and restart the services using the net start commands from Step 1, or:
- Press Windows + R, type services.msc, and hit Enter.
- Right-click Windows Update and select Start.
Final Step: Restart Your Computer
Reboot your PC to ensure all changes take effect. Once it restarts, try checking for updates again—you should be all set!