Designing a stepping stone pathway in your yard or garden is not only an essential part of landscaping, but also a creative way to express your personal style. While there are numerous methods for creating outdoor pathways, crafting your own stepping stones is an enjoyable project that can involve the whole family. It’s a great way to add both character and functionality to frequently walked areas, providing a personalized touch while protecting the ground beneath.
Method1 Making a Mosaic Stepping Stone
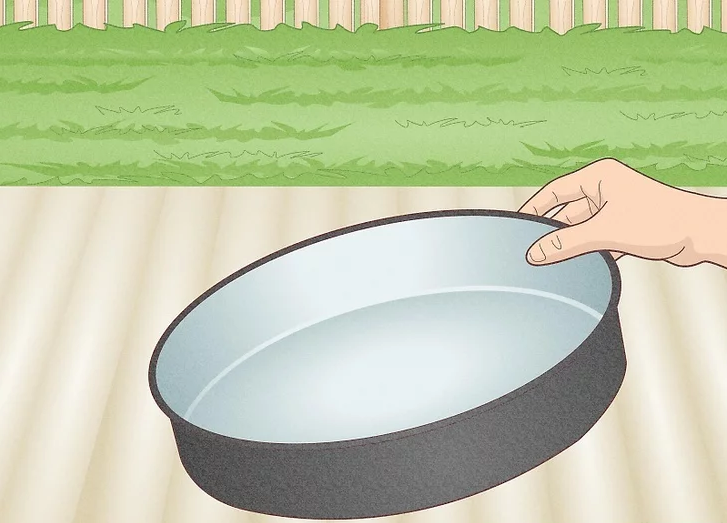
1. Choose a Mold for Your Stepping Stone
Selecting the right mold is essential for creating your stepping stone. Common options include cake pans, pie pans, or even plastic tubs or cardboard boxes. You can also find special molds for stepping stones at arts and crafts stores. The mold should be at least 2 inches (5.1 cm) thick for durability. If the edges of the mold aren’t rigid, reinforce them until the concrete hardens, which typically takes about 24 hours.
Choosing the Right Mold
For more mold options, visit Michaels’ Craft Mold Selection.
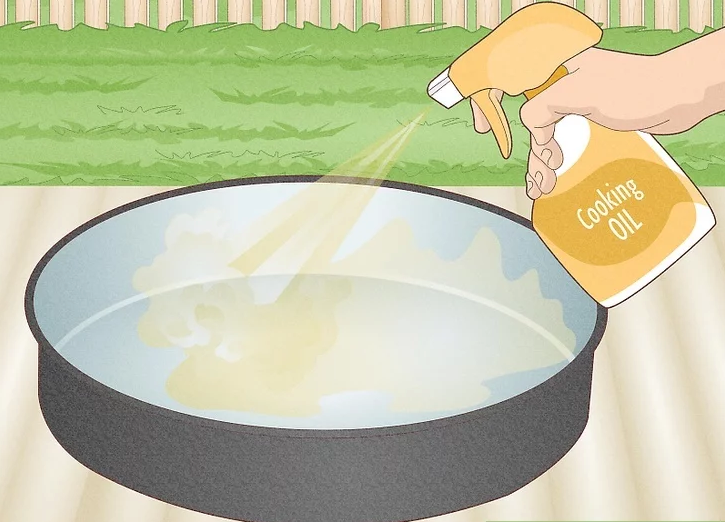
2. Coat the Inside of the Mold with Petroleum Jelly or Nonstick Spray
To ensure the concrete releases easily, coat the inside of your mold with petroleum jelly or nonstick cooking spray. If you’re using a cardboard mold, line it with a plastic sheet (e.g., plastic wrap or bags) and grease the plastic as well. Be careful of wrinkles or seams, as these may appear on your concrete once it’s set.
Making Removal Easier
For more tips on mold preparation, check out DIY Stepping Stone Tips.

3. Put on Protective Gear
Protective gear is crucial when working with concrete. The dust can irritate your skin and lungs, so always wear safety goggles, a dust mask, and work gloves. Keep your workspace tidy, and be cautious not to get concrete on your skin. If concrete touches your skin, wash it off with mild vinegar followed by soap and water to reduce irritation.
Safety First
Learn more about working safely with concrete at OSHA Safety Guidelines.
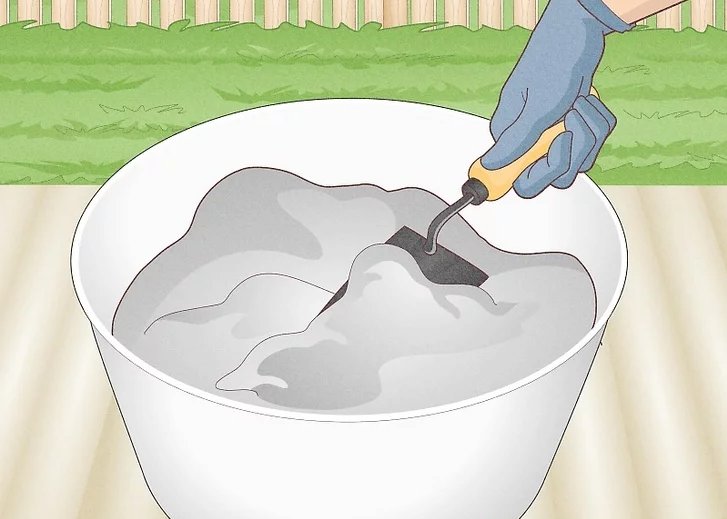
4. Prepare the Concrete
Follow the instructions on your concrete container carefully, as different brands may have specific mixing ratios. If the concrete mixture is too wet, add more dry concrete powder until it reaches the consistency of wet sand. The ideal texture should allow the concrete to clump together when squeezed.
Mixing Concrete Correctly
For a detailed guide on mixing concrete, check out Concrete Mix Tips.
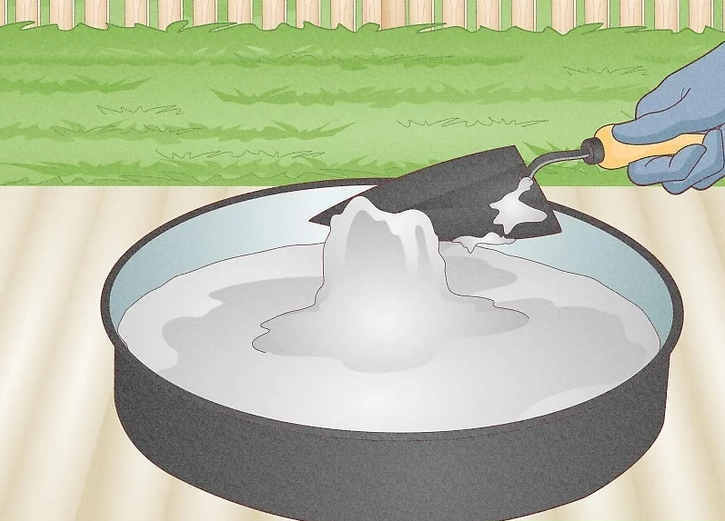
5. Fill the Mold Partway with Concrete
Use a trowel to spread the concrete in your mold, ensuring it covers the bottom layer evenly. If you’re using a square mold, make sure the concrete fills the corners. The first layer should be approximately 1 inch (2.5 cm) thick.
Filling the Mold Properly
For more tips on filling your mold, visit Stepping Stone Mold Preparation.
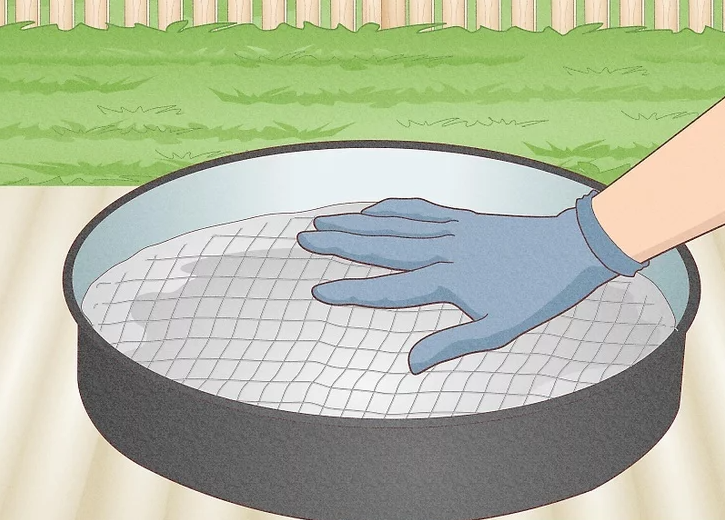
6. Press Some Chicken Wire into the Concrete
Optional but helpful, press a piece of chicken wire (1 inch smaller than the mold) into the wet concrete. This step strengthens the stepping stone and helps prevent cracking. If chicken wire isn’t available, use a sturdy wire mesh instead.
Reinforcing Your Stepping Stone
Learn more about wire reinforcement for concrete at Wire Mesh Reinforcement Guide.
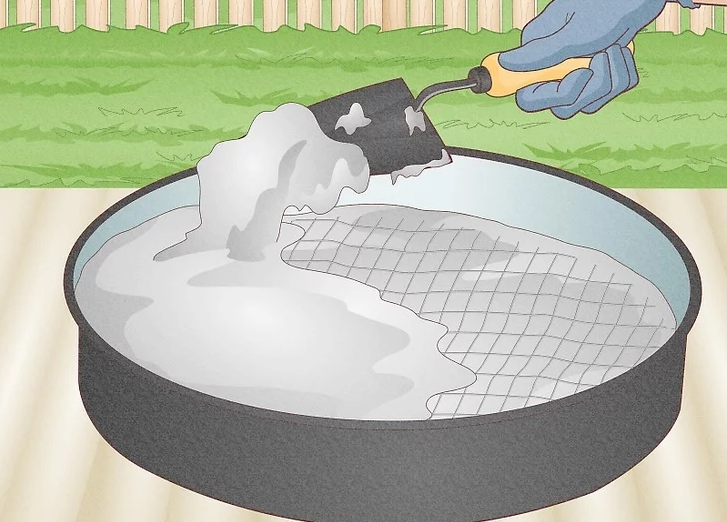
7. Pour More Concrete Over the Wire
Add another layer of concrete over the wire, about 1 inch (2.5 cm) thick. Use the trowel to smooth the surface, ensuring no air pockets remain. Tap the mold gently to settle the concrete.
Smoothing the Concrete Layer
For additional concrete smoothing techniques, check out Concrete Finishing Tips.
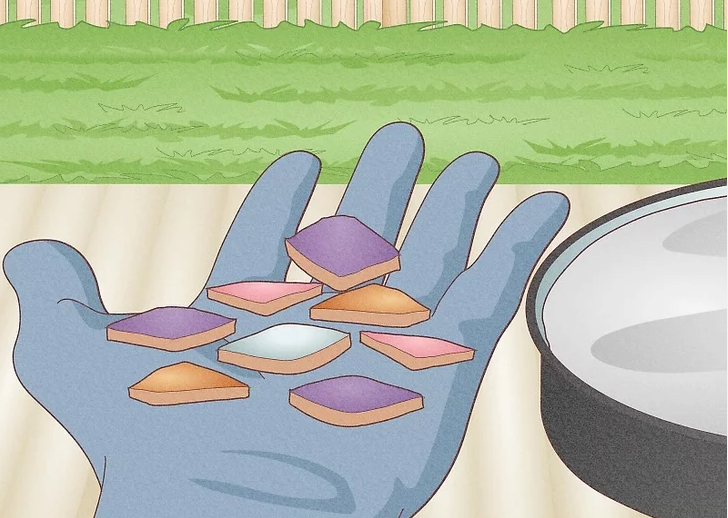
8. Choose Your Desired Mosaics
Mosaic tiles, broken pottery, glass gems, seashells, or pretty stones are excellent for decorating your stepping stone. If using glass gems or sea glass, paint the backs white to maintain their brightness. Ensure all pieces are smooth and without sharp edges to prevent injury.
Selecting Decorative Mosaics
For mosaic ideas and inspiration, visit Mosaic Tile Ideas.
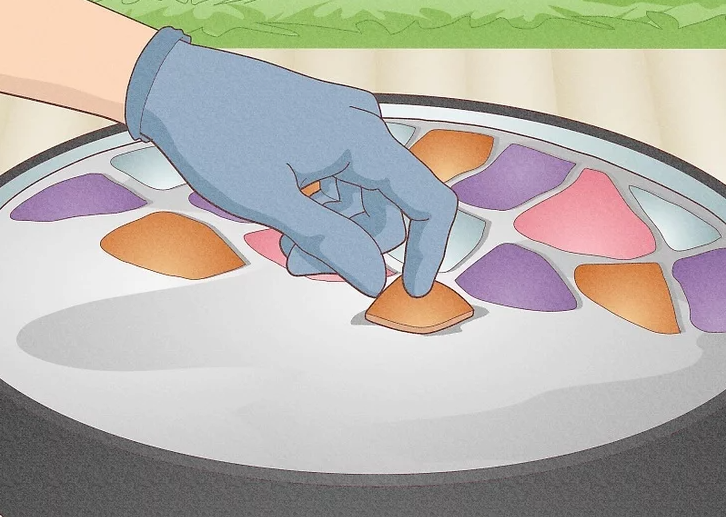
9. Press Your Mosaics Into the Concrete
Press your mosaic pieces into the wet concrete in a pattern or design of your choice. Wait about 30 minutes if the pieces start to sink, then press them again. Be sure the mosaics are fully embedded to avoid them sticking out.
Arranging Your Mosaics
For more ideas on mosaic patterns, check out Mosaic Techniques.
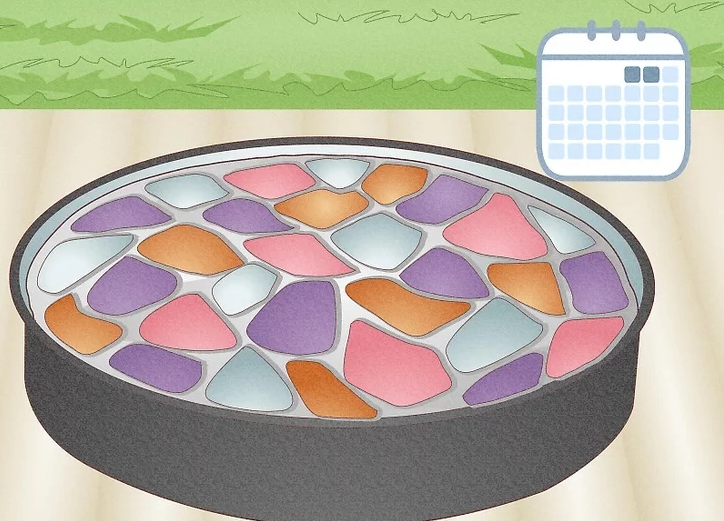
10. Allow the Concrete to Set for 2 Days
Let your stepping stone set for at least 48 hours. After this time, flip the mold over onto a soft surface, such as grass or a towel, and gently tap to remove the mold.
Setting the Concrete
Learn more about concrete curing times at Curing Concrete Properly.
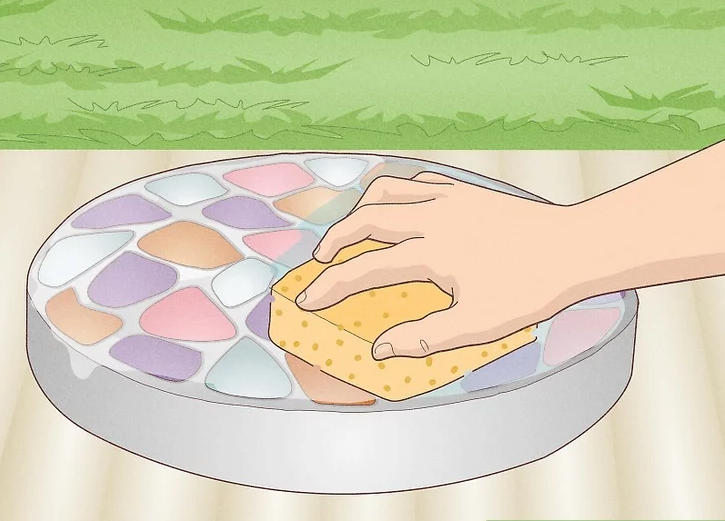
11. Clean Up the Stepping Stone
After removing the mold, sand down any rough areas with sandpaper. Fill in any holes with aggregate-free cement, and use a wet sponge or old toothbrush to clean the top surface.
Cleaning Your Stepping Stone
For more post-pour cleaning tips, visit Stepping Stone Care.
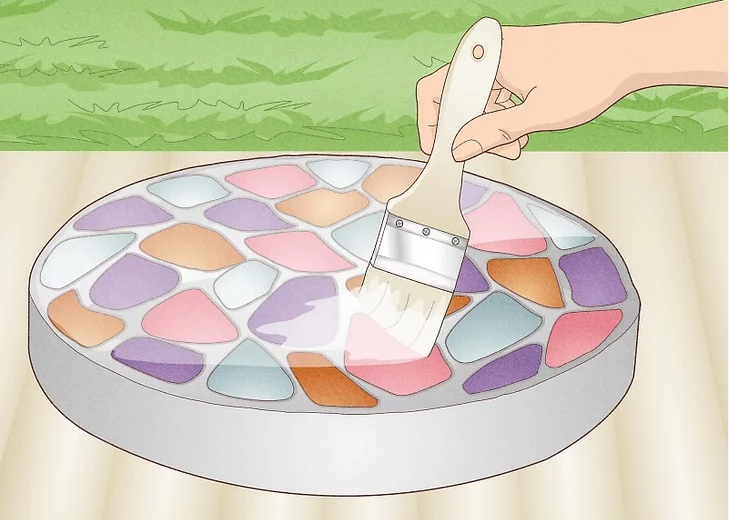
12. Seal the Stepping Stone (Optional)
To enhance the appearance and durability of your stepping stone, apply a high-quality sealant or marine varnish to the decorated top surface. This helps the stone last longer and provides a shiny finish. Be sure to follow curing instructions on the varnish label.
Sealing for Protection
Check out Sealing Concrete Stepping Stones for the best products and techniques.
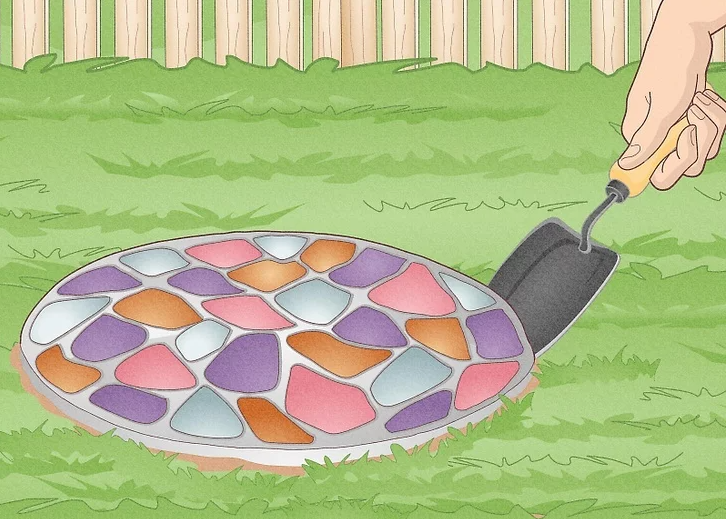
13. Set the Stepping Stone in Your Garden
Choose a spot in your garden for your new stepping stone. Dig a shallow hole (about 2 inches deep) and set the stone in, design side up. Pat the soil around the stone to ensure it’s level with the surrounding area.
Placing Your Stepping Stone
For more garden stone placement tips, visit Garden Stone Ideas.
By following these steps, you can create personalized stepping stones that add beauty and functionality to your garden while also providing a fun DIY project for the whole family.
Method2 Making a Decorative Leaf-Shaped Stone
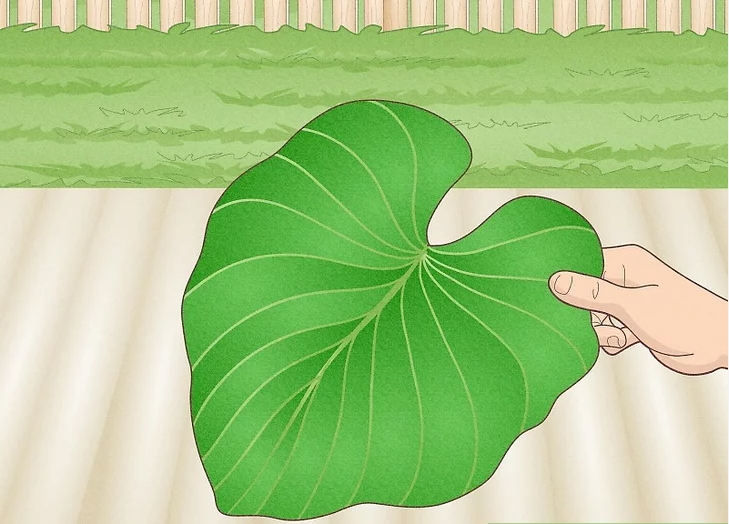
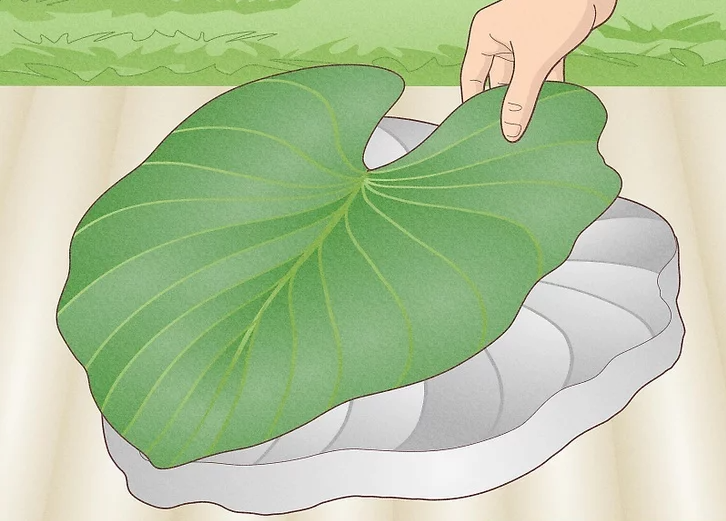
1. Choose a Large, Sturdy Leaf for Your Base
To create a beautiful leaf-shaped stepping stone, select a large, sturdy leaf that is at least 10 inches (25 cm) to 12 inches (30 cm) in width. Ideal options include leaves from gunnera, hosta, or rhubarb. Make sure the leaf is free of holes or tears. Other suitable choices may include cucumber, squash, pumpkin, or certain calla lily leaves.
Choosing the Right Leaf
For more about choosing the perfect leaf for your project, check out Leaf Selection Tips.
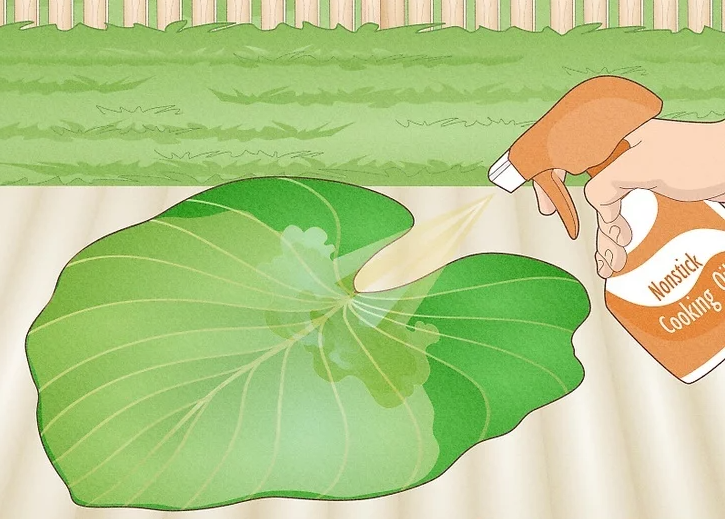
2. Spray the Front of the Leaf with Nonstick Cooking Spray
Coat the front of the leaf with nonstick cooking spray or brush on some cooking oil. This step ensures the concrete won’t stick to the leaf and helps with easy removal once the stone is set.
Preparing the Leaf
Learn more about how to prepare leaves for molding concrete at Concrete Molding Tips.

3. Put on Protective Gear
Safety is important when working with concrete. Wear safety goggles, rubber gloves, and a dust mask to protect your skin, eyes, and lungs. It’s also a good idea to wear old clothes and cover your workspace with a plastic sheet. Keeping your tools and mixing area tidy will make the process smoother.
Safety Precautions
Check out OSHA Safety Guidelines for Concrete Work for more information on protective measures.
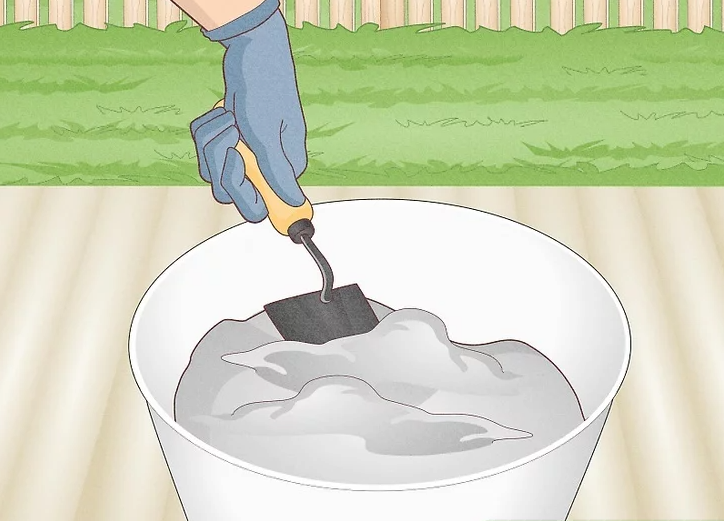
4. Choose and Prepare Your Concrete
Follow the instructions on your concrete bag to prepare the mixture. The concrete should be firm and dry, not wet and soupy. The consistency should resemble wet sand and should clump together when squeezed. If you’re making a decorative stone, use a lightweight concrete with little gravel. For a more durable stepping stone, use heavier concrete with more gravel.
Selecting the Right Concrete
For tips on choosing the right concrete mix, visit Concrete Mix Selection Guide.
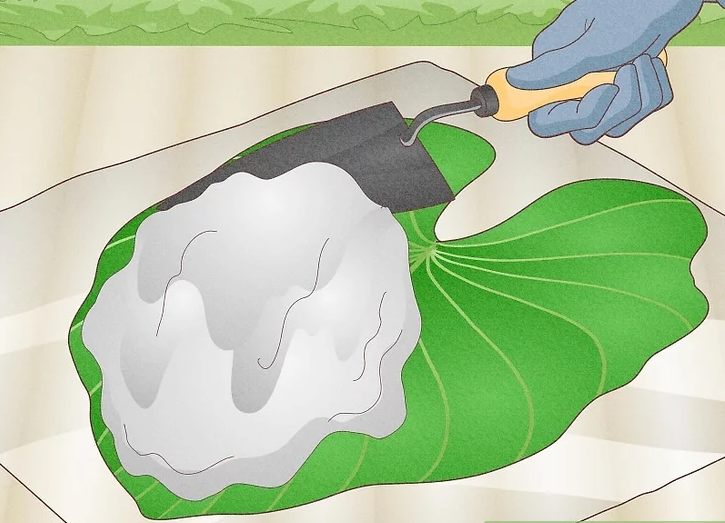
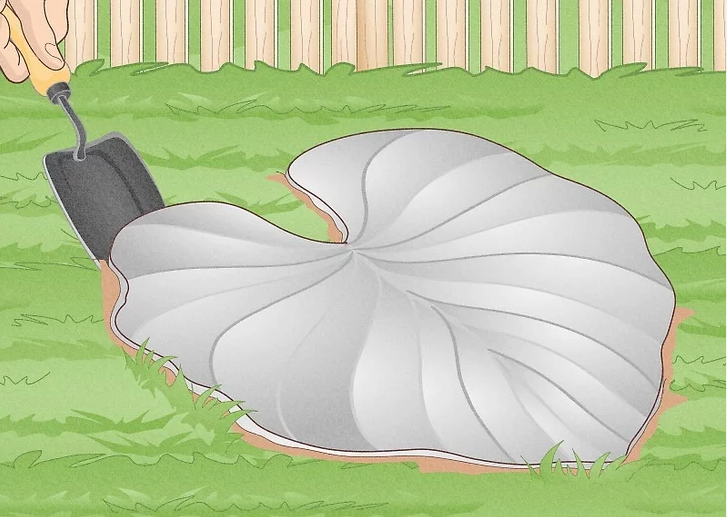
5. Pile the Concrete onto the Front of the Leaf
Place the leaf on a large plastic sheet and use a trowel to scoop concrete onto the front of the leaf. Spread the concrete to form a 2-inch (5.08 cm) thick layer, ensuring an even distribution.
Applying the Concrete
For detailed instructions on concrete application, refer to DIY Concrete Stepping Stones.
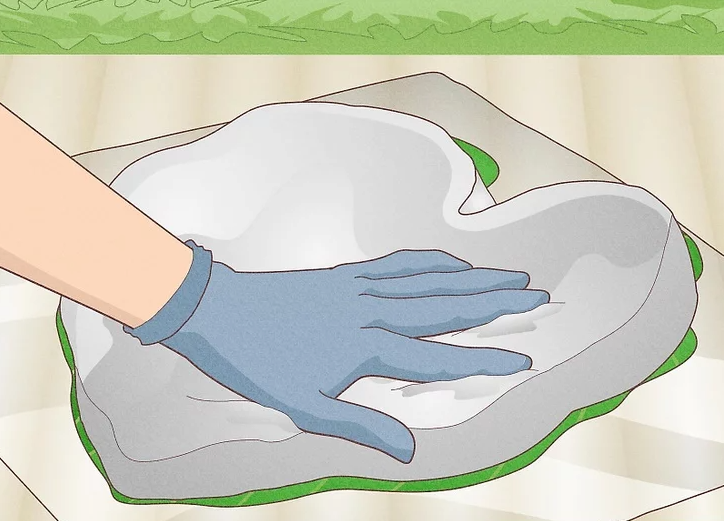
6. Pat the Concrete Down
Gently pat the concrete down with gloved hands, ensuring it adheres to the leaf’s surface. Work carefully to avoid spilling the concrete over the edges. Wipe away any excess to maintain a clean outline.
Smoothing the Concrete
Learn more about smoothing concrete at Concrete Finishing Techniques.
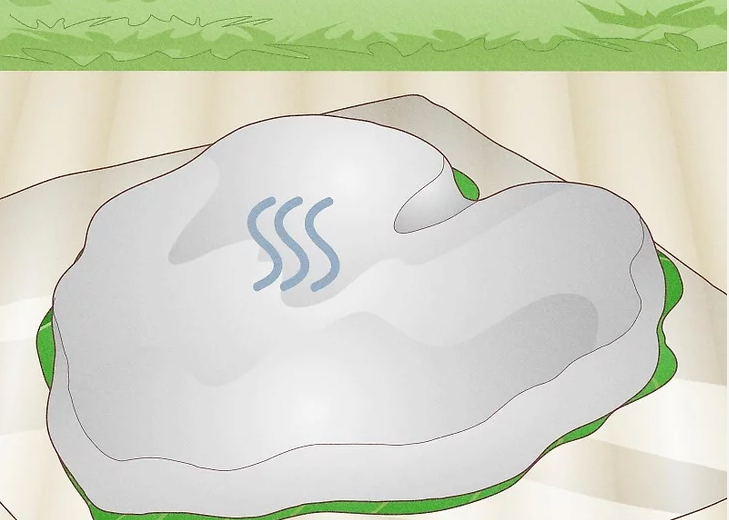
7. Allow the Concrete to Cure
Let the concrete cure for about 2 to 3 days, depending on the concrete type you are using. This curing period is essential for the stone’s strength and durability.
Curing Your Concrete Stepping Stone
For more on curing times, visit Curing Concrete Properly.
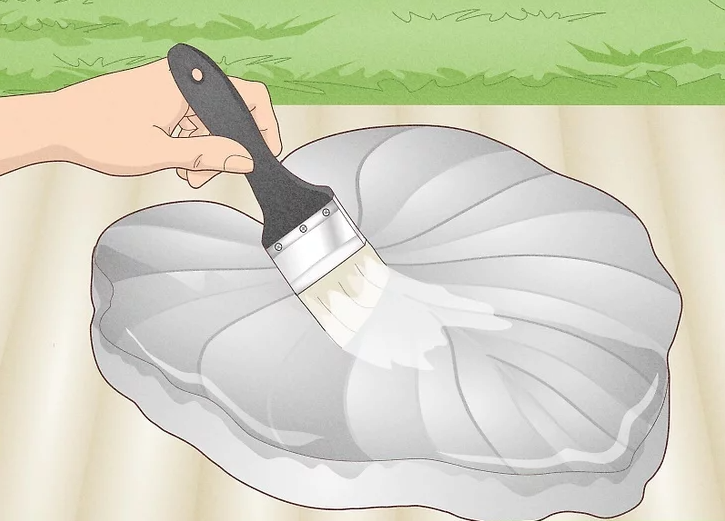
8. Remove the Leaf Once the Concrete Has Dried
After the concrete has dried, flip the stone over and peel off the leaf. If any leaf parts are stuck, gently scrape them off with water and a soft brush. If needed, use a hammer and chisel to remove excess concrete around the edges.
Removing the Leaf
For more tips on removing leaves from concrete, check out How to Remove Leaves from Concrete.
9. Varnish the Stepping Stone (Optional)
If you want to enhance the look of your stepping stone, apply a high-quality outdoor or marine varnish. This will give it a shiny, wet look and protect it from the elements.
Varnishing Tips
For more information on sealing your stepping stone, visit Sealing Concrete Stepping Stones.
10. Set the Stepping Stone into Your Garden
Choose a spot in your garden and dig a shallow hole about 2 inches (5.1 cm) deep. Place the stepping stone in the hole, design side up, and fill any gaps with soil.
Placing Your Stepping Stone
For garden placement tips, check out Placing Stepping Stones in Your Garden.
Method3 Other Stepping Stone Options
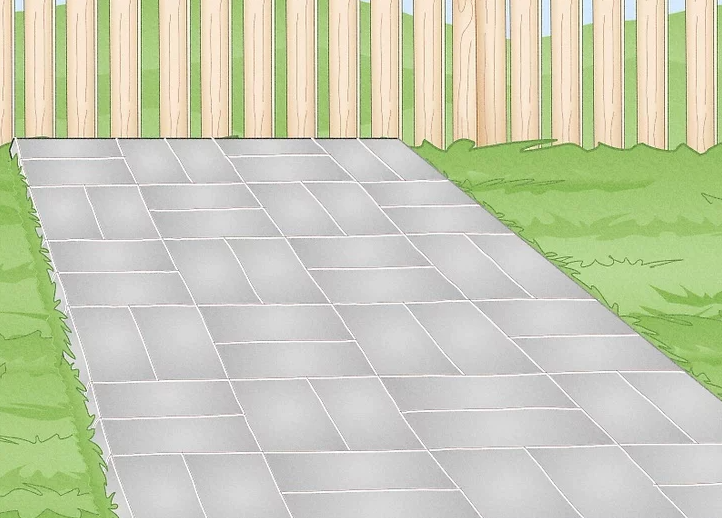
1. For a Modern Landscape Design, Try Hard Trowel Pavers
If you’re aiming for a modern aesthetic in your landscape design, hard trowel pavers are a great option. These pavers typically come in rectangular or square shapes, and their smooth concrete finish will give your yard a sleek, contemporary look.
Modern Pavers for Sleek Aesthetics
Learn more about modern paver options at Hardscaping Ideas.
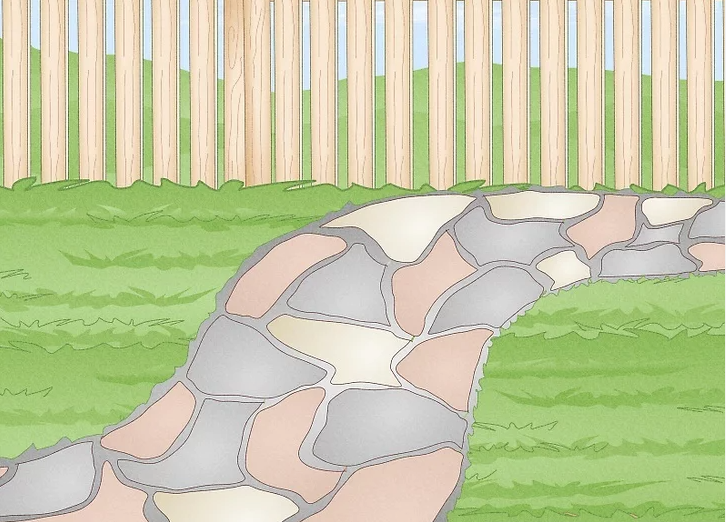
2. For an Organic, Lighter Mood, Try Less Linear Flagstones
If you’re looking to create a more organic and natural feel, consider using flagstones with less rigid shapes. Curved flagstones will flow more naturally within your landscape, offering a more fluid, softer design. These stones are often less expensive, depending on their origin, and typically come in a neutral grayish color.
Flagstones for a Natural, Relaxed Vibe
Explore the benefits of flagstone in landscaping at Flagstone Uses and Benefits.
With these options, you can choose the perfect paving material for your landscape project, whether you prefer a modern or organic look.