How to Sign Up for a New Google Voice Phone Number
This service lets you make calls and send text messages without revealing your real phone number, providing a simple and secure way to stay connected. With a Google Account and a valid U.S. phone number, you can sign up for a free virtual number at no cost. If you already have one, you can delete it and claim a new number, though this is limited to once per year. Users located outside the United States will need to use the paid version. This wikiHow-style guide explains how to get a free virtual phone number using your existing phone number.
Part1. Signing up for Google Voice

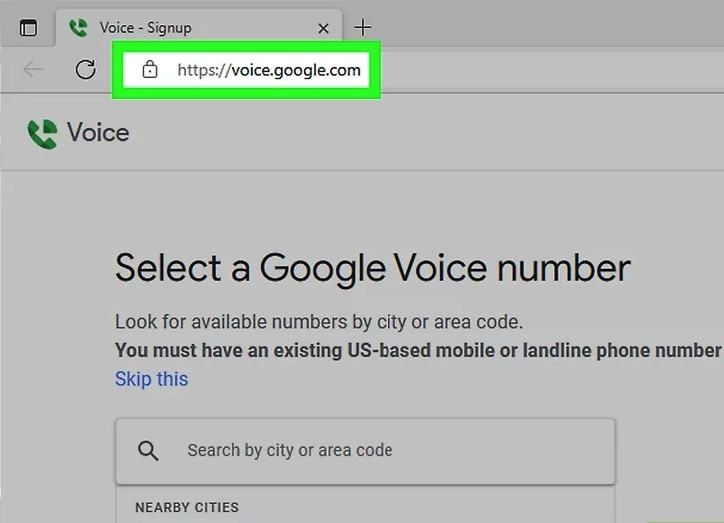
Step 1: Open the Google Voice Website
If you’re not already signed in, click Sign in in the top-right corner and log in with your Google Account.
Requirements:
- A Google Account
- A valid U.S. phone number
- You must be physically located in the United States
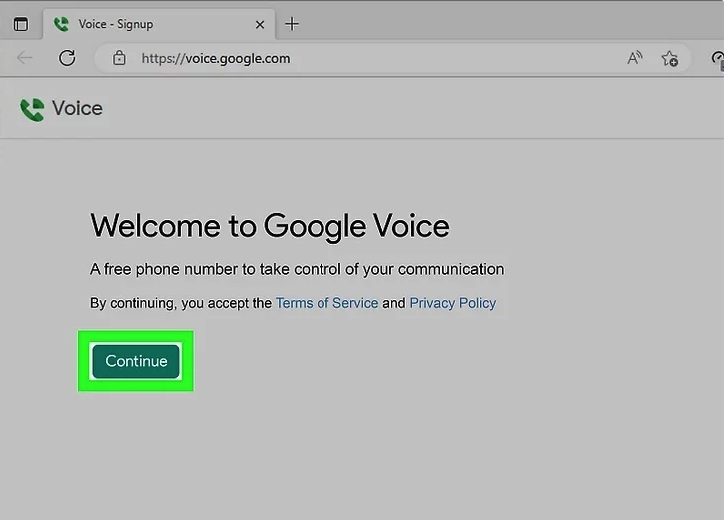
Step 2: Click “Continue”
Click the green Continue button in the center of the page to begin the setup process.
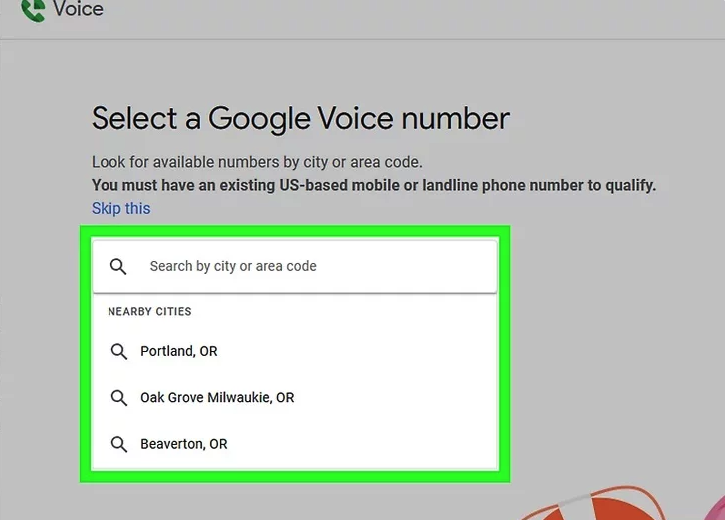
Step 3: Search for a Location
In the search box, type a city name or ZIP code (for example, 96703).
A list of available Google Voice numbers will appear automatically.
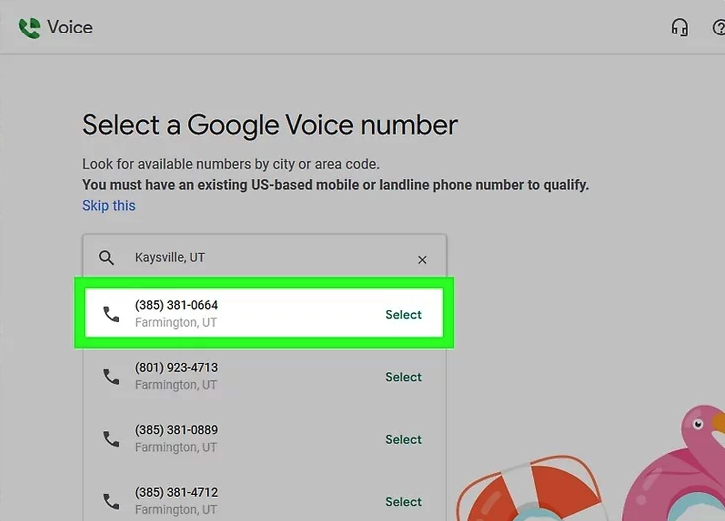
Step 4: Select a Phone Number
Find a number you like and click Select next to it.
You may need to choose a city from the drop-down list first before selecting a number.
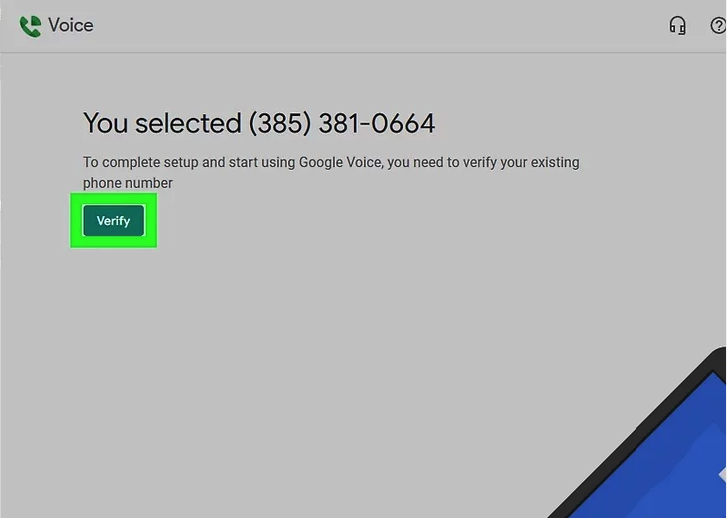
Step 5: Click “Verify”
Click the green Verify button to confirm that you want to link a real phone number to your Google Voice account.
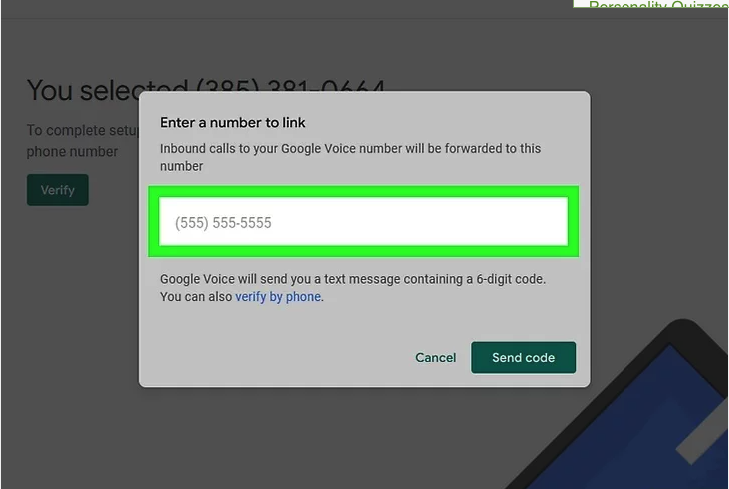
Step 6: Enter Your Existing Phone Number
Type in a valid phone number that you currently have access to.
This number will be used only for verification.
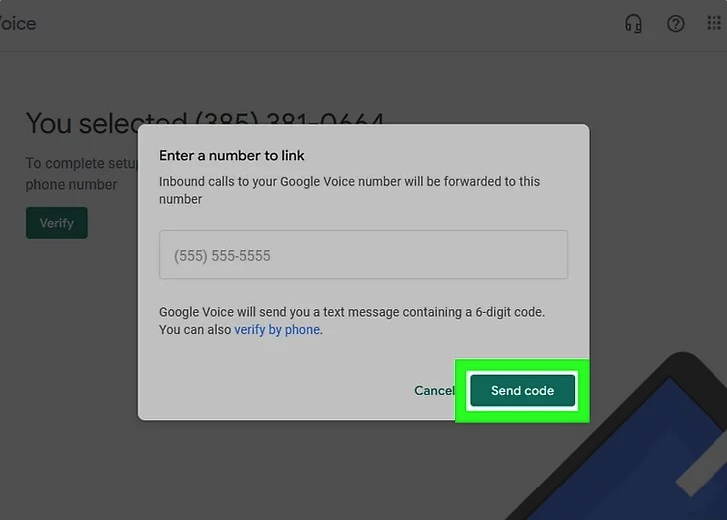
Step 7: Send Verification Code
Click SEND CODE.
Google will send a six-digit verification code via SMS to your phone.
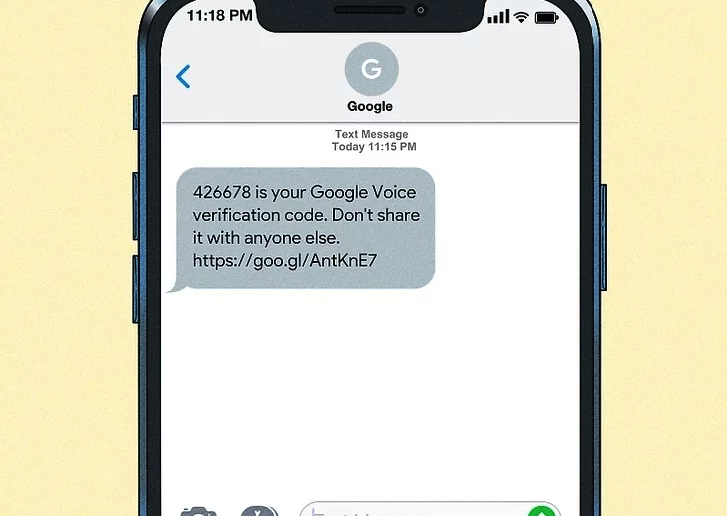
Step 8: Retrieve the Verification Code
Open your phone’s messaging app and find the text from Google.
It will look like this:
“123456 is your Google Voice verification code.”
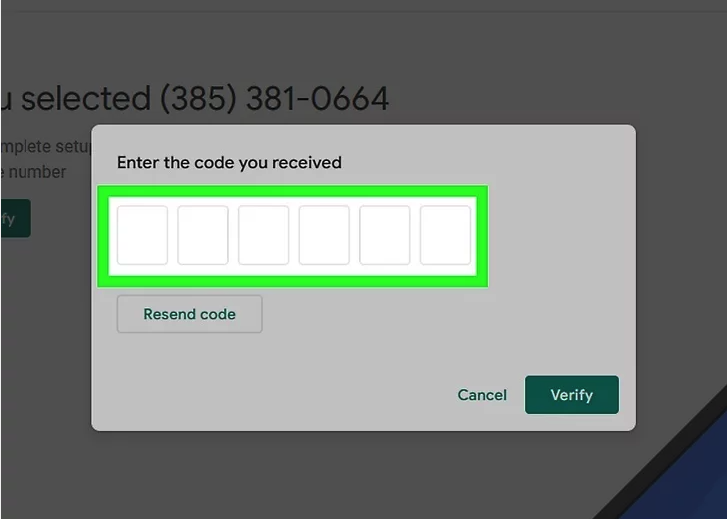
Step 9: Enter the Code
Type the six-digit code into the verification field on the Google Voice webpage.
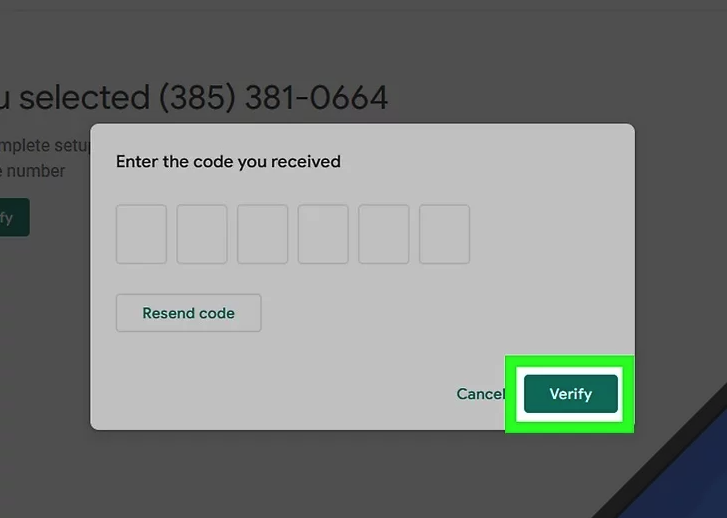
Step 10: Click “Verify”
Click Verify to confirm your phone number.

Step 11: Click “Claim” (If Prompted)
If prompted, click Claim to officially assign the Google Voice number to your account.
Some phone numbers may skip this step automatically.
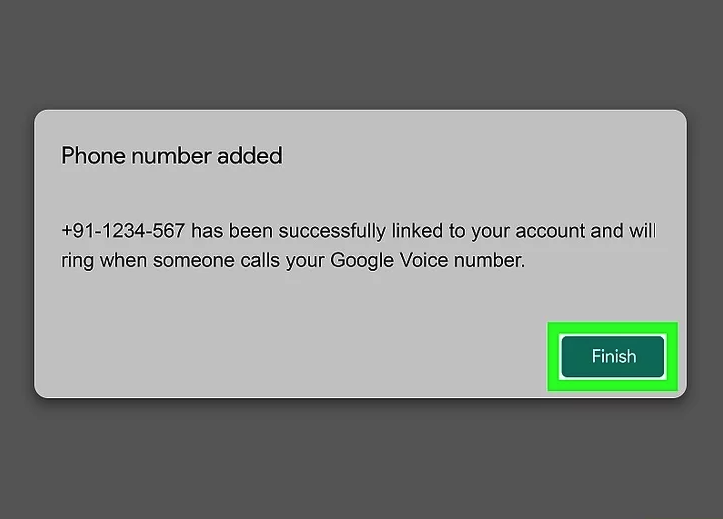
Step 12: Click “Finish”
Click Finish to complete the setup.
You’ll be redirected to your Google Voice dashboard.
🎉 Your number is now active.
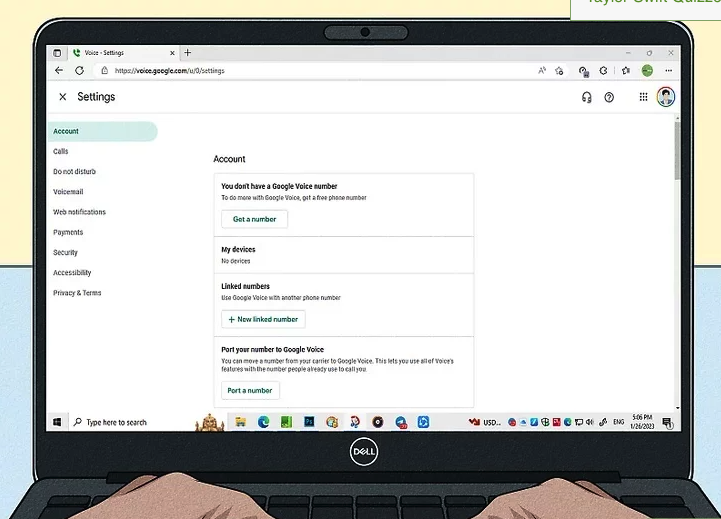
Step 13: Set Up Settings
Click the gear icon (⚙️) in the top-right corner to customize your settings, including:
- Call forwarding
- Voicemail greetings
- Notification preferences
- Accessibility options
How to Use Google Voice
Make a Call
Enter a phone number using the keypad on the right side of the homepage, then click the phone icon to dial.
A working microphone is required.
Send a Text Message
Click the Messages icon on the left panel → Send new message → add a recipient and message → click the send (airplane) icon.
Part2 .Getting a New Phone Number
Step 1: Open the Official Website
Go to the official setup page in your web browser:
If you are not logged in, sign in with your email address and password before continuing.
Important notes:
- You can reclaim your old number within 90 days if it was your only number
- You can only change your number once every 12 months
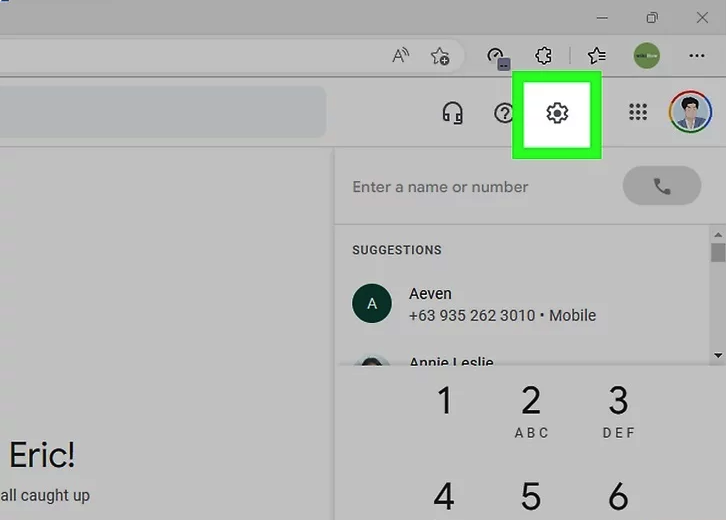
Step 2: Open Settings
Click the cog (gear) icon in the top-right corner of the page, next to the question mark icon.
The Settings page will open, and you will be on the Account tab by default.
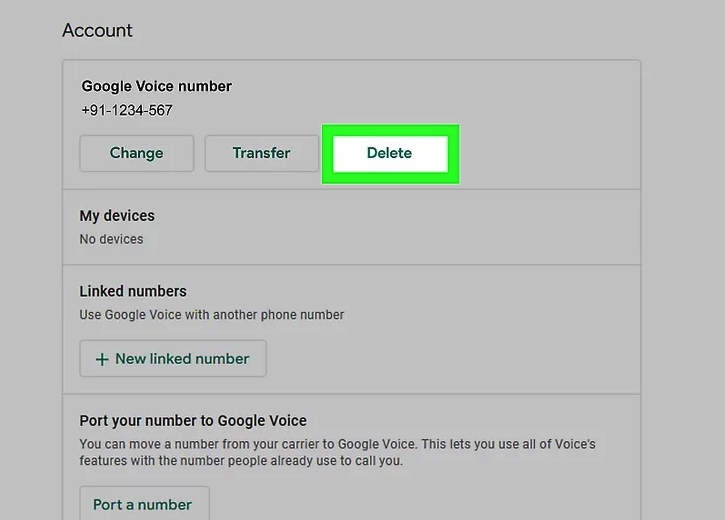
Step 3: Click Delete
Under your current phone number, click Delete.
A confirmation window will appear.
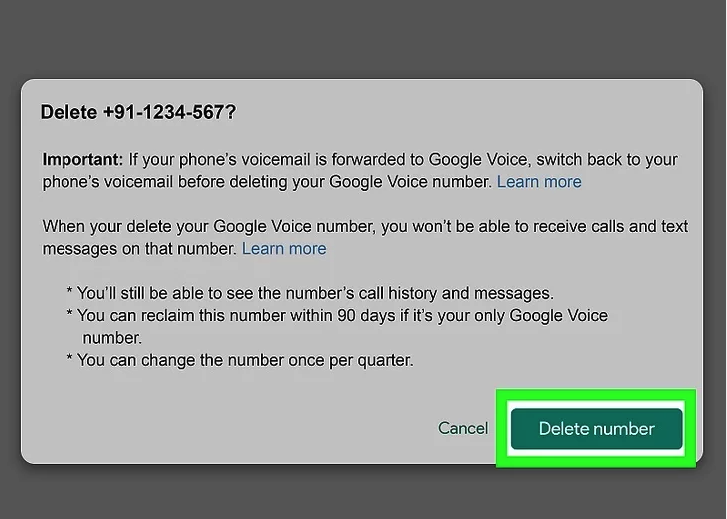
Step 4: Confirm Number Deletion
Click Delete number to confirm.
Your current number will be removed from your account.
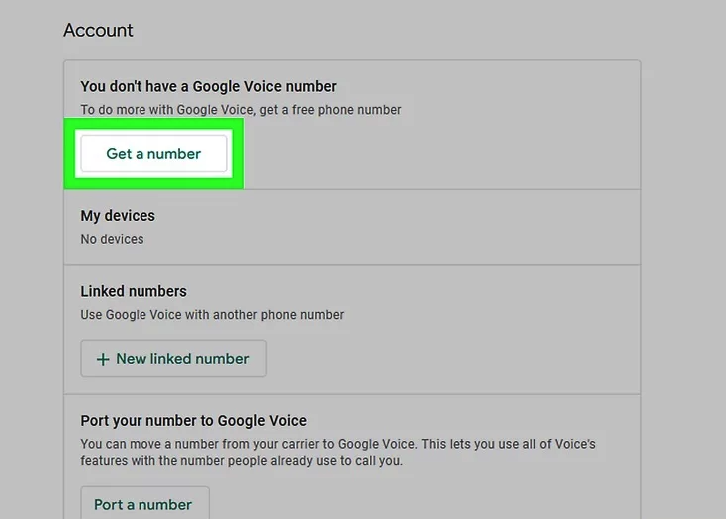
Step 5: Get a New Number
After deletion, click Get a number under the Account section.
This option replaces the Delete button and starts the setup process again.
Follow the on-screen instructions to choose and claim a new number.
Reference Keywords and Outbound Links
- Google Voice Help Center – Manage Numbers
https://support.google.com/voice - Google Account Login
https://accounts.google.com - Google Voice Official Site
https://voice.google.com/about