How to Bypass Gmail Phone Verification .If you need to create a Gmail account but don’t have a phone number available for verification, there are still a few possible options. In many regions, Google allows you to tap the Skip option on the phone number screen if you’ve already added a backup email address. If the Skip option doesn’t appear, you may be able to use a temporary phone number or borrow a phone from a friend or family member to complete the verification process. This wikiHow-style guide explains how to sign up for a Gmail account without using your own phone number, and what steps to take if you later lose access to the phone or number linked to your Google account.
Method1 .Use the Skip Option
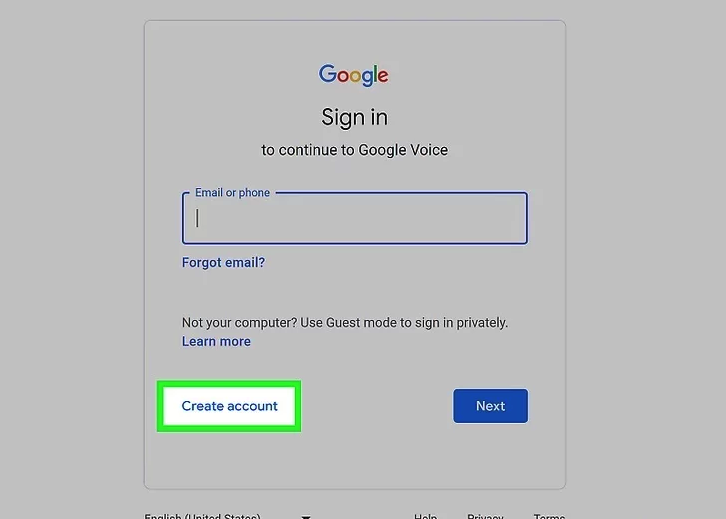
Step 1: Open the Account Creation Page
The steps vary depending on the device you’re using:
On Android, iPhone, or iPad:
- Open the Gmail app
- Tap your profile photo
- Select Add another account
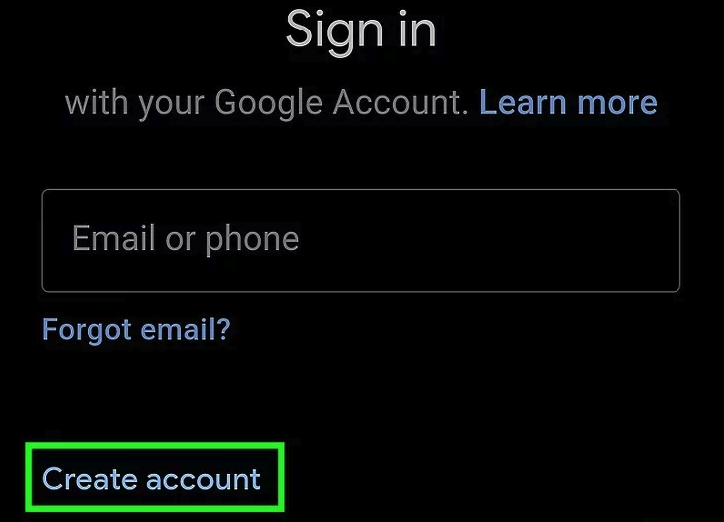
- Tap Google, then tap Create account
In a web browser:
Open the official sign-up page:
https://accounts.google.com/signup
Important:
Because phone number verification is mandatory in some regions, this method may not work for all users.
Reference keywords: Gmail account creation, Google account sign-up, Gmail registration page
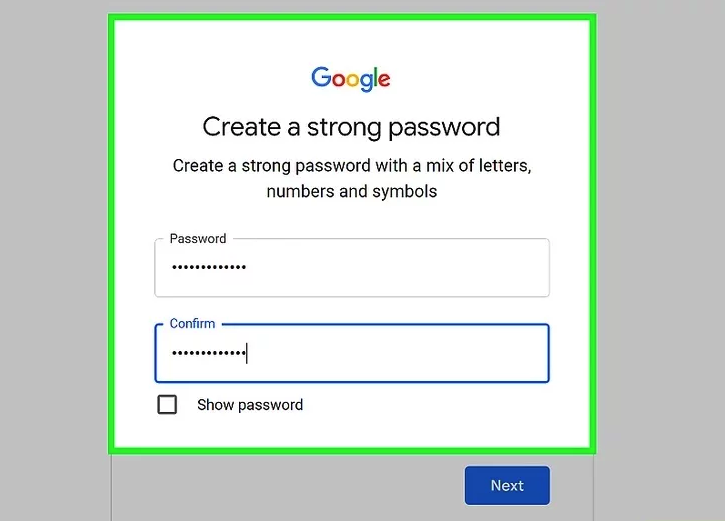
Step 2: Follow the On-Screen Instructions
Continue through the setup process until you reach the phone number entry screen.
You may be asked to provide:
- First and last name
- Username
- Password
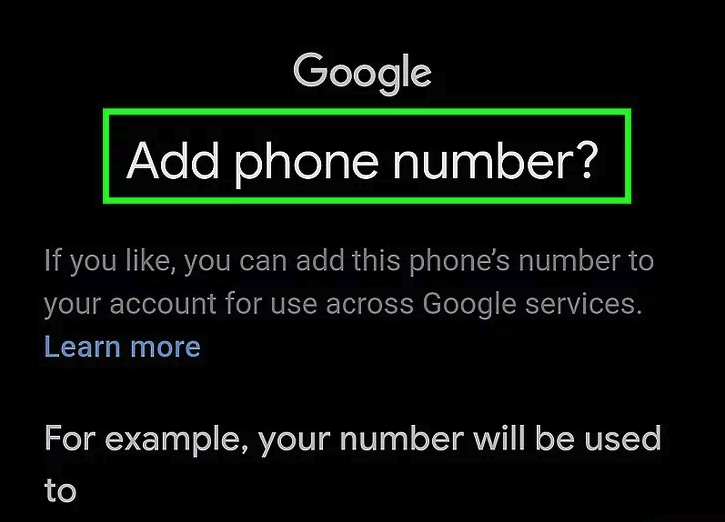
To proceed without a phone number, you must add a backup email address. This email will be used for account recovery if you ever lose access.
Reference keywords: Gmail backup email, account recovery email, Google account security
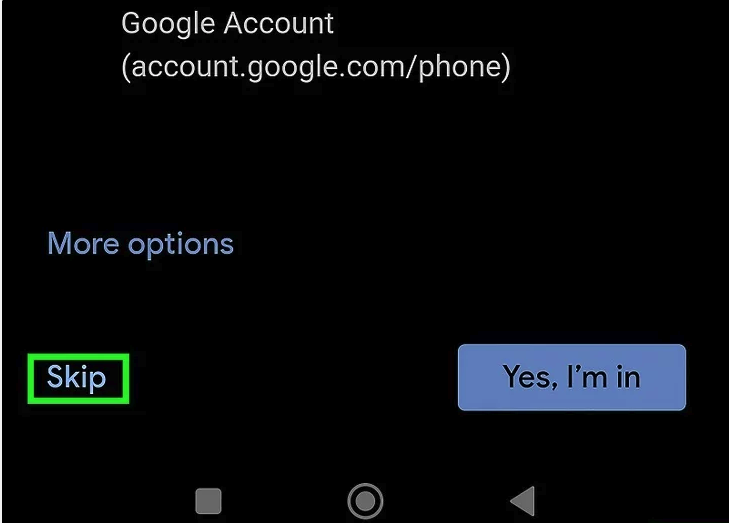
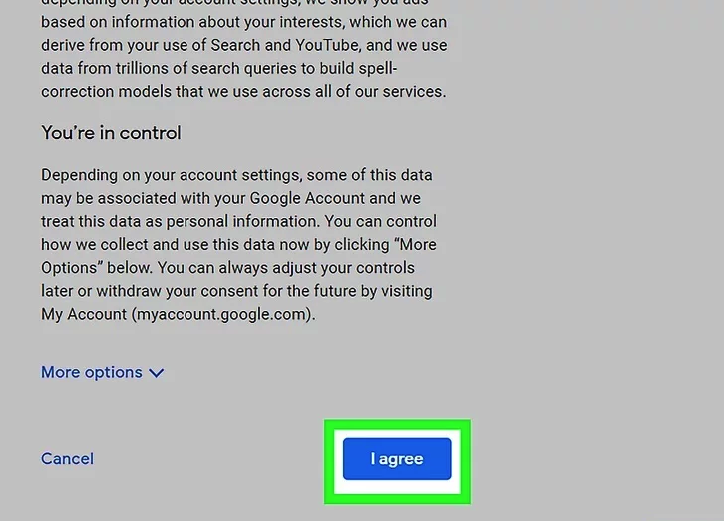
Step 3: Tap or Click “Skip” on the Phone Number Screen
On the phone number page, look for the Skip option.
- If the Skip button appears, select it to continue without phone verification
- If the Skip option does not appear, this method is not available in your region
In that case, you will need to use an alternative method, such as a temporary number or a trusted contact’s phone.
Reference keywords: bypass phone verification, Gmail skip phone number, phone verification requirement
Reference Materials and Outbound Links
- Google Account Help Center
https://support.google.com/accounts - Create a Google Account
https://accounts.google.com/signup - Google Account Recovery Options
https://support.google.com/accounts/answer/7682439
Method2 .Signing Up with a Temporary Phone Number
Step 1: Get a Temporary Phone Number That Can Receive Texts
When creating a new account, Google requires a verification code sent by SMS or voice call. If you don’t have your own number, you can temporarily use one of the following options:
- Virtual phone number services
Depending on your country, you may be able to use a paid disposable number service. Legitimate options include:
https://hushed.com
https://www.textverified.com - A virtual number from another Google account (U.S. only)
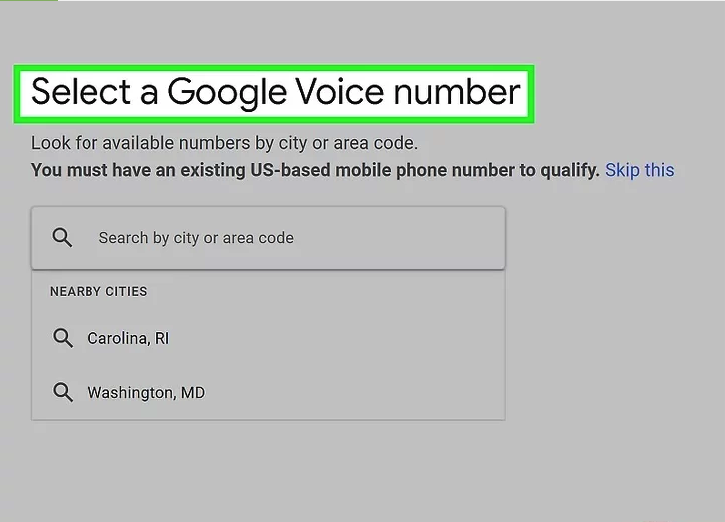
If you already have a separate Google account and are located in the United States, you may be able to create a free virtual number.
Reference guide: https://www.wikihow.com/Get-a-Google-Voice-Number - Borrow a trusted person’s phone number
You can use a friend or family member’s phone during verification. The phone should be accessible so you can immediately receive the confirmation code, either in person or via chat.
Reference keywords: temporary phone number, SMS verification, virtual number for Gmail
Step 2: Go to the Account Creation Page
Open the official sign-up page based on your device:
On Android, iPhone, or iPad:
- Open the Gmail app
- Tap your profile photo
- Select Add another account
- Tap Google, then Create account
In a web browser:
https://accounts.google.com/signup
Reference keywords: Google account sign-up, Gmail registration page
Step 3: Follow the On-Screen Instructions
Continue through the setup process until you reach the phone number entry screen.
You may need to enter:
- Name
- Username
- Password
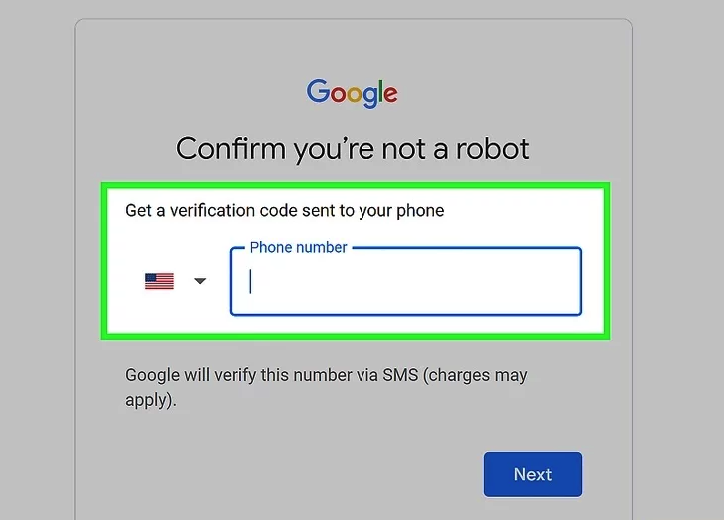
Step 4: Enter the Temporary Phone Number
Enter your temporary or borrowed phone number and select Next.
A verification code will be sent via SMS text message.
If the number cannot receive texts, follow the on-screen option to receive a voice call instead.
Reference keywords: phone verification code, SMS confirmation

Step 5: Verify the Code
Enter the verification code sent by Google. The message usually begins with a letter “G” followed by numbers.
- On mobile devices, tap Next
- In a web browser, click Verify
Once the correct code is entered, you can continue creating the account.
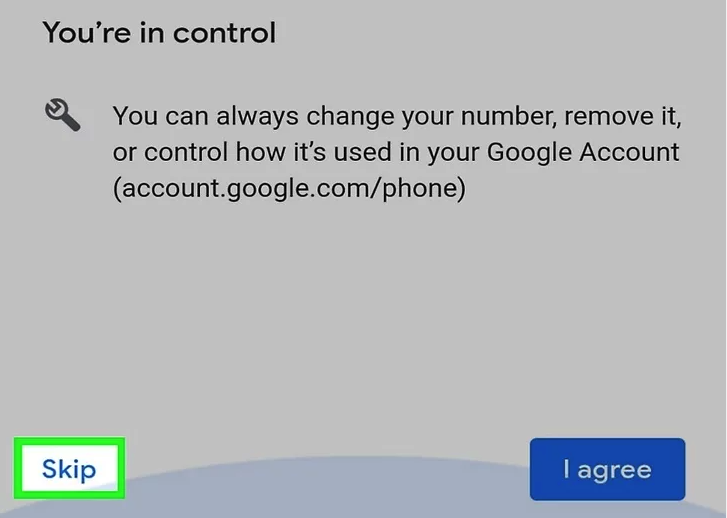
Step 6: Remove the Phone Number From the Account
If the phone number is not yours long-term, remove it to prevent future access issues.
On Android, iPhone, or iPad:
- Finish setting your email address and password
- Scroll down and tap More options
- Select Do not add my phone number
- Tap Done
In a web browser:
- If prompted with “Get more from your phone number,” click Skip
- If you see a form with a Phone number field, delete the number
- Complete the form and click Next
Reference keywords: remove phone number, Google account security
Step 7: Complete Account Setup
Finish the remaining steps to finalize your account. Once complete, your account will be active with no phone number associated.
If the number was not removed successfully, you can delete it manually:
https://myaccount.google.com/phone
Click the phone number, then select the trash icon to remove it.
Reference Materials and Outbound Links
- Google Account Help Center
https://support.google.com/accounts - Create a Google Account
https://accounts.google.com/signup - Manage Phone Numbers on Google Accounts
https://support.google.com/accounts/answer/3463280