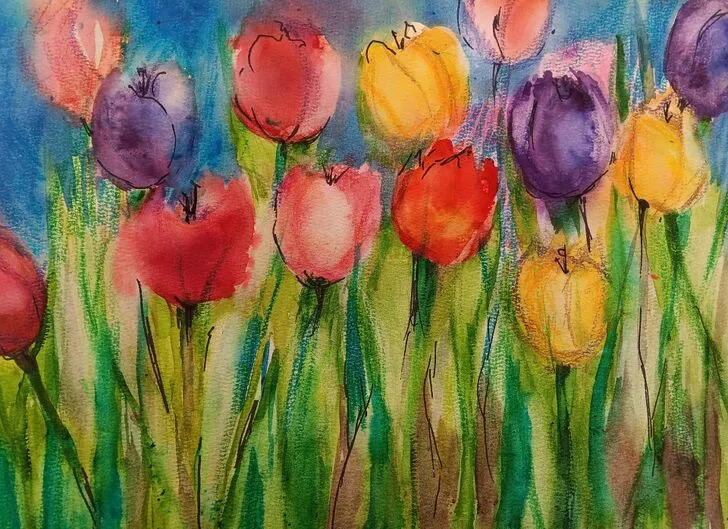
How to Paint Tulips in Watercolor — nothing says spring quite like the sight of colorful tulips pushing through the soil. For those weary of winter, these cheerful blooms signal hope and invite thoughts of sunshine and outdoor fun. Tulips are simple and rewarding subjects for beginners to paint, while experienced artists will find endless opportunities to explore color, light, and form with every new watercolor piece.
1. Gather Your Supplies and Prepare Your Workspace
Before you begin, make sure your painting area is clean and well-lit. Fill a jar or plastic container with fresh water, open your watercolor paints, and have two brushes ready—a ½-inch flat brush and a pointed round brush. Use a sheet of student-grade watercolor paper, and keep a #2 pencil and eraser nearby for sketching.
Tip: Preparation is the foundation of every great painting.
👉 Reference: Watercolor Painting Basics – Winsor & Newton
2. Create Color Swatches and Experiment with Mixing
Familiarize yourself with your paints by creating small swatches on a practice sheet. On a plastic plate or the paintbox lid, mix different colors and note your favorite combinations. Keep a record of the pigments used to recreate them later.
Subheading: Understanding color relationships helps build your artistic intuition.
👉 Reference: Color Mixing Guide for Beginners – Blick Art Materials
3. Warm Up and Practice Brush Strokes
Before painting your tulips, test your brushes. Use the flat brush to paint both broad and fine lines, and practice smooth movements with the pointed brush for detail work. Remember to change your water frequently and place supplies on your dominant-hand side to prevent spills.
Subheading: Practice makes precision—your brush is an extension of your hand.
👉 Reference: Watercolor Brush Techniques – Art is Fun
4. Lightly Sketch Tulip Shapes on Your Paper
Draw gentle outlines of tulip blossoms—cup-like forms with jagged tops—positioned slightly above the center of the paper. Add stems extending downward and long, pointed leaves. Keep the pencil marks light so they don’t show through the paint.
Subheading: A delicate sketch guides the flow of your watercolor painting.
👉 Reference: How to Draw Tulips – Art for Kids Hub
5. Paint the Tulip Blossoms
Mix your chosen color with clean water until it appears bright yet translucent. Apply the paint to each flower, allowing the white paper beneath to shine through. To create lighting effects, wet the flower first and apply pigment to one side so the color naturally flows across.
Subheading: Light and transparency bring tulips to life in watercolor.
👉 Reference: Beginner’s Guide to Watercolor Flowers – Skillshare Blog
6. Paint the Stems and Leaves
Using green paint, make sturdy stems about ¼ inch thick. Load your flat brush and paint leaves in one fluid motion—press down, twist gently upward, and lift to form a sharp tip. This technique gives your tulips graceful, natural-looking foliage.
Subheading: Fluid, confident brushwork captures the essence of real tulip leaves.
👉 Reference: Watercolor Leaf Painting Techniques – The Spruce Crafts
7. Let It Dry and Plan Your Background
After completing your first layer, allow the painting to dry fully. Step back and observe it from a short distance. Consider adding a background—a bright sky, earthy browns at the base, or warm yellow tones for sunshine. Let it dry completely before proceeding.
Subheading: A thoughtful background enhances the overall harmony of your painting.
👉 Reference: Creating Watercolor Backgrounds – Artists Network
8. Add Details and Final Touches
Once dry, enrich your tulips with another layer of color and use your pointed brush to add details—petal lines, leaf veins, and subtle shading on stems. Be careful not to overwork the piece; watercolor shines best when it looks effortless.
Subheading: Simplicity and restraint keep your artwork fresh and luminous.
👉 Reference: Watercolor Detailing Tips – Jackson’s Art Blog
9. Experiment with Mixed Media Finishes
Try enhancing your painting using markers, Sharpies, or crayons. Don’t hesitate to experiment—use new colors, alter your composition, or create depth by varying tulip sizes and tones. Each attempt helps you grow as an artist.
Subheading: Creative exploration turns a simple exercise into a personal masterpiece.
👉 Reference: Combining Watercolor with Other Media – Arteza Blog
10. Sign and Share Your Work
Proudly sign your painting once finished. Display it in your home or share it with others. The more you paint, the more your eyes will notice beauty in everyday details—shapes, light, and colors you once overlooked.
Subheading: Every painting you sign marks another step on your creative journey.
👉 Reference: Displaying Your Art – The Virtual Instructor