您的购物车目前是空的!
How to Write Calligraphy for Cards, Letters, & Art Projects . Calligraphy, meaning “beautiful writing” in Greek, is an art form practiced for thousands of years across European, Islamic, and East Asian cultures. With its elegant strokes, calligraphy transforms ordinary lettering into art you can use for handmade cards, crafts, and creative projects. In this guide, you’ll learn the essentials—from tools and basic strokes to popular styles—plus expert tips from calligraphers Swetha Shenoy and Katherine Rinewalt.
Calligraphy Brush Strokes & Lettering
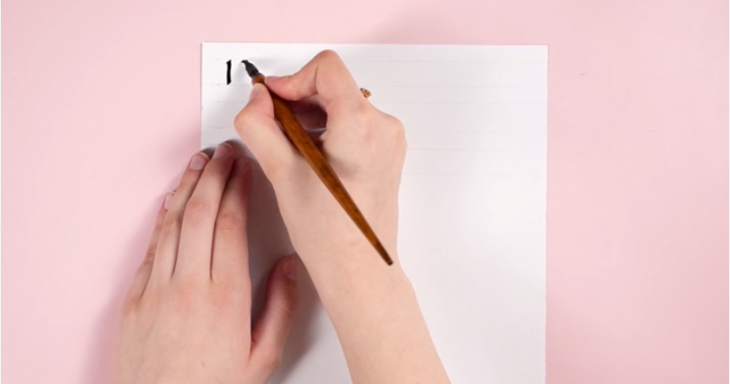
1. Hold the Pen Correctly at a 40°–45° Angle
To achieve clean, elegant strokes, grip the pen lightly between your thumb and index finger near the nib, while resting your middle finger underneath for support. Experts like Katherine Rinewalt emphasize keeping the nib steady without twisting it. Pointing the nib slightly away from you at 40–45° ensures smooth, thick downstrokes. Apply light pressure—too much force can damage the nib or cause blotting.
🖋️ Subheading: Proper Grip and Angle
- Avoid twisting the nib during strokes.
- Direct the nib backward or sideways, not forward.
- Use a soft grip with consistent, light pressure.
📖 Reference: The Paisley Corner – Swetha Shenoy
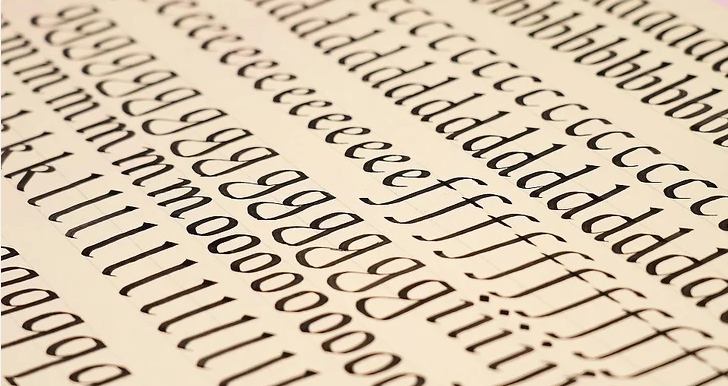
2. Practice Calligraphy Strokes Before Writing Letters
Instead of jumping straight into the alphabet, practice the nine foundational strokes: upstroke, downstroke, overturn, underturn, compound curve, oval, ascending loop, descending loop, and comma dot. These strokes form the building blocks of all calligraphy styles.
🖋️ Subheading: Basic Stroke Drills
- Trace pre-printed worksheets for consistency.
- Explore resources on Pinterest, Etsy, or Creative Market for practice sheets.
- Remember: calligraphy differs from cursive—it’s made of smaller strokes, not continuous lines.
📖 Reference: Beginner’s Guide to Modern Calligraphy
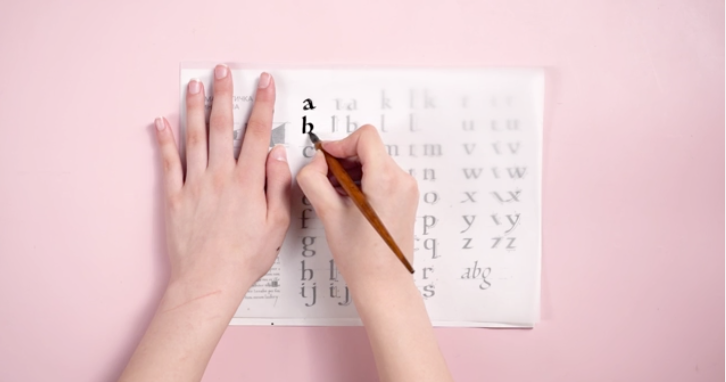
3. Practice Letters Using Worksheets
The best way to build confidence is tracing letters repeatedly. Print a sample alphabet, place tracing paper over it, and follow the strokes until you can form letters independently. Daily short practice sessions (5–15 minutes) strengthen muscle memory over time.
🖋️ Subheading: Tracing for Muscle Memory
- Start with lowercase letters, then move to uppercase.
- Repeat consistently for steady progress.
- Follow expert advice: “Calligraphy isn’t mastered in a day—it takes steady practice.”
📖 Reference: Rosebud Calligraphy
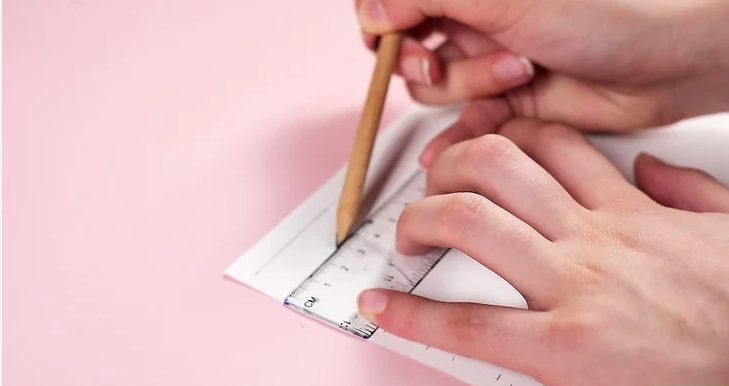
4. Use Grid Lines for Consistency
To keep your lettering aligned and uniform, draw faint grid lines or use transparent guide sheets. You can also place your writing paper over a light box with grid paper beneath. Alternatively, use a ruler and pencil to mark guidelines, then erase after finishing.
🖋️ Subheading: Aligning Your Work
- Search online for free grid templates.
- Use practice notebooks designed for calligraphy learners.
- Apply grids to real projects like birthday cards, wedding invitations, and handwritten notes.
📖 Reference: Free Calligraphy Worksheets
Calligraphy Supplies & Tools
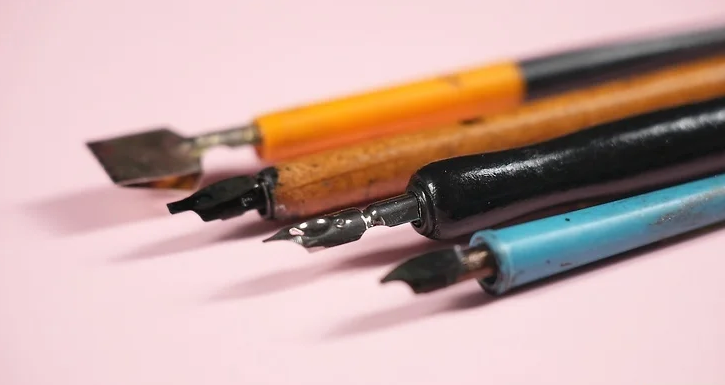
1. Choose the Right Calligraphy Pen
You can technically practice calligraphy with any writing tool—like a ballpoint pen, pencil, or marker—but specialized calligraphy pens will help you achieve smoother strokes and more professional results.
🖋️ Subheading: Popular Types of Calligraphy Pens
- Brush Pens: Pre-inked, pressure-sensitive pens ideal for modern calligraphy. Beginners should start with a small nib brush pen for easier control.
- Fountain Pens: These refillable pens hold ink in the barrel and allow you to switch nibs for different Western calligraphy styles like Copperplate, Italic, and Gothic. See Goulet Pens for options.
- Dip Pens: Classic pens with replaceable nibs dipped into ink, often used in Islamic calligraphy. Handles may be wood, plastic, or bone, paired with metal or glass nibs.
📖 Reference: The Postman’s Knock – Pen Guide

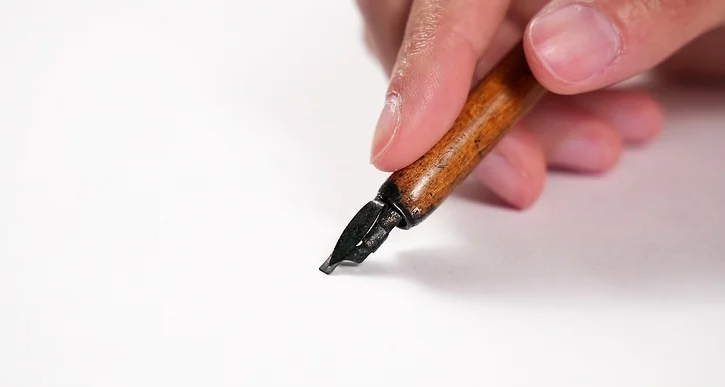
2. Understand Pen Nibs
The nib is the pointed metal (or glass) tip of the pen that makes contact with paper. It determines the thickness, flexibility, and style of your strokes.
🖋️ Subheading: Nib Shapes and Uses
- Pointed Nibs: Flexible, pressure-sensitive tips that produce thin upstrokes and thick downstrokes. Perfect for styles like Copperplate.
- Broad Nibs: Chiseled edges that create uniform lines based on nib size and angle. Best for Gothic or Italic lettering.
- Brush Pen Variants: Some pens offer dual ends with both pointed and broad nibs.
📖 Reference: JetPens Nib Guide
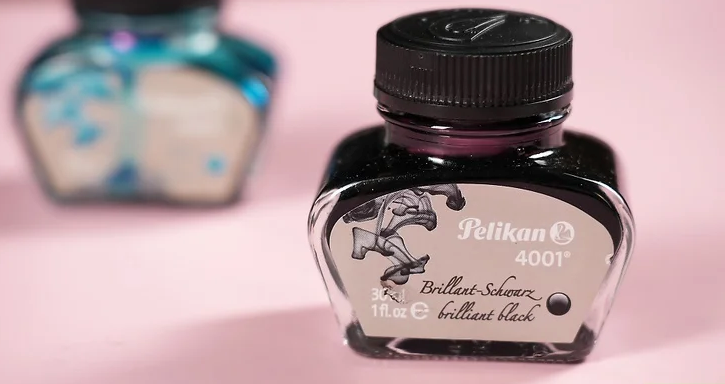
3. Select the Right Ink
Your ink should match your writing tool to avoid damage and ensure smooth flow. While black is the most traditional, calligraphy inks come in a wide variety of colors.
🖋️ Subheading: Common Ink Types
- Pot Ink (India Ink): Ready-to-use ink in jars; commonly paired with dip pens and fountain pens.
- Fountain Pen Ink: Special dye-based ink formulated for fountain pens. Only use approved fountain pen ink to avoid clogging. Options include cartridges or bottled ink.
- Ink Sticks: Traditional Asian calligraphy inks that require grinding on an ink stone. These allow tonal variation depending on dilution.
📖 Reference: Jackson’s Art – Calligraphy Ink Guide
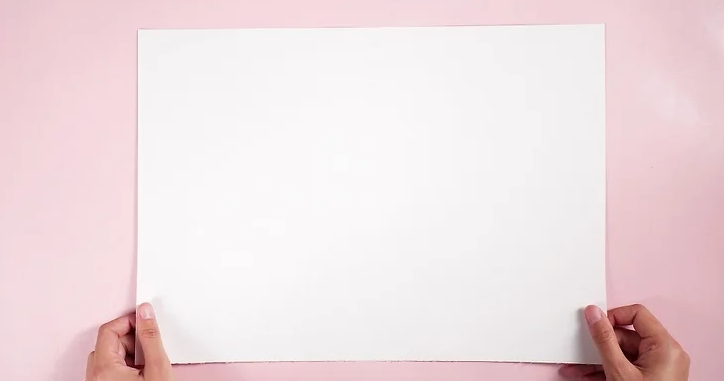
4. Use High-Quality Calligraphy Paper
Smooth, well-sized paper ensures your strokes glide evenly and prevents ink bleeding. Avoid regular notebook paper, which can cause feathering, or waxy paper, which repels ink.
🖋️ Subheading: Paper Recommendations
- Choose smooth, sized calligraphy paper designed for ink absorption.
- Look for brands like Rhodia or Canson.
- Avoid greasy, waxy, or low-quality papers that may ruin your lettering.
📖 Reference: The Postman’s Knock – Calligraphy Paper
Common Calligraphy Styles
1. Modern Calligraphy
Modern calligraphy is a freeform, flexible style that encourages creativity instead of strict adherence to rules. Unlike Copperplate or Italic, it allows looser strokes, making it one of the easiest styles for beginners.
🖋️ Subheading: Creative and Beginner-Friendly
- Focus on expression rather than uniformity
- Great for wedding invites, cards, and art projects
- Typically practiced with brush pens or pointed nib pens
📖 Reference: The Postman’s Knock – Modern Calligraphy

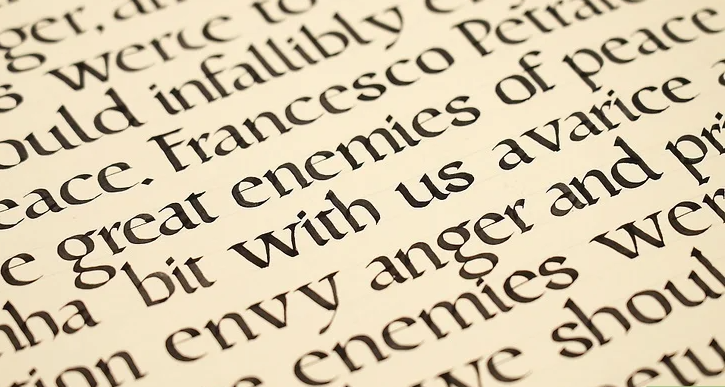
2. Copperplate Calligraphy
Copperplate is a traditional, elegant style known for its contrast between delicate thin strokes and bold downstrokes. It’s written with a pointed nib and often incorporates flourishes to highlight words or titles.
🖋️ Subheading: Elegant and Flourished
- Popular in formal invitations and certificates
- Uses pointed pens with flexible nibs
- Emphasizes thin upstrokes and thick downstrokes
📖 Reference: IAMPETH – Copperplate Guide
3. Italic Calligraphy
Italic is a simple, consistent style written with a broad nib. Its letters are slightly slanted, with thick primary strokes and thinner accents created by adjusting the nib angle.
🖋️ Subheading: Clean and Structured
- Recognizable by its slanted, rhythmic strokes
- Often used in manuscripts and formal writing
- Easier to learn than flourished styles
📖 Reference: Calligraphy Skills – Italic Script
4. Uncial Calligraphy
Uncial dates back to the 4th century and is found in ancient European manuscripts. It is written with a broad nib and features rounded, large letters—distinct from Italic’s angular strokes.
🖋️ Subheading: Ancient and Rounded
- Common in early religious and historical texts
- Known for its circular “M” and rounded characters
- Great for creating medieval-style artwork
📖 Reference: Medieval Writing – Uncial Script
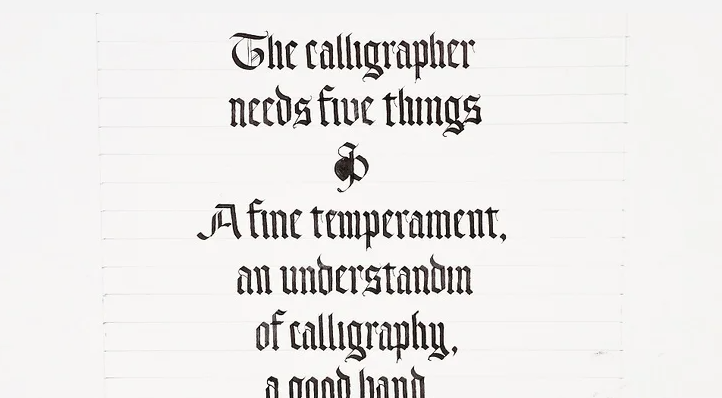
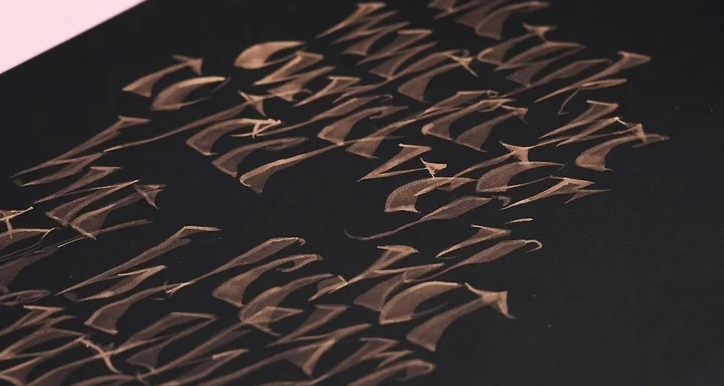
5. Gothic (Blackletter) Calligraphy
Gothic, also known as Blackletter, emerged in the 12th century and is recognized by its dense, angular lowercase letters and ornate uppercase forms. It was widely used in Europe for manuscripts and still appears today on diplomas and certificates.
🖋️ Subheading: Dense and Ornamental
- Narrow, upright letters conserve space
- Intricate capitals with embellishments
- Best written with a broad nib
📖 Reference: IAMPETH – Gothic Script
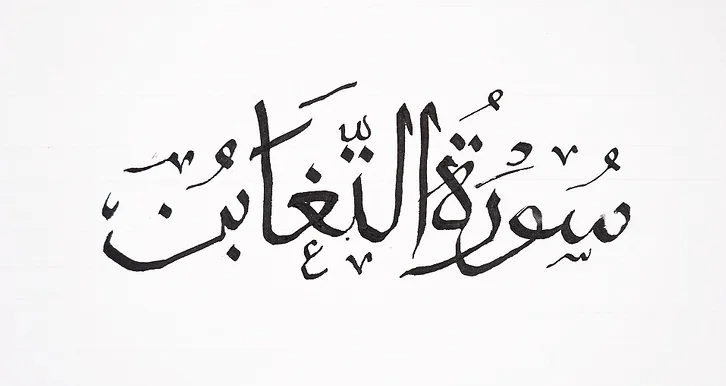
6. Arabic Calligraphy
Arabic calligraphy is a flowing, artistic script written from right to left. It is not only functional but also a visual art form, often used in decoration and religious texts. The style is achieved with a pointed nib or traditional reed pen.
🖋️ Subheading: Flowing and Decorative
- Letters are interconnected and curved
- Used in Islamic art, manuscripts, and architecture
- Emphasizes harmony and rhythm
📖 Reference: The Met Museum – Arabic Calligraphy
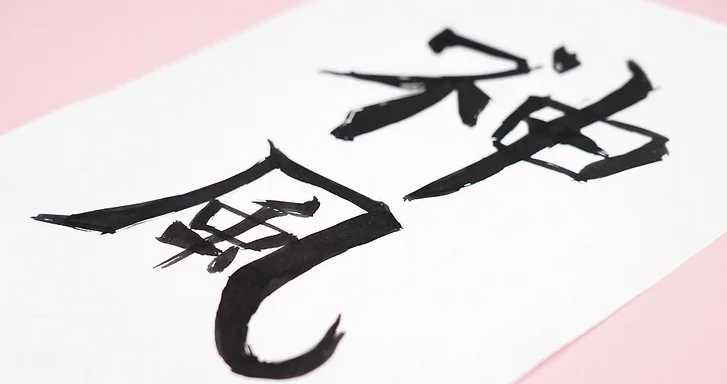
7. Kanji Calligraphy (Shodo)
Kanji calligraphy, also known as Shodo, is rooted in Chinese and Japanese traditions. Artists use brushes dipped in ink—either from pre-made pots or ground from ink sticks—to create slow, deliberate strokes.
🖋️ Subheading: Brush-Based and Meditative
- Focuses on balance, patience, and fluidity
- Practiced as both writing and spiritual discipline
- Uses ink stones and brushes rather than pens
📖 Reference: Japan Guide – Shodo (Japanese Calligraphy)