您的购物车目前是空的!
How to Write in Gothic Calligraphy: Gothic calligraphy, also known as blackletter, is an elegant and historic style of hand lettering that dates back to the Middle Ages.1 With its ornate strokes and dramatic forms, this lettering style comes in several variations, each with its own charm. Whether you’re designing wedding invitations, creating artistic projects, or simply exploring a new hobby, learning blackletter is both a rewarding and enjoyable challenge for anyone.
Method1 Practicing the Letters
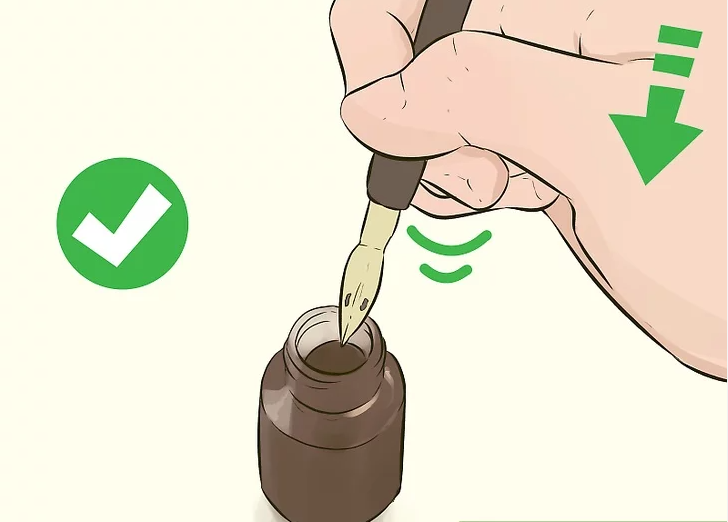
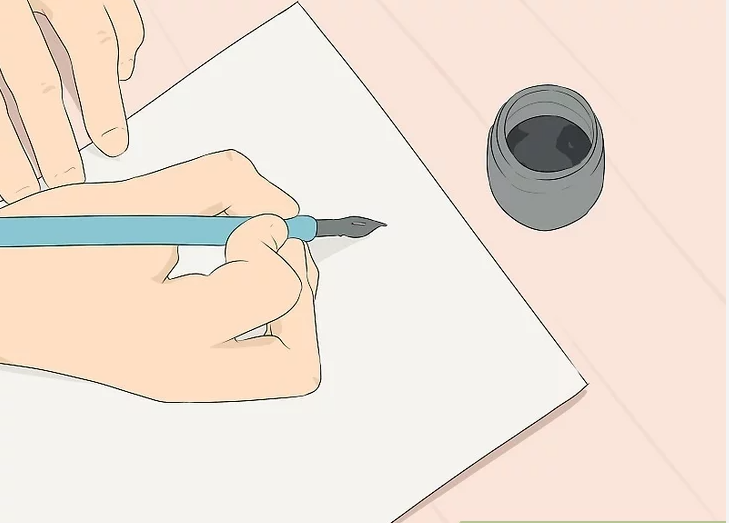
1. Dip the Pen Nib in Ink and Shake Off Excess
Before you begin writing, dip the pen nib into the bottom of the ink bottle to fill the vent. Then, with the pen still inside the bottle, give it a quick downward shake to remove excess ink. This helps prevent blotting and ensures smoother strokes.1
Step Title: Preparing Your Pen
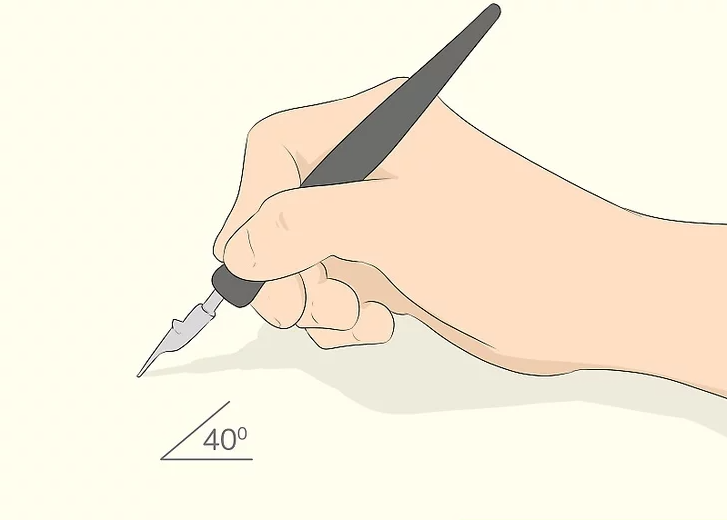
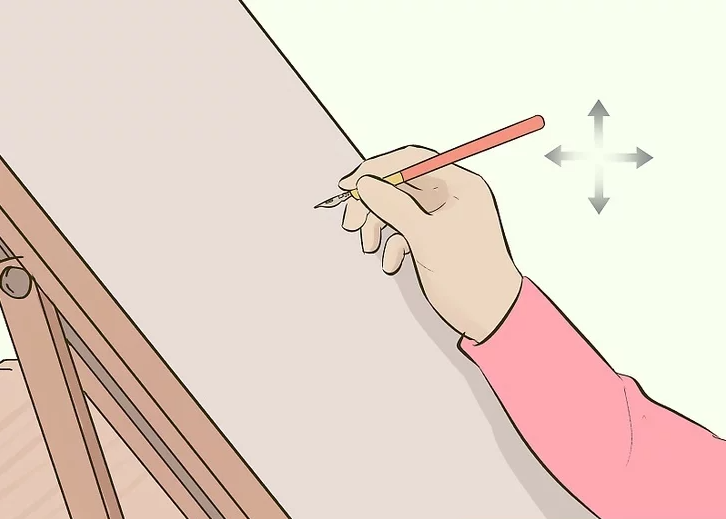
2. Hold the Pen at a 40° Angle
Hold your pen roughly at a 40° angle to the paper. You don’t need an exact protractor—just practice until the pen feels comfortable. A proper angle allows for more control, making your vertical and diagonal strokes more precise.2
Step Title: Pen Positioning
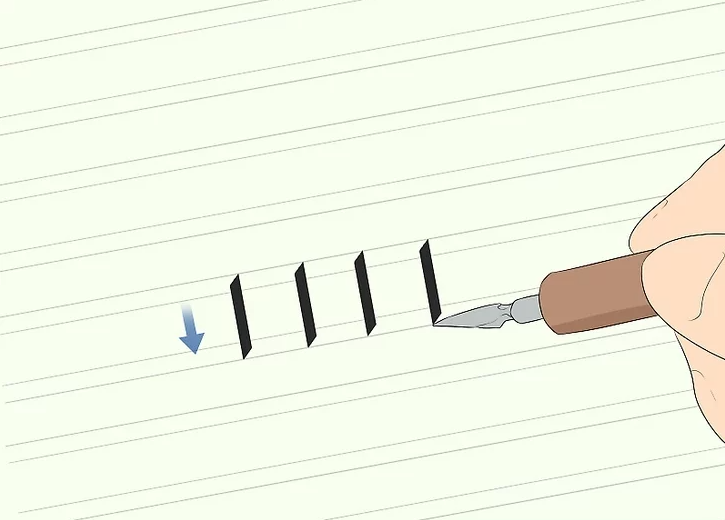
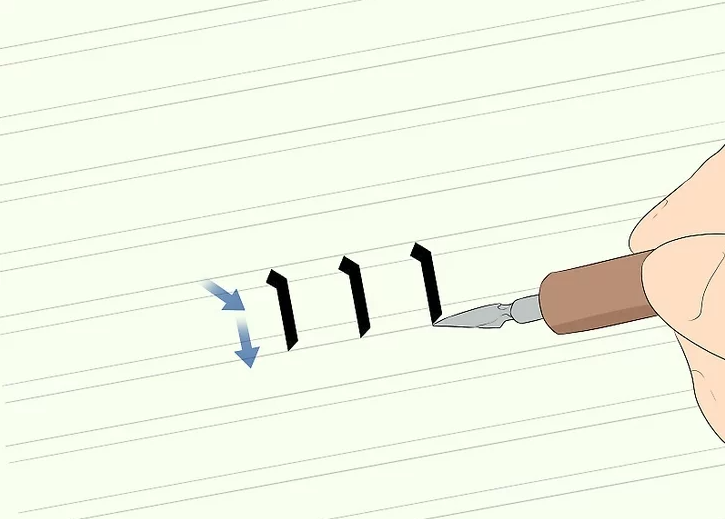
3. Draw a Simple Downward Stroke
Start by drawing a straight vertical line from the x-height to the baseline. Use even pressure and repeat several times, leaving equal spacing between each stroke. This forms the foundation for letters like “i” and “l.”3
Step Title: Basic Vertical Stroke
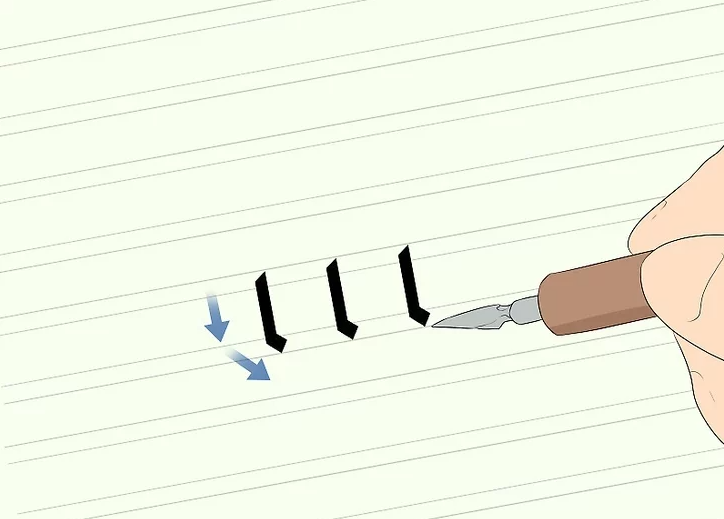
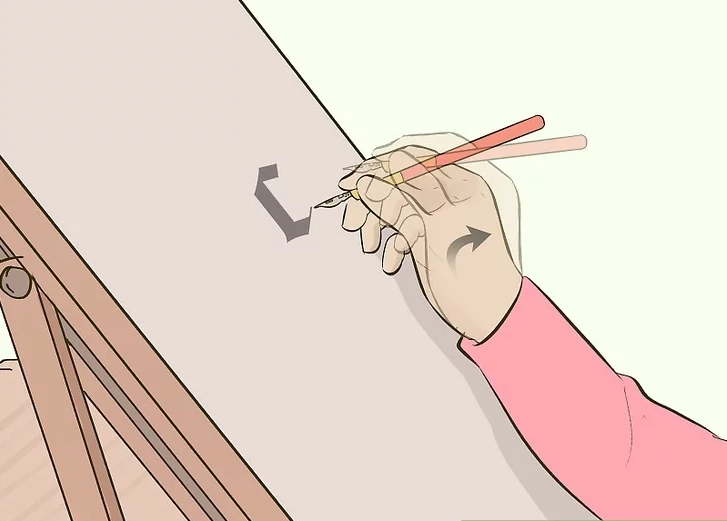
4. Add a Serif at the Bottom of the Line
Once your vertical strokes feel comfortable, add a small horizontal serif at the bottom of the line. Draw it about 1 nib-width across, making sure it connects seamlessly to the vertical stroke. Practice this several times for consistency.4
Step Title: Bottom Serif
5. Create a Serif at the Top of the Line
Many Gothic letters feature a top serif. Start at the waist line and draw a horizontal stroke 1 nib-width wide. Without lifting your pen, draw a vertical line down to the baseline. You can also start from the top line for variation.5
Step Title: Top Serif
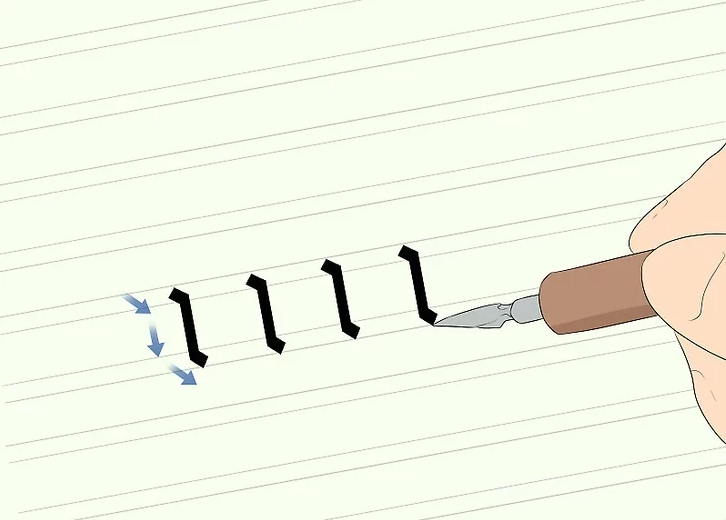
6. Practice a Line with Both Top and Bottom Serifs
Combine the skills by drawing a line with a serif at both the top and bottom. Start at the waist line, draw the vertical stroke, and finish with a bottom serif. Repeat until the serifs are uniform. This creates a basic lowercase “i” or “l.”6
Step Title: Full Vertical Letter
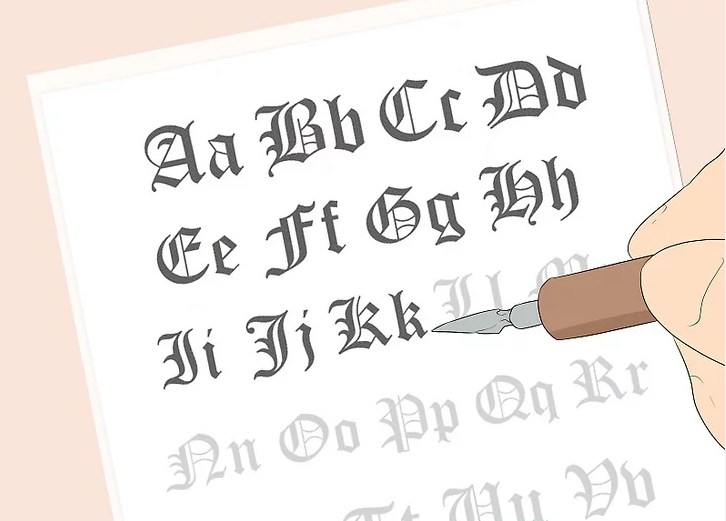
7. Trace Letters Before Writing Freehand
Tracing helps you understand letter construction. Place a sheet of paper over a sample alphabet and trace the letters with your pen, following serifs and flourishes closely. Practice each letter multiple times before moving on.7
Step Title: Tracing Practice
8. Practice Letters Within the X-Height
Start freehand writing with letters fully contained in the x-height like “i,” “m,” “n,” and “w.” These straight-line letters are easier to master before moving on to taller or longer characters.8
Step Title: X-Height Letters
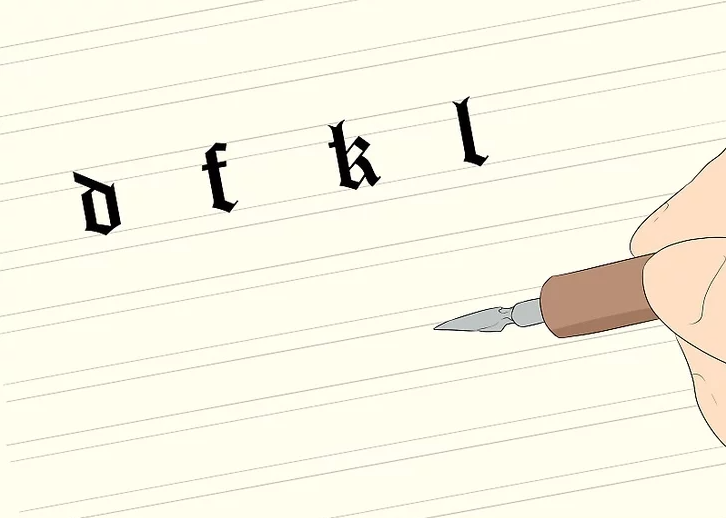
9. Draw Ascenders Above the X-Height
Next, practice ascenders, the vertical strokes that extend above the x-height. Letters such as “b,” “d,” “f,” “h,” “k,” and “l” all have ascenders. The top serif of “t” also fits within this zone.9
Step Title: Ascender Strokes
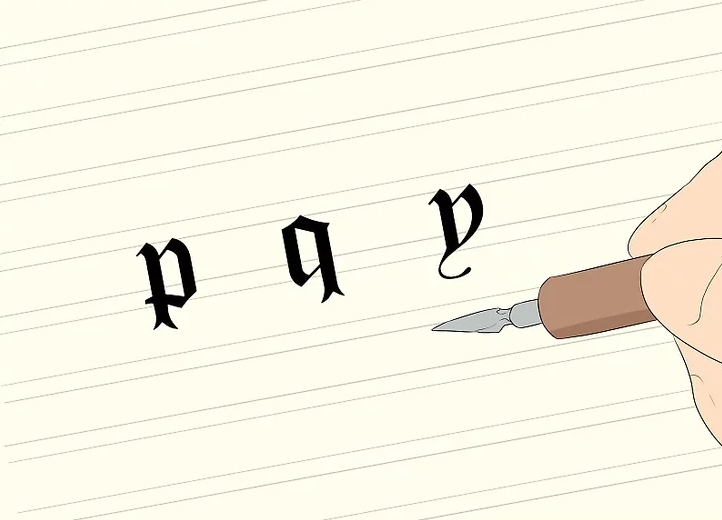
10. Mark Descenders Below the Baseline
For letters like “g,” “j,” “p,” “q,” and “y,” draw descenders that drop below the baseline. You can also add decorative flourishes within the descender space for stylistic effect.9
Step Title: Descender Strokes
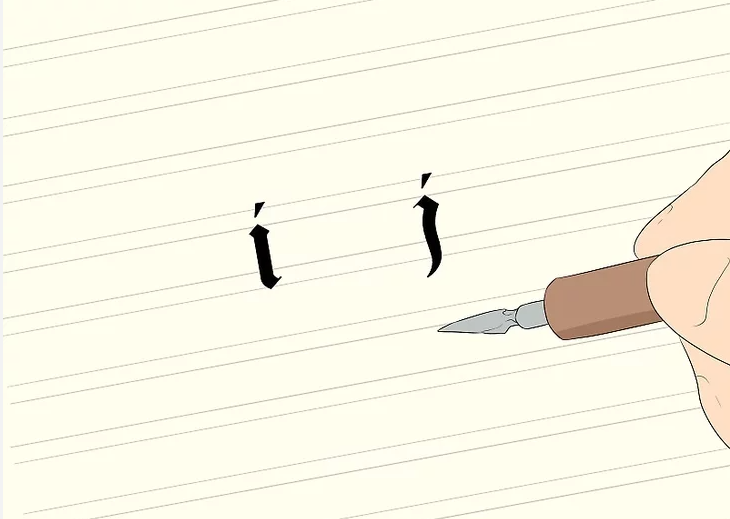
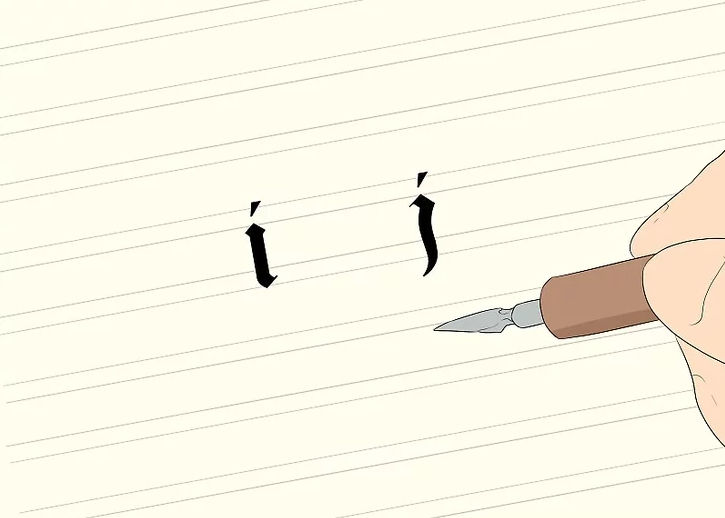
11. Dot the Letters “i” and “j” with a Hairline Stroke
Finally, use the tip of the pen to add a thin, angled dot on top of “i” and “j.” Avoid a full nib mark, which is too wide; instead, create a subtle, upward-angled stroke. Experiment with placement for a creative touch.10
References
Footnotes
- Gothic Calligraphy Pen Techniques ↩
- Holding the Pen Correctly ↩
- Basic Gothic Strokes ↩
- Adding Serifs in Blackletter ↩
- Top Serifs Explained ↩
- Practicing Vertical Letters ↩
- Tracing for Beginners ↩
- X-Height Letters ↩
- Ascenders & Descenders ↩ ↩2
- Hairline Dots for i & j ↩
Method2 Choosing the Right Tools
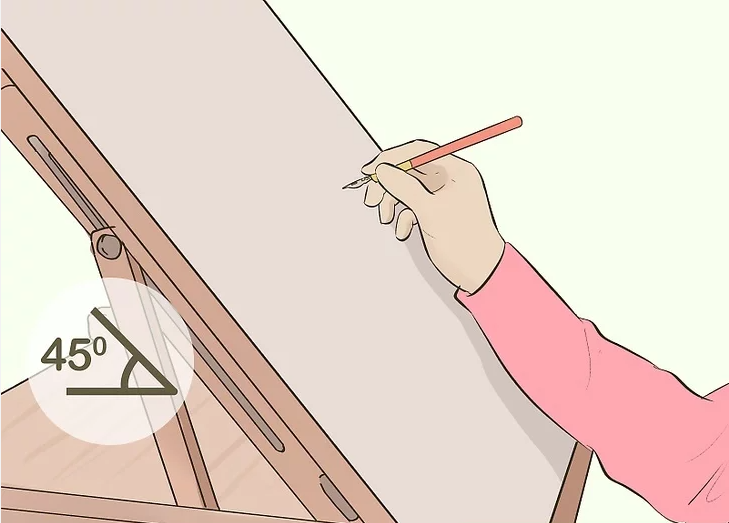
1. Work on a Sloped Surface
A flat desk can limit your arm movement and cause strain in your neck and shoulders. A sloped desk or propped surface at about a 45° angle makes it easier to move your whole wrist and arm, leading to smoother and more consistent lettering.1
Step Title: Create a Comfortable Writing Angle
2. Choose a Dip Pen and Ink Bottle
For a traditional setup, use a dip pen with a nib and an ink bottle. India ink is commonly used for hand-lettering because of its thickness and rich black color. A nib holder around 15–20 cm (5.9–7.9 in) works best for beginners. You can find dip pens and ink online or at most craft supply stores.2
Step Title: Traditional Writing Tools
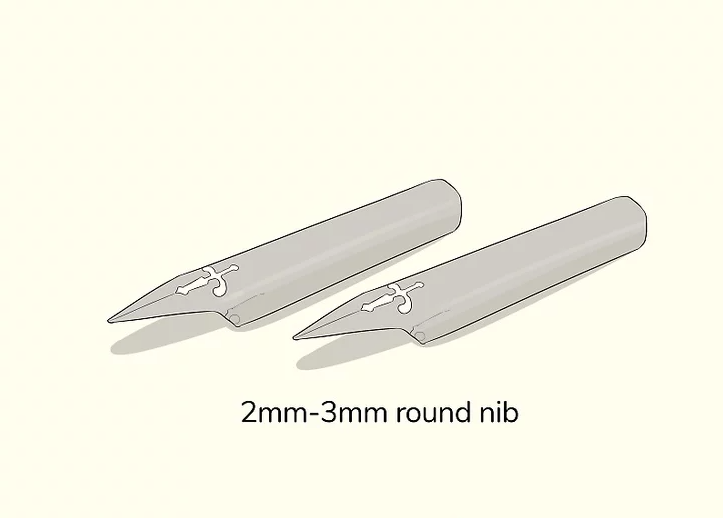
3. Opt for a 2mm–3mm Round Nib
Select a nib with medium flexibility and a rounded 2–3mm tip. Smaller nibs make it harder to see serifs, while overly flexible nibs can cause wobbly lines. A rounded nib strikes the right balance for beginners, offering control and visibility.3
Step Title: Selecting the Right Nib
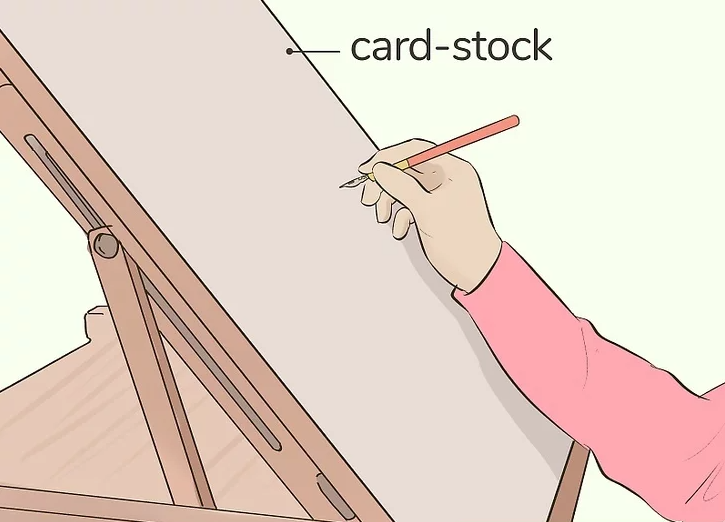
4. Use Heavy Printer Paper or Cardstock
Regular copy paper is too thin for liquid ink and may bleed through. Instead, use 120 gsm (32-lb) printer paper or heavier cardstock. If you only have thin paper, stack several sheets together. For serious practice, consider calligraphy notebooks that are already lined.4
Step Title: Choosing the Right Paper
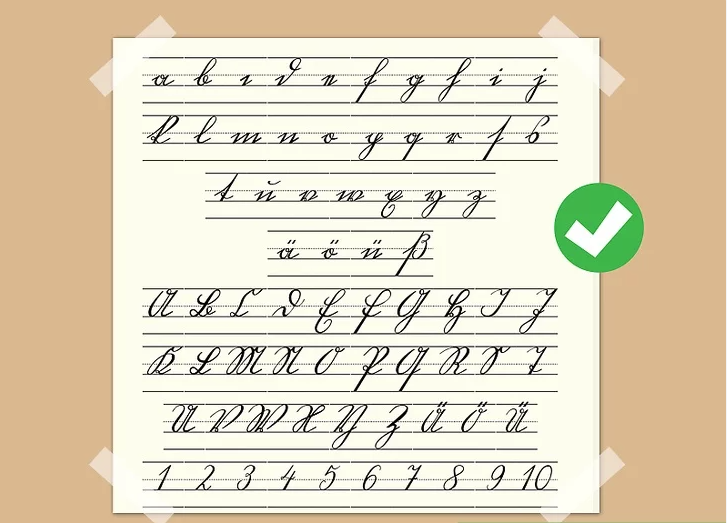
5. Print Out Sample Alphabet Sheets
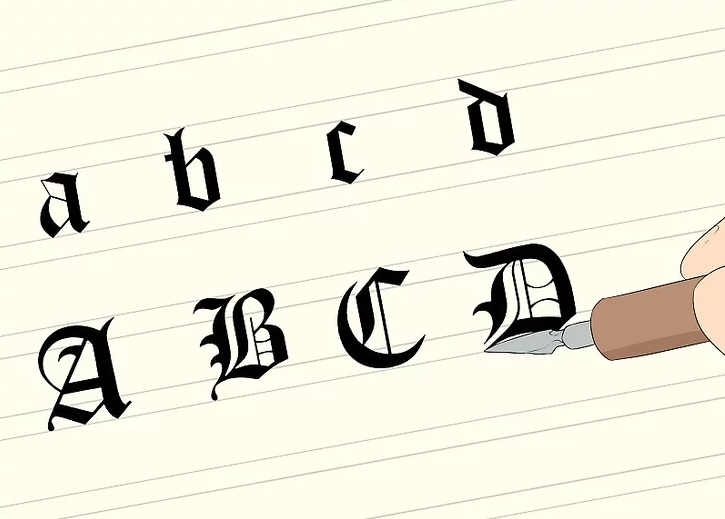
Keep reference alphabets nearby while you practice. Gothic calligraphy has several styles, such as Textualis, Rotunda, Schwabacher, and Fraktur. Textualis is the easiest starting point since it uses fewer curves. Comparing alphabets side by side helps you learn stylistic differences—like how the capital “S” in Fraktur looks more like a modern “G.”5
Step Title: Reference Alphabets
6. Keep Tissues or Cloth Handy
Ink work can be messy, so always have tissues, paper towels, or a cloth nearby to wipe up spills or clean the nib. A small bowl of water is optional but useful for cleaning tools quickly.6
Step Title: Clean-Up Tools
7. Line Your Paper for Practice
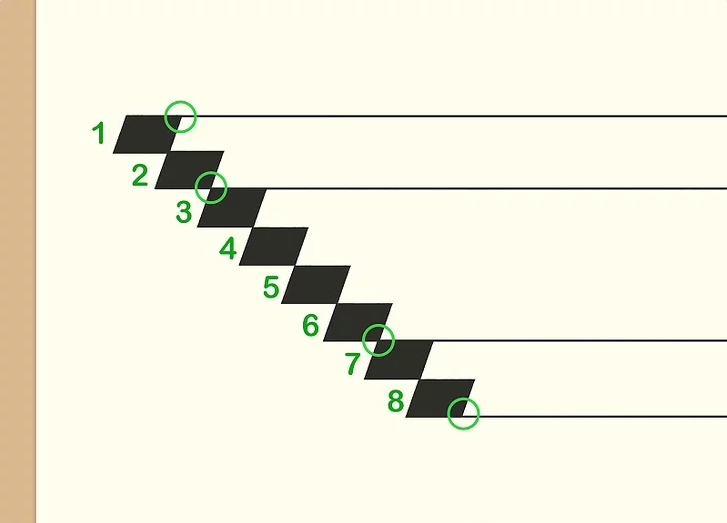
If your paper isn’t pre-lined, create guides yourself. Use your nib to mark equal-width strokes diagonally, then connect them with four horizontal guidelines using a ruler. The result gives you an x-height row (4 nib-widths tall) with ascender and descender rows above and below. These guides help structure your Gothic letters correctly.7
Step Title: Guideline Setup
References
Would you like me to combine this prep guide with the Gothic writing steps you asked me to rewrite earlier so you have one complete tutorial (preparation + writing techniques) in a single, polished format?
Footnotes
- Setting Up Your Calligraphy Workspace ↩
- Traditional Dip Pens and Ink ↩
- Choosing the Right Calligraphy Nib ↩
- Best Papers for Calligraphy Practice ↩
- Blackletter Styles: Textualis, Rotunda, Fraktur ↩
- Calligraphy Ink Management ↩
- How to Line Paper for Calligraphy ↩
Method3 Improving Your Technique

1. Sit Up Straight and Relax Your Arm
Good posture improves pen control and keeps your letters neat. Sit with your back straight, shoulders relaxed, and both feet on the floor. Avoid gripping the pen too tightly, as tension makes strokes messy and limits the graceful flair Gothic calligraphy is known for. Take short breaks to stretch if you start feeling stiff.1
Step Title: Maintain Proper Posture
2. Move Your Whole Hand and Wrist
Instead of relying only on your fingers, engage your hand and wrist when forming strokes. Gothic calligraphy relies on broad, deliberate motions, and using your whole hand actually gives you greater control over the shape of your letters. This may feel unfamiliar at first but will become natural with practice.2
Step Title: Broad and Controlled Strokes
3. Lift Your Pen Between Strokes
Each Gothic letter is built from several strokes, so lifting the pen after each one helps ensure clean lines and visible serifs. While it’s acceptable to draw a line and serif in a single motion, separating strokes adds clarity and precision—an important part of blackletter aesthetics.3
Step Title: Controlled Stroke Separation
4. Practice Lowercase Before Uppercase
Start with lowercase letters, which are simpler and less ornate. Uppercase Gothic letters often feature complex flourishes and extra serifs that can be overwhelming for beginners. Once you’ve mastered lowercase forms and feel confident, progress to capitals for a fuller Gothic alphabet.4
Step Title: Step-by-Step Letter Progression
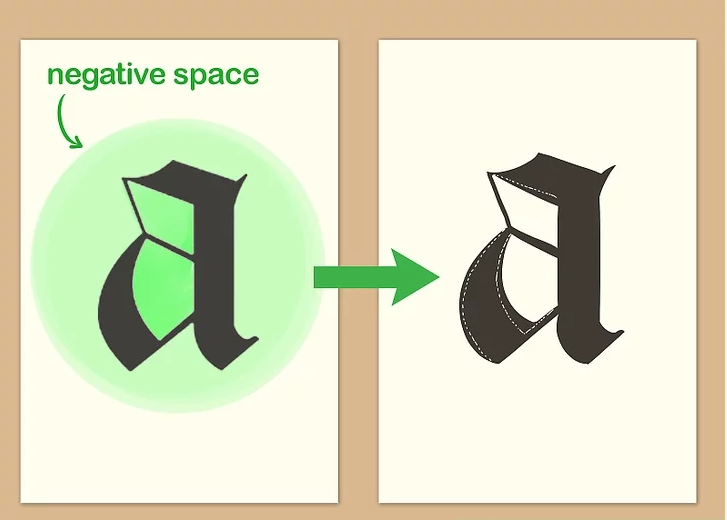
5. Analyze Negative Space to Spot Errors
To refine your technique, study the negative space within and between your letters. Compare your strokes to sample alphabets to catch imbalances—such as uneven spacing in an “m” or misaligned serifs in an “o.” Correcting these subtle issues will greatly improve accuracy and consistency in your writing.5