您的购物车目前是空的!
How to Animate in Procreate: Procreate is a powerful digital drawing app for iPhone and iPad, widely loved for its versatility and ease of use. Beyond creating beautiful illustrations, it also lets you bring your artwork to life with simple animations. With a bit of practice, you can use it not only for fun projects but also as a stepping stone toward a career in professional animation. This guide will walk you through the basics of making a quick and simple animation in Procreate.
Part1 Creating an Animation
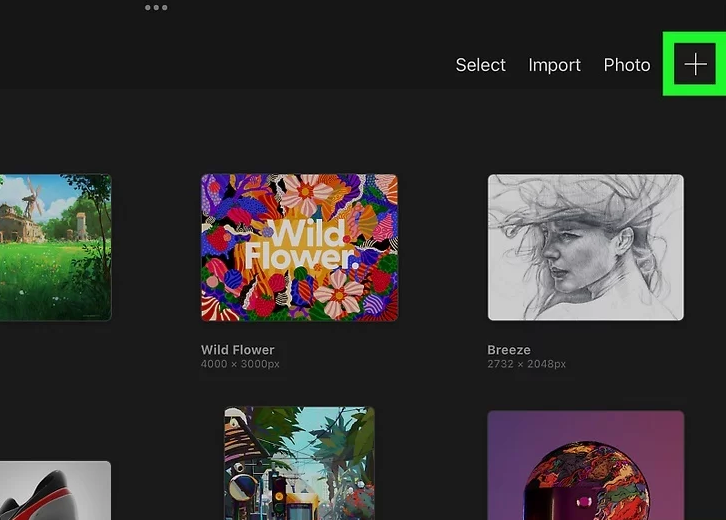
1. Open a new canvas in Procreate
To get started, launch the Procreate app on your iPhone or iPad. In the Gallery, you can either tap an existing canvas or create a new one by pressing the plus (+) icon in the upper-right corner. Select the size of the canvas you want to work with.
Subheading: Setting up your workspace
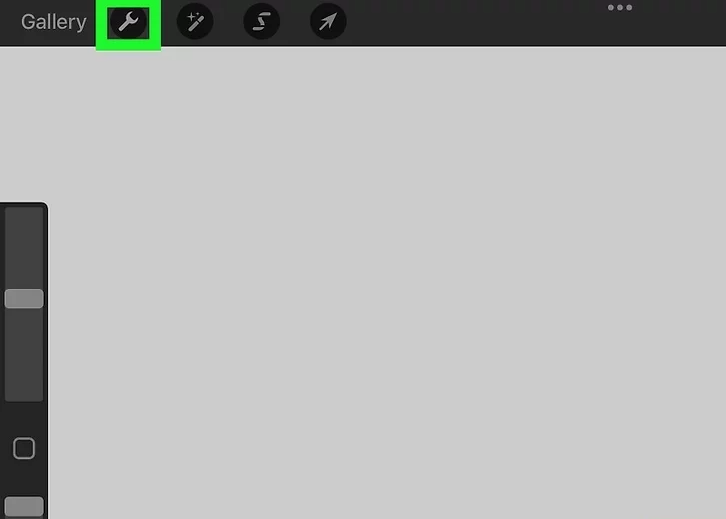
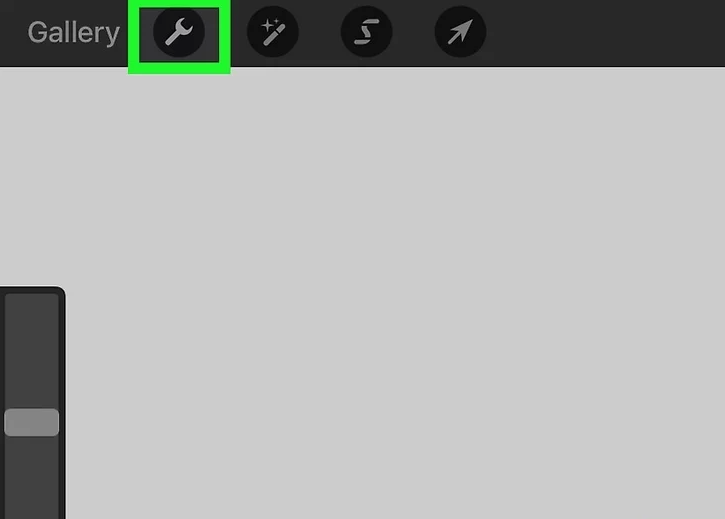
2. Tap the wrench icon
In the upper-left corner, next to where it says Gallery, tap the wrench (Actions) icon. This will open the Actions menu, where you’ll find the settings you need for animation.
Subheading: Accessing the Actions menu
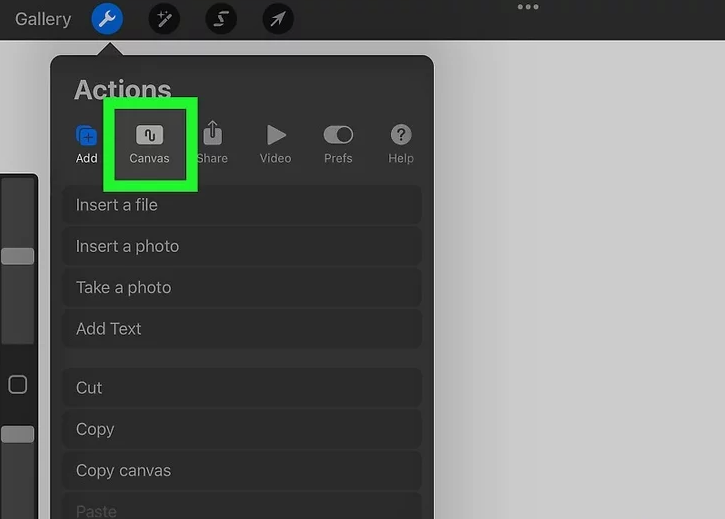
3. Tap Canvas
Inside the Actions menu, locate and tap Canvas. The Canvas icon looks like a screen with a wavy line and is the second tab at the top.
Subheading: Navigating to Canvas settings
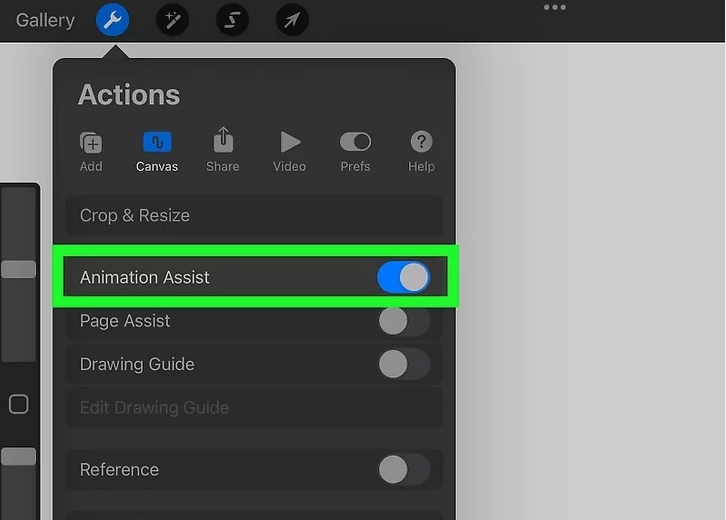
4. Toggle on “Animation Assist”
At the top of the Canvas settings, switch on Animation Assist. This enables animation mode and displays the timeline at the bottom of your screen. For more details, you can check the Procreate Handbook on Animation Assist.
Subheading: Enabling Animation Assist
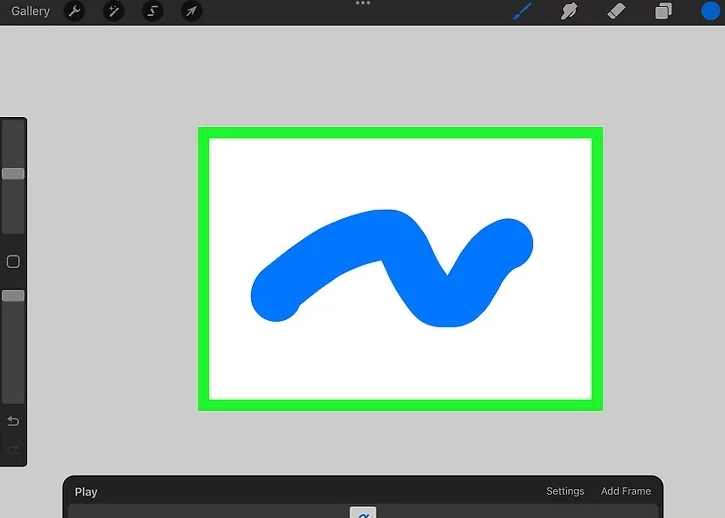
5. Draw your first frame
Use Procreate’s drawing tools to create your first frame just as you would with any illustration. This will serve as the foundation of your animation.
Subheading: Creating your starting frame

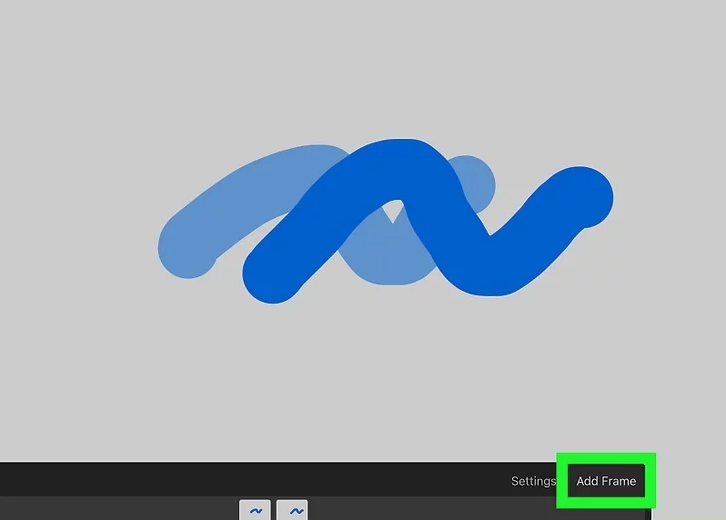
6. Tap Add Frame
On the timeline at the bottom of the screen, tap Add Frame on the far right. This creates a new frame for your animation. You can also add frames by creating new layers—grouped layers will act as a single frame.
Subheading: Adding new frames
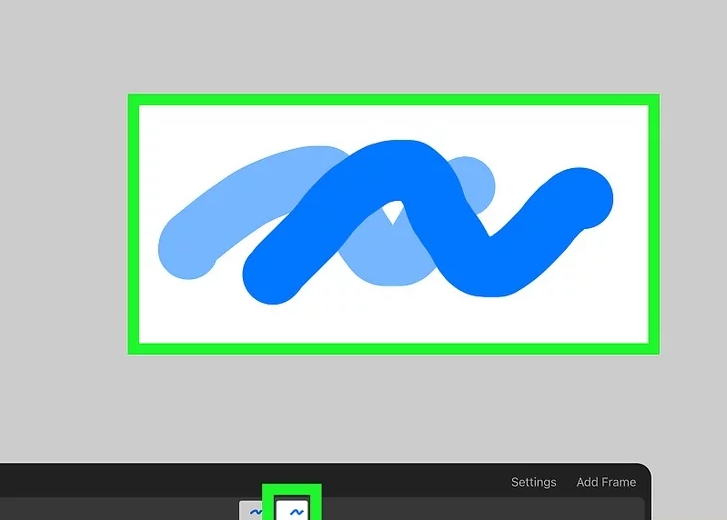
7. Draw your next frame
Select the new frame from the timeline (a white square) and begin drawing. You’ll notice a faint outline of the previous frame—this is called an onion skin, and it helps you keep movement consistent between frames.
Subheading: Using onion skin for guidance
8. Add more frames
Continue the process by tapping Add Frame and drawing each new step of your animation. Repeat until your animation is complete. For inspiration, you might explore frame-by-frame animation basics.
Subheading: Building your sequence
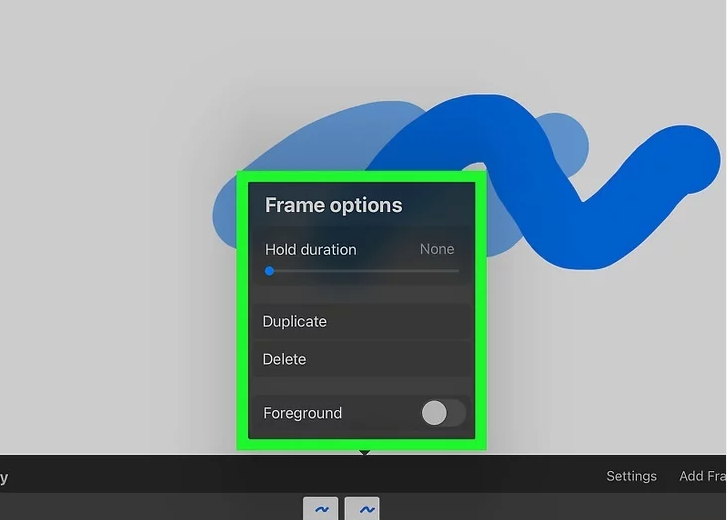
9. Open the Frame Options menu
To adjust a frame, tap it in the timeline and then tap it again to open the Frame Options menu. This allows you to modify individual frames for greater control.
Subheading: Customizing frame settings
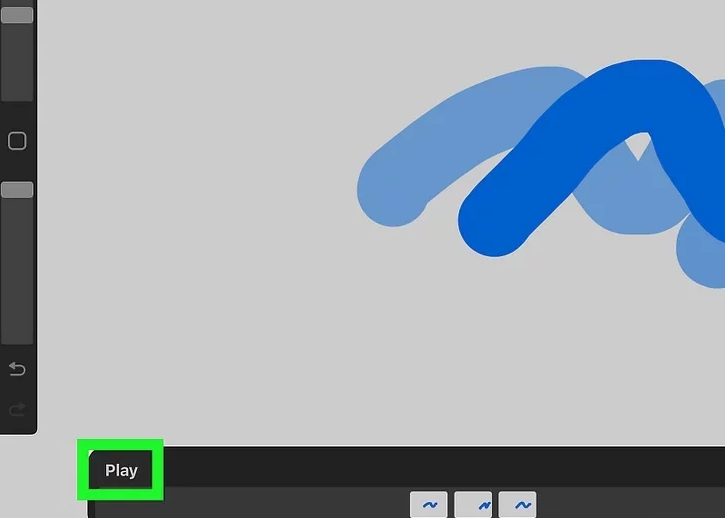
10. Tap Play
When you’re ready to preview your work, tap the Play button on the left side of the timeline. This lets you see your animation in action before exporting it.
Subheading: Previewing your animation
📚 References
- Procreate Official Site
- Procreate Handbook – Animation Assist
- Creative Bloq – Frame-by-Frame Animation
- Apple – Procreate on the App Store
Part2 Adjusting the Settings and Options

1. Adjust the Frame Options
The Frame Options menu in Procreate gives you control over individual frames. Here are the main tools you can use:
- Hold duration: Use the slider to decide how many frames a drawing should stay on screen, creating a pause in motion.
- Duplicate: Instantly copy a frame.
- Delete: Remove an unwanted frame.
For more details, check the Procreate Handbook – Frame Options.
Subheading: Fine-tuning individual frames
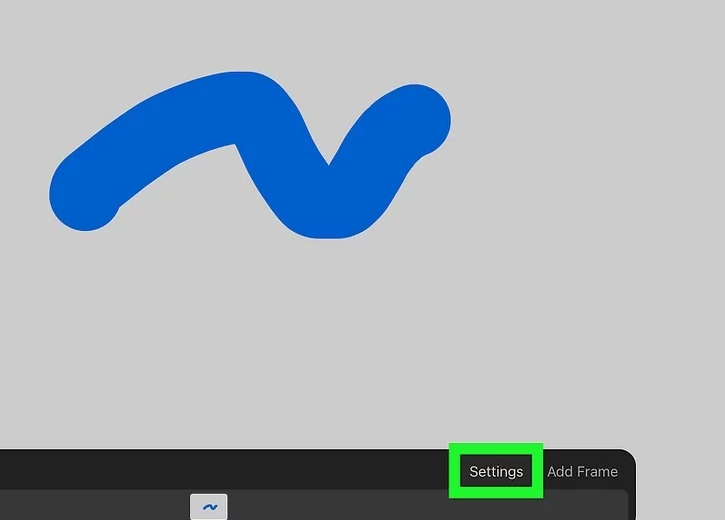
2. Tap Settings
On the timeline at the bottom of your screen, tap Settings (located next to “Add Frame”). This opens the Animation Settings menu, where you can adjust playback and onion skin preferences.
Subheading: Accessing animation settings
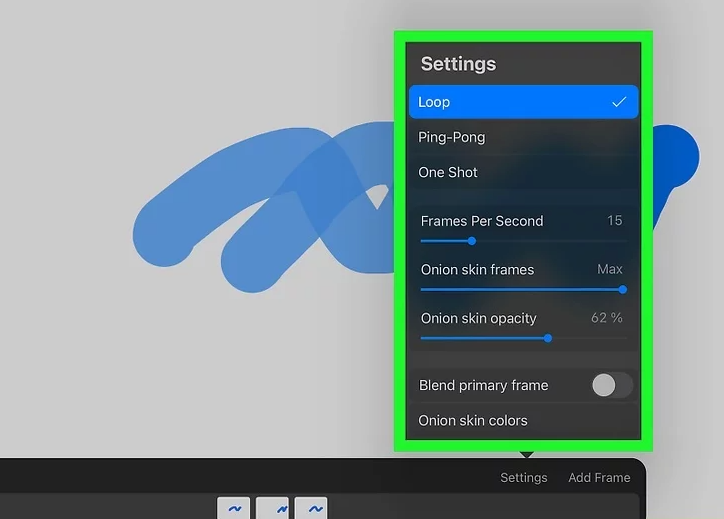
3. Edit your Animation Settings
Inside the Settings menu, you can refine how your animation behaves:
- Loop: Makes the animation replay from the beginning.
- Ping-Pong: Plays forward, then in reverse, then repeats.
- One Shot: Plays once and stops at the final frame.
- Frames Per Second (FPS): Adjusts the speed of your animation with a slider.
- Onion skin frames: Controls how many previous frames appear as onion skins.
- Onion skin opacity: Adjusts how faint or visible onion skins are.
- Blend primary frame: Dims the opacity of the current frame to help you align movement.
- Onion skin colors: Change the onion skin color via the color wheel for easier frame tracking.
For a deeper dive, explore Creative Bloq – Frame-by-Frame Animation Tips.
Subheading: Customizing playback and onion skin tools
📚 References
- Procreate Official Site
- Procreate Handbook – Animation Assist
- Creative Bloq – Frame-by-Frame Animation
- Apple – Procreate on the App Store
Part3 Exporting the Animation
1. Tap the wrench icon
In the upper-left corner of Procreate, next to where it says Gallery, tap the wrench icon. This opens the Actions menu, which contains export and sharing options.
Subheading: Opening the Actions menu

2. Tap Share
At the top of the Actions menu, select Share (the third tab). The icon looks like a square with an upward arrow.
Subheading: Accessing export options
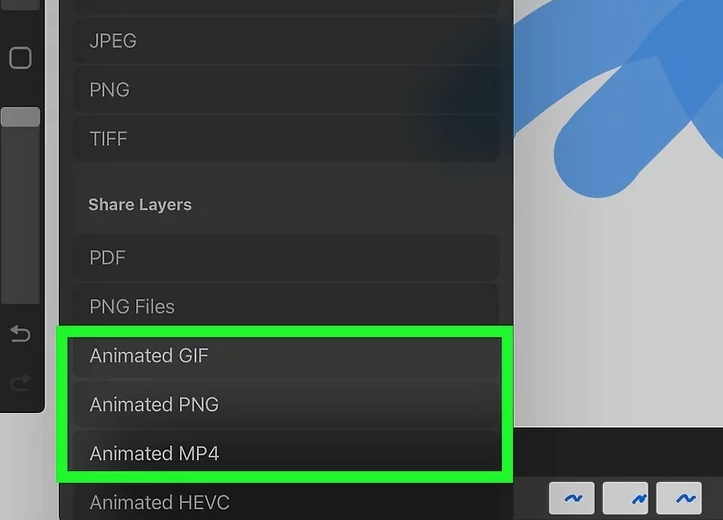
3. Choose your export format
Scroll down and select Animated GIF, Animated PNG, or Animated MP4, depending on your needs:
- Animated GIF: Best for short loops and wide compatibility, though image quality is lower.
- Animated PNG (APNG): Offers better quality than GIF, but is less widely supported.
- Animated MP4: Ideal for uploading to platforms like YouTube or social media, as MP4 is the most common video format.
For a full comparison of formats, see Procreate Handbook – Exporting Animations.
Subheading: Picking the right file type
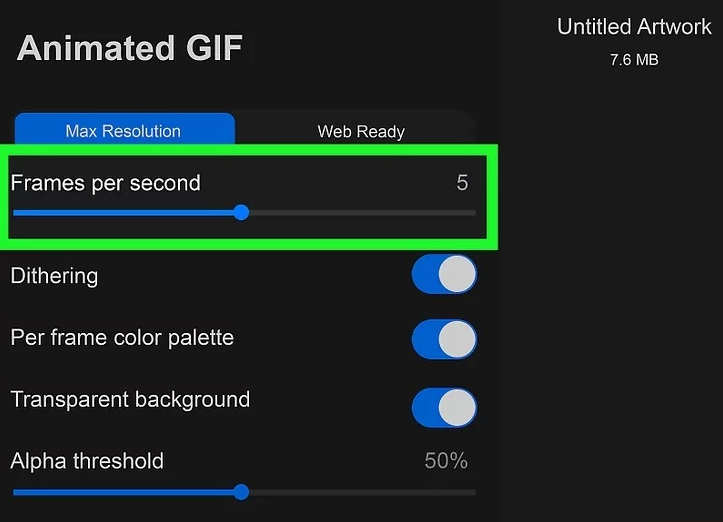
4. Adjust the speed of your animation
Use the Frames Per Second (FPS) slider to control playback speed. By default, this matches the FPS setting in the Animation Assist menu, but you can increase or decrease it here before exporting.
Subheading: Customizing playback speed
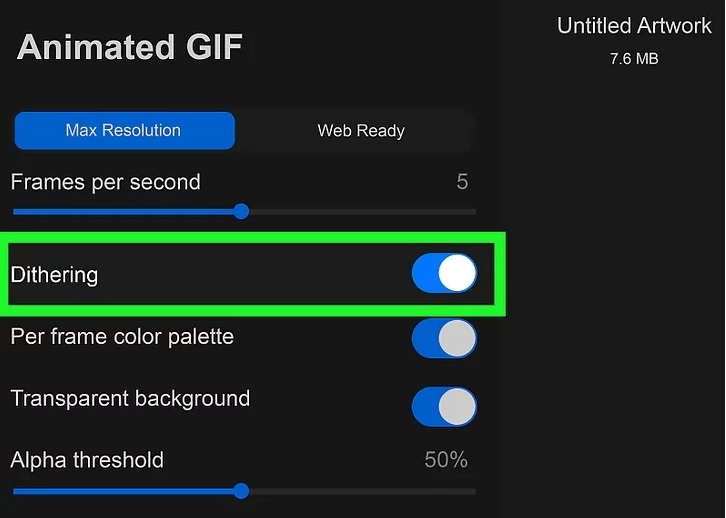
5. Toggle Dithering on or off
When exporting as a GIF (which has a limited color palette), you can enable dithering. This blends pixels to simulate more colors, improving the visual quality of your animation.
Subheading: Improving GIF color output
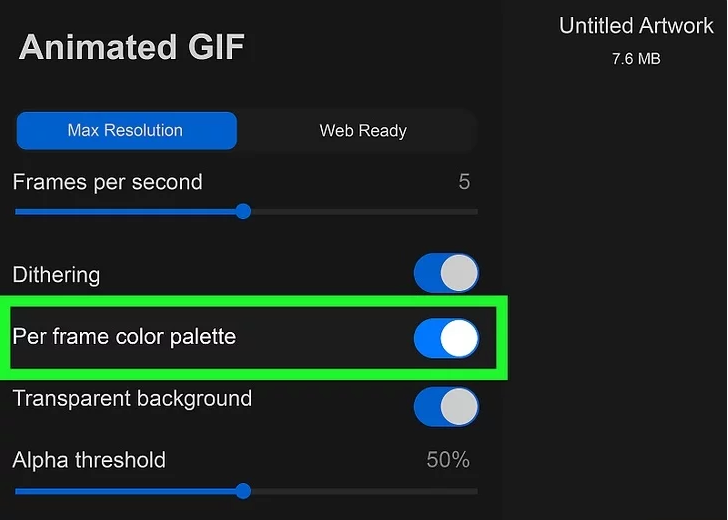
6. Enable per-frame color palettes
If you want each frame to have its own unique color palette in a GIF, toggle Per Frame Color Palette on. This option helps optimize file size and manage colors more efficiently.
Subheading: Managing color palettes per frame
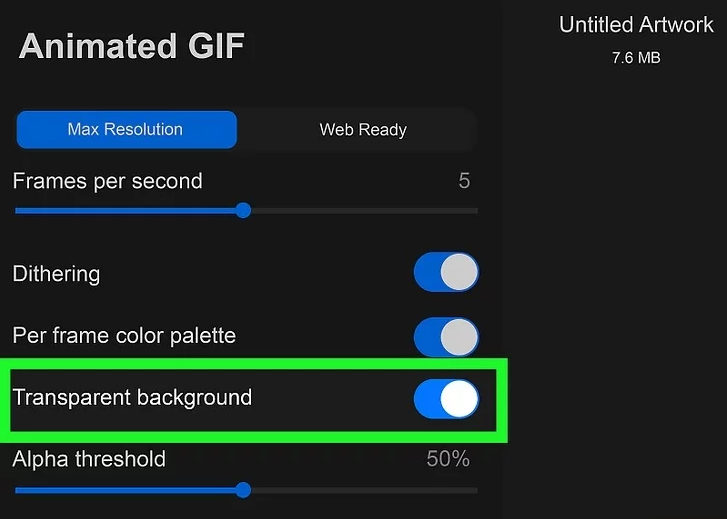
7. Activate transparent backgrounds
For GIF and PNG exports, you can remove the solid background and make it transparent. Toggle this setting if you want a transparent background for overlays or web use.
Subheading: Creating background-free animations
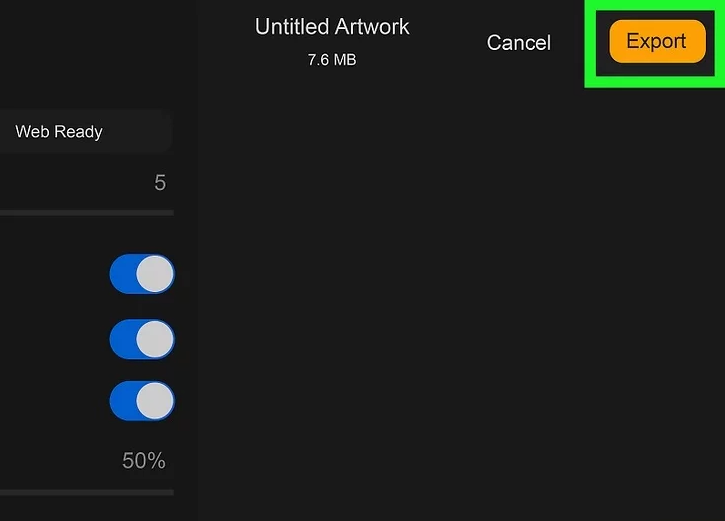
8. Tap Export
When you’re satisfied with your settings, tap the Export button (yellow, top-right corner). Procreate will process your animation into the format you chose.
Subheading: Finalizing the export
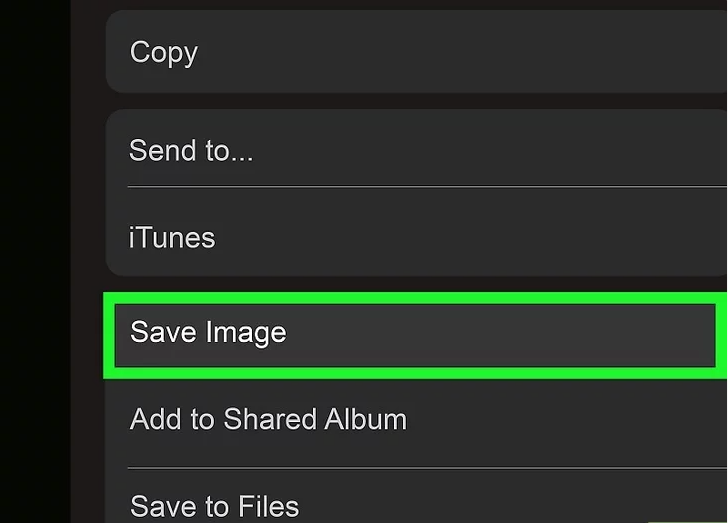
9. Tap Save Image
After exporting, tap Save Image to store your animation directly on your iPhone or iPad. You can find the file in your Photos app or the Files app, depending on your settings.