您的购物车目前是空的!
How to Make a Mannequin for your sewing projects without spending a fortune? Store-bought mannequins can be pricey, and even adjustable versions rarely match your exact body shape. Fortunately, you can create a mannequin at home that’s simple, affordable, and perfectly tailored to you. The best part? It will be an exact replica of your figure, ensuring that anything you design and sew on it will fit you flawlessly.
Part1 Making the Body
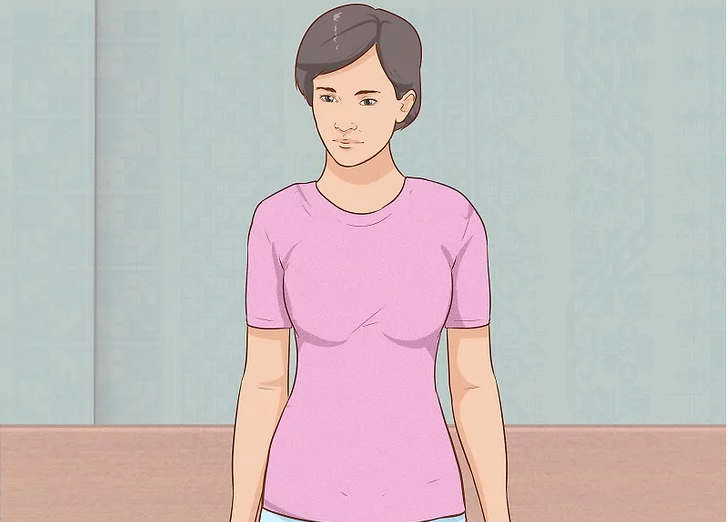
1. Put on an old, fitted shirt that you don’t mind sacrificing.
Choose a shirt that hugs your torso smoothly, without wrinkles or extra bulk. The hem should reach your hips to give enough coverage for taping. Avoid baggy shirts, as they’ll distort the mannequin’s shape. Since the shirt will be cut and taped, it cannot be reused.
🧵 Clothing Preparation
Reference: Threads Magazine
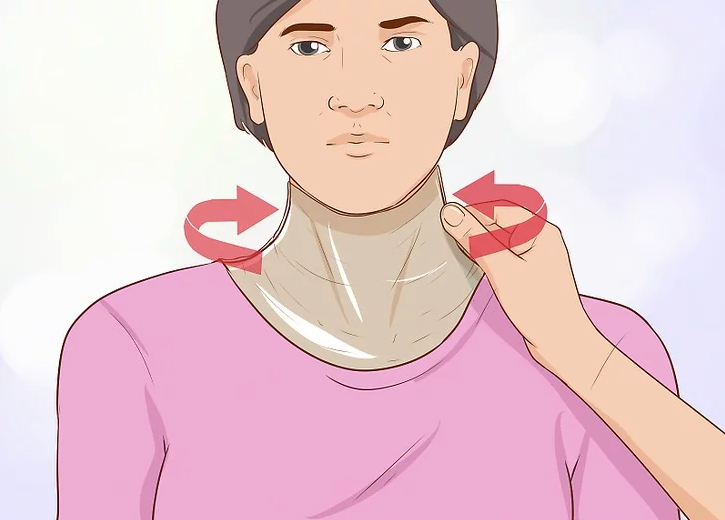
2. Cover your neck and collar area with plastic wrap.
Tear off a sheet of plastic wrap and fold it until it matches your neck’s height. Wrap it gently around your neck and tuck the ends under your shirt collar, ensuring no skin is exposed. This protects your skin once you begin taping. Paper towels can be used as an alternative if plastic wrap isn’t available.
🛡️ Skin Protection
Reference: Craftsy Guide
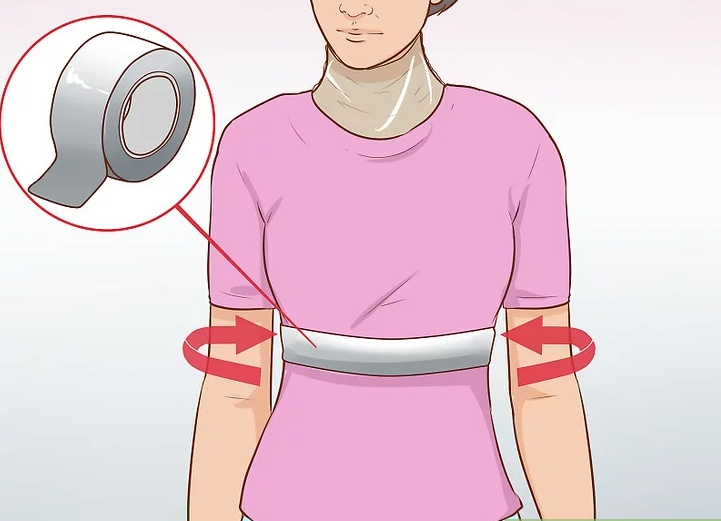
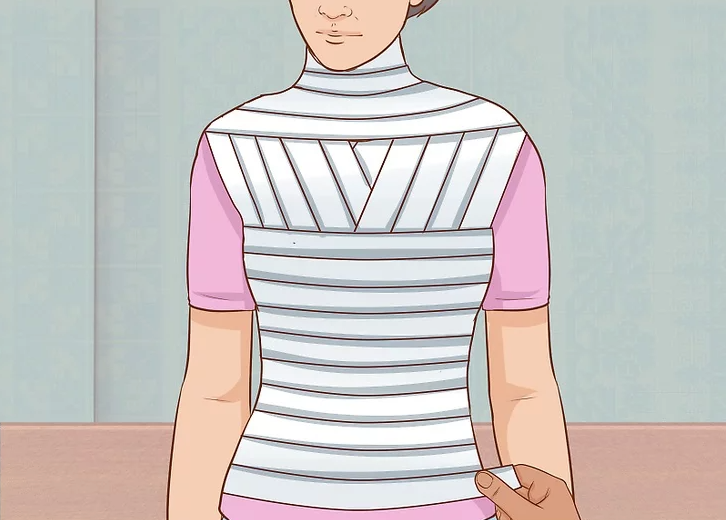
3. Start with a strip of duct tape just below your bust or chest.
Have a helper wrap the tape firmly around your torso so it contours to your shape. Keep it snug but not so tight that breathing becomes difficult. Men should place this tape just under the pectoral muscles. Assistance is recommended for accuracy and safety.
🎀 First Layer of Tape
Reference: Sew Guide
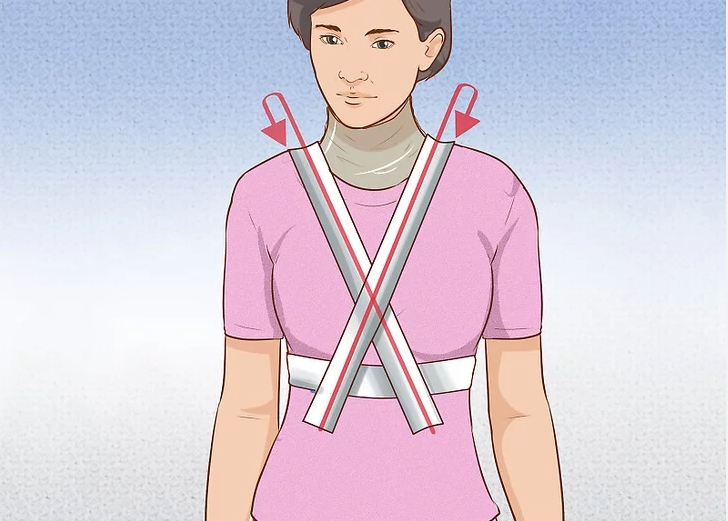
4. Create an X-shape with tape across the chest.
Apply one strip diagonally from your left shoulder down to the underside of your right breast (or chest). Then apply another strip from the right shoulder to the underside of the left breast. This cross pattern helps anchor the form and mimic your body’s contours.
✖️ Chest Cross Support
Reference: WikiHow Sewing Projects
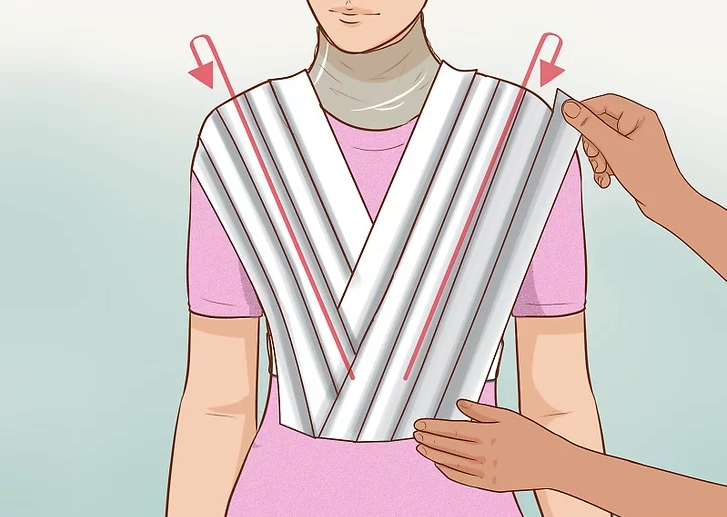
5. Continue layering tape over the shoulders, chest, and back.
Lay strips across the left shoulder, angling them down across the chest and back. Overlap each strip by about ½ inch (1.27 cm). Repeat on the right side, ensuring the tape molds smoothly to your natural curves and posture.
🩵 Shoulder and Upper Torso Coverage
Reference: Burda Style
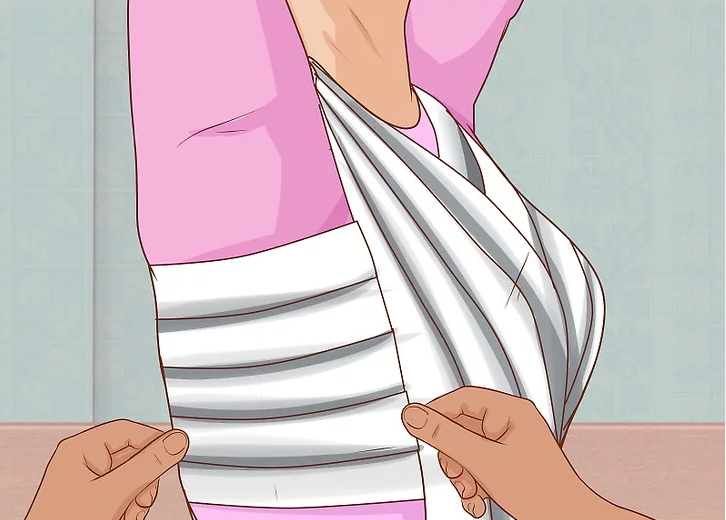
6. Fill in the armpit gaps with smaller strips of tape.
Lift your arms and apply short, horizontal strips across the ribcage, closing any open areas near the armpits. Maintain the same ½-inch overlap to keep the layers stable and consistent.
🙌 Underarm Adjustment
Reference: Craft Passion
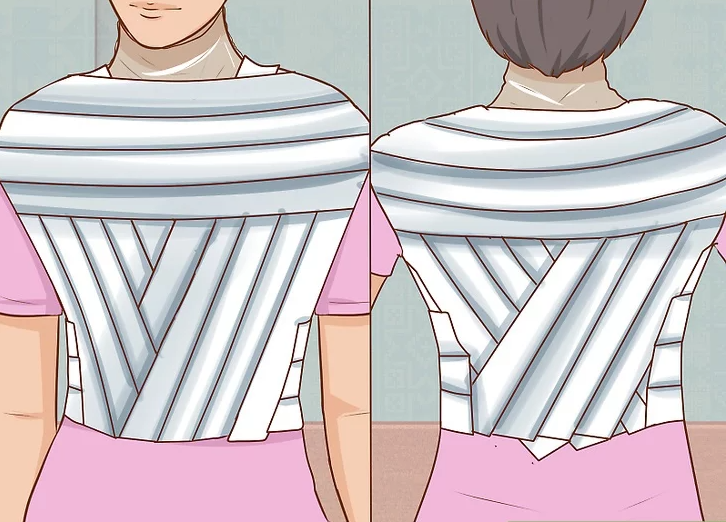
7. Cover the remaining gaps on the chest and back.
You’ll likely see a V-shaped gap both at the chest and back. Fill these with additional tape strips until the surface is smooth and fully enclosed. If your shirt has a low neckline, be sure the exposed skin is protected with wrap or towel.
🔲 Chest & Back Gap Filling
Reference: The Spruce Crafts
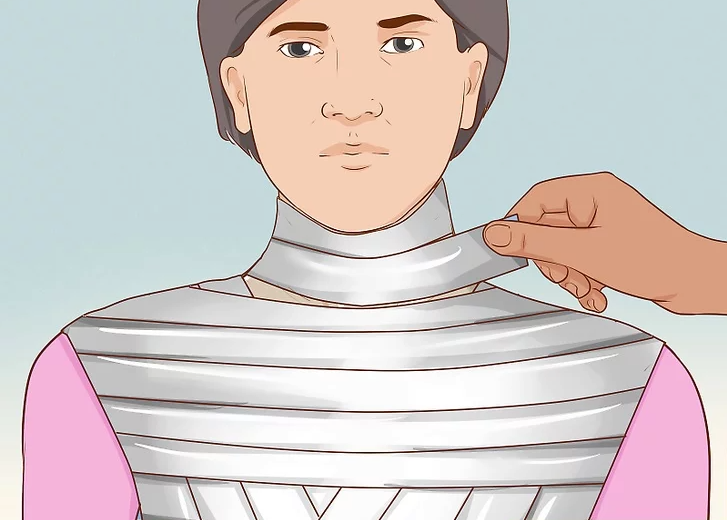
8. Add tape around the neck area.
Wrap one or two strips loosely around your neck, then use smaller pieces to close any gaps. Ensure that it’s snug but not restrictive. This step ensures the neckline of your mannequin is sturdy and well-defined.
🧣 Neckline Reinforcement
Reference: Threads Sewing Basics
9. Finish by wrapping tape from the waist down to the shirt’s hem.
Continue wrapping rows of duct tape around your waist, overlapping each layer by ½ inch (1.27 cm). Work downwards until you reach the bottom of the shirt. This completes the torso shell, giving you a sturdy mannequin base.
✅ Final Layering
Reference: DIY Network
Part2 Stuffing the Body
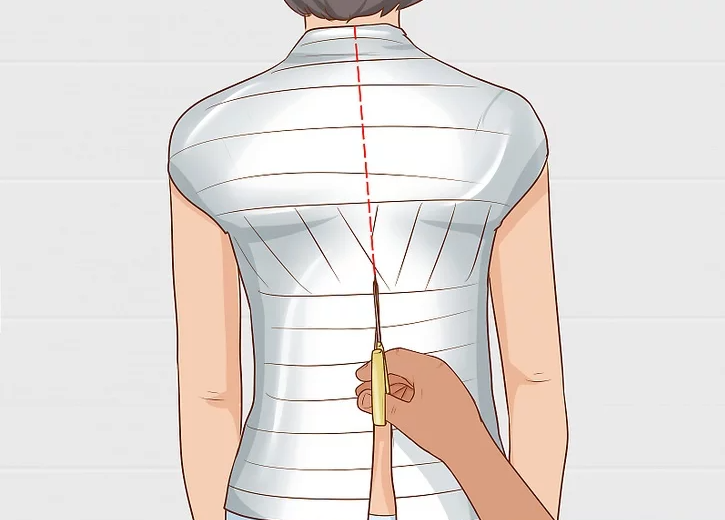
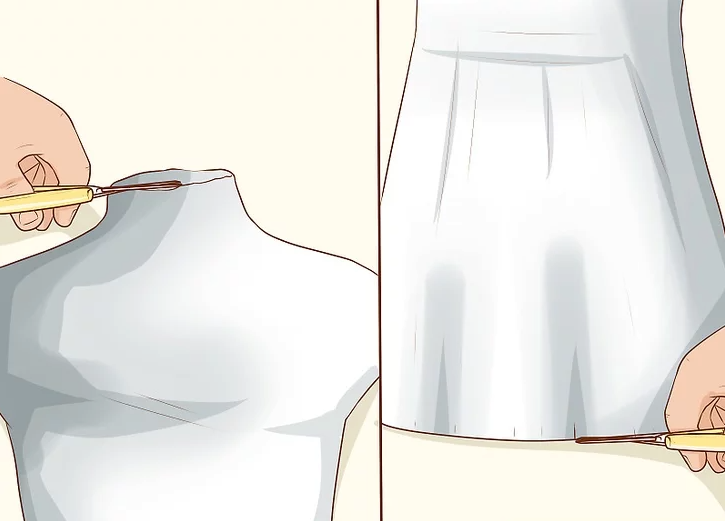
1. Carefully cut up the back of your duct tape shell.
Ask a trusted helper to cut straight down the center of the back, from the bottom hem up to the neckline. Be sure they cut through all three layers—duct tape, fabric, and plastic wrap—without nicking your skin.
✂️ Cutting the Mold
Reference: Instructables DIY
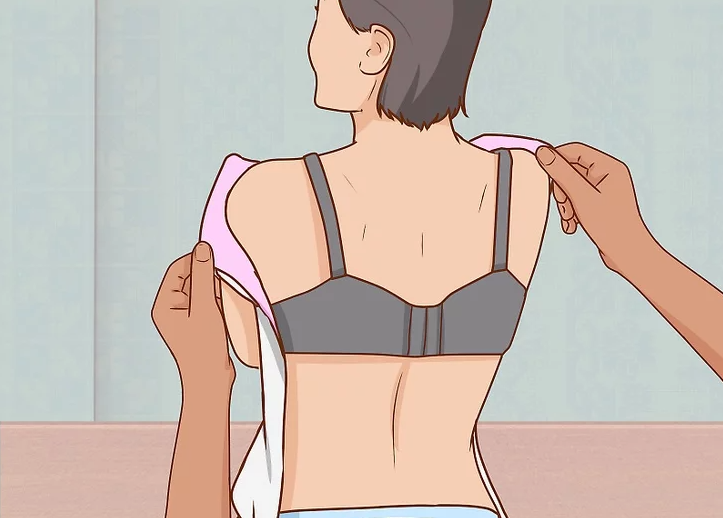
2. Gently remove the duct tape shirt from your body.
Once cut open, slide the taped shirt off carefully. You should now have a hollow duct tape replica of your torso. If any areas, such as the bust or shoulders, appear dented, press them back into shape with your fingers.
👕 Removing the Shell
Reference: Sew Guide
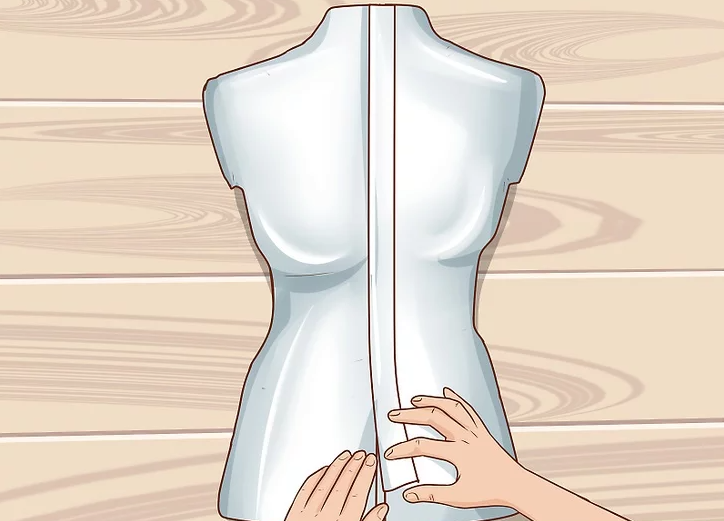
3. Seal the back opening with strips of duct tape.
Line up the two cut edges so they match your natural shape. Place strips of duct tape across the seam to close the gap securely. For added durability, reinforce both the inside and outside with extra layers of tape.
🛠️ Sealing the Form
Reference: Threads Magazine
4. Smooth out the top and bottom edges.
Inspect the neckline and hem of your mannequin. If they look rough or uneven, trim and cover them with additional tape. To create a more realistic finish, you can angle the neckline slightly downward, but ensure there is still enough neck left for stability.
🔲 Edge Finishing Touches
Reference: Craftsy Sewing Tips
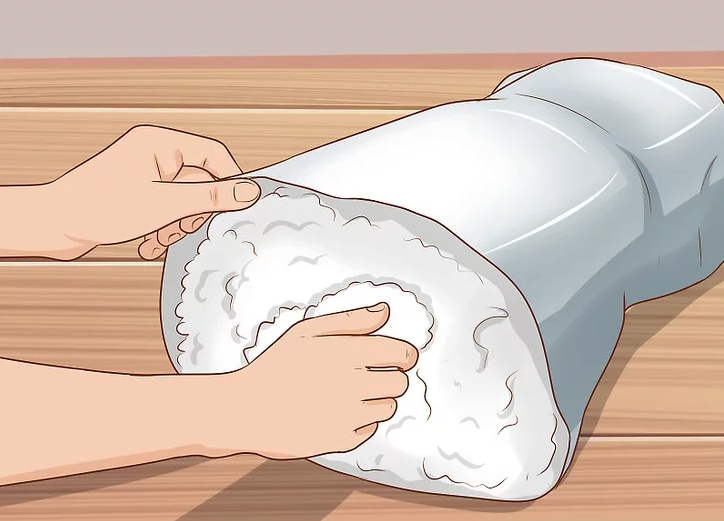
5. Fill the duct tape shell with polyester stuffing.
Cover the neck opening with tape to prevent stuffing from escaping, then begin filling the form. Use polyester stuffing to pack the shell firmly until it feels solid and life-like. Expect to use about two full bags for a standard torso.
🧵 Stuffing the Mannequin
Reference: Joann Fabric DIY
Part3 Finishing the Mannequin
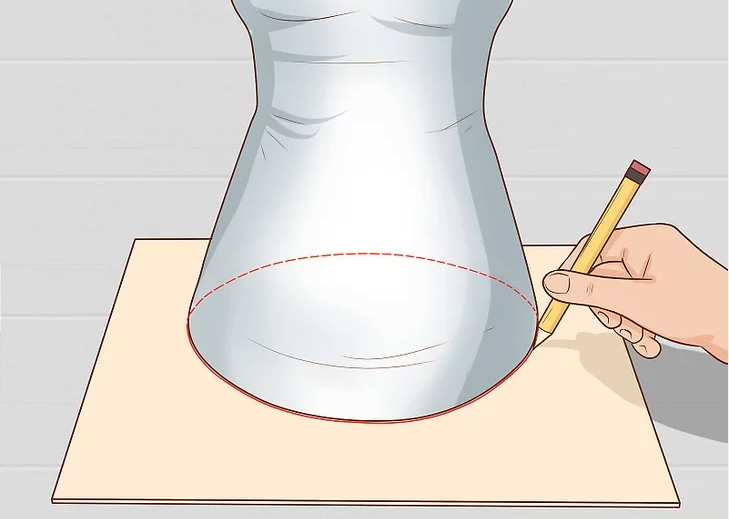
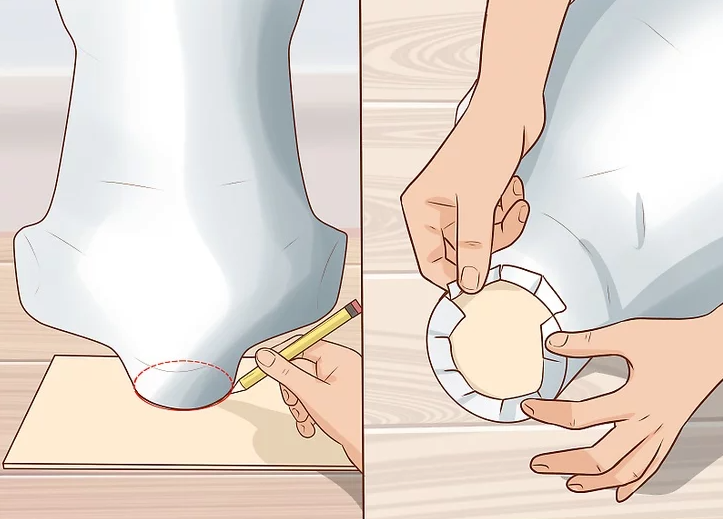
1. Trace the base of your mannequin onto cardboard or foam board.
Stand the mannequin upright on a sturdy sheet of cardboard or foam board, then use a marker to trace around the bottom edge. This traced outline will become the foundation of your mannequin.
📏 Base Tracing
Reference: Instructables DIY
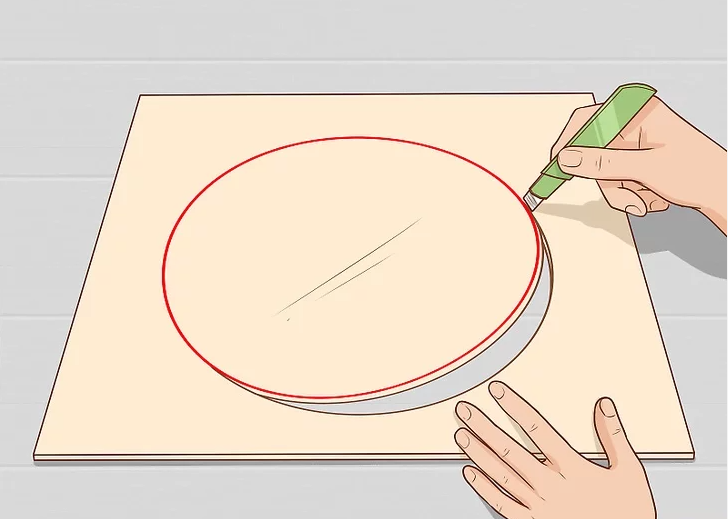
2. Cut out the traced base using a box cutter or craft blade.
Carefully cut along the inside of the traced line to ensure a snug fit. Take your time to make smooth, precise cuts that will help the base sit flush against the bottom of the mannequin.
🔪 Base Cutting
Reference: The Spruce Crafts
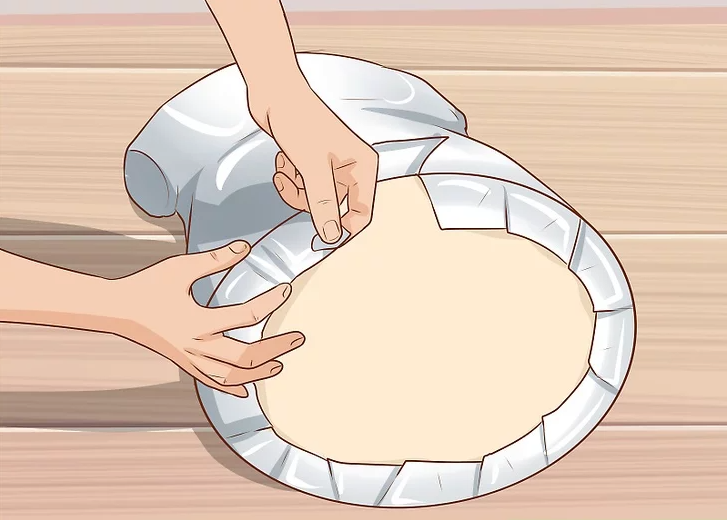
3. Attach the cardboard base to the mannequin’s bottom.
Flip the mannequin upside down and insert the cardboard piece. Fold short strips of duct tape over the edges of the base to secure it in place. For a cleaner finish, cover the entire base with duct tape so it blends seamlessly with the rest of the form.
🛠️ Securing the Base
Reference: Craft Passion
4. Close the top of the mannequin using the same method.
Trace the neck opening onto a sheet of cardboard, cut it out, and place it on top of the mannequin’s neck. Seal it with duct tape strips all the way around, then reinforce with an extra layer of tape if you want a more polished appearance.
🧩 Neck Cap Assembly
Reference: Threads Magazine
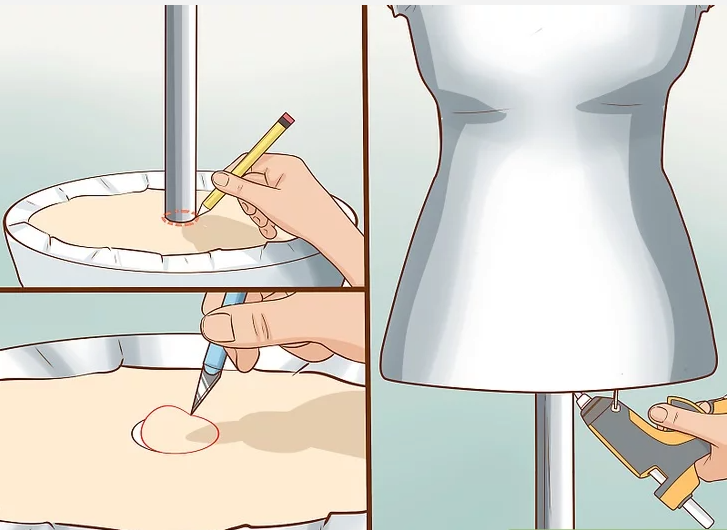
5. Mount the mannequin onto a sturdy metal stand.
Select a strong stand, such as a repurposed lamp post or metal pole. Trace its diameter onto the base of your mannequin, cut a hole, and slide the mannequin onto it. Secure the seam with hot glue, or for extra durability, use epoxy or industrial-strength adhesive. If you’re using a lamp stand, be sure to remove any wiring first.
🏗️ Stand Installation
Reference: DIY Network
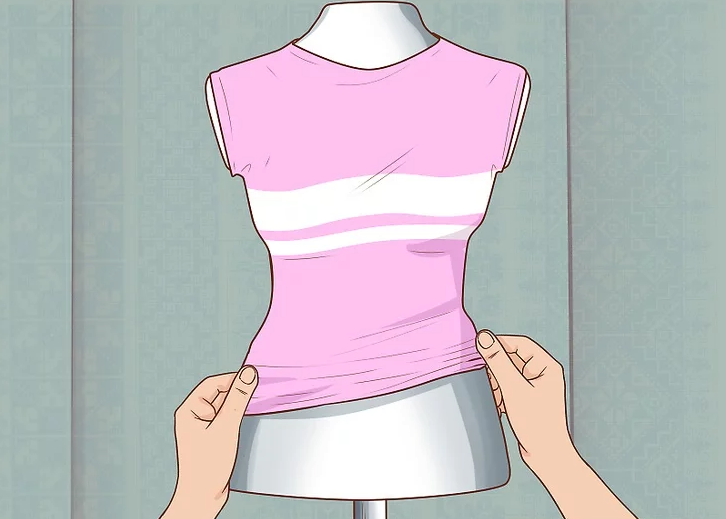
6. Cover the mannequin with fabric for a professional finish.
Slip a fitted shirt over the mannequin for a quick cover, or sew a custom fitted slipcover from cotton or jersey fabric for a more tailored look. A fabric layer not only makes the mannequin more attractive but also protects the tape surface from wear.
👗 Fabric Covering
Reference: Sew Guide