您的购物车目前是空的!
How to Design a Playbill — Every level of theater performance, from a simple elementary school production to an elaborate Broadway show, includes a playbill. This small pamphlet provides the audience with essential details about the performance: the title and show dates, the cast list with the roles each actor plays, and a short summary of the scenes or musical numbers in each act.[1] A playbill can be created as a compact 4-page booklet using a single sheet of paper or expanded into an 8-page version by stapling two sheets together.
Part1 Selecting a Style of Playbill

1. Choose the Size of Your Playbill
For most off-Broadway or community plays, a simple playbill design will work perfectly. Common formats include a 4-page layout (all content fitted on one folded sheet of paper) or an 8-page design (two folded sheets stapled together). Your choice will depend largely on the budget and the amount of information the theater director wants to share.
👉 Professional productions often have access to greater resources, allowing for a custom-designed cover and professionally printed layout, but the core content—cast lists, show dates, and synopses—remains consistent across all levels. See more examples of playbill formatting here.
Subheading: Size & Budget Considerations
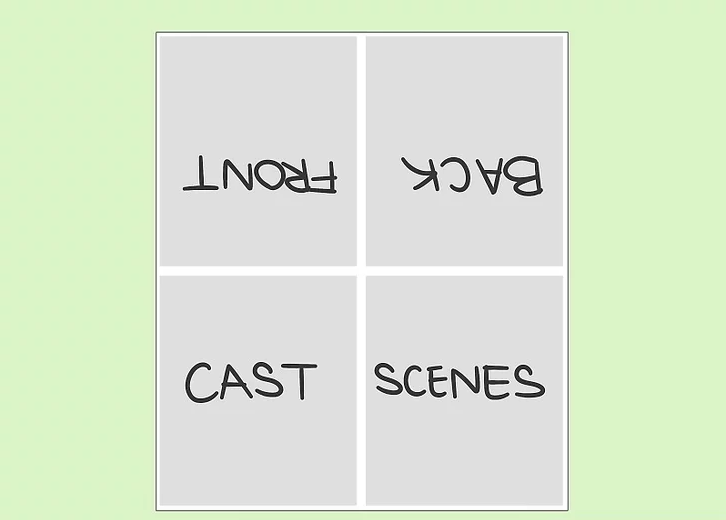
2. Design the 4-Page Playbill
If you go with the 4-page option, the front and back covers will be placed on the top left and right quarters of a single sheet of paper. Meanwhile, the cast page and list of scenes will be on the bottom left and right quarters, forming the inside of the playbill.
👉 This compact design is the most budget-friendly solution and works best for smaller productions with limited content. Check this DIY layout guide for inspiration.
Subheading: The Compact 4-Page Layout

3. Design the 8-Page Playbill
For larger or more complex productions with multiple acts, numerous performers, and additional musical numbers, an 8-page playbill is often the better choice. This format is created by stapling folded sheets of paper together into a booklet.
👉 If your budget allows, you can expand beyond eight pages to include director’s notes, advertisements, or acknowledgments. See examples of professional playbill design here.
Subheading: The Expanded 8-Page Layout
References
- Playbill. What Is a Playbill?
- PrintingCenterUSA. How to Create a Program Booklet
- Canva. Playbill Templates
Part2 Designing the Front and Back Covers

1. Design the Front Cover
The front cover of your playbill should include the title of the play and usually features a large image or illustration that visually represents the theme or tone of the production.[3][4] Choose or design an image that fits the spirit of the story—for instance, a detective play might include a city skyline, a fedora, or a newspaper motif.
👉 Collaborate with the director or art team to ensure the visual aligns with the play’s message or aesthetic. This image sets the audience’s first impression and can help capture the overall mood of the production. See professional examples of playbill covers here.
Subheading: Creating a Thematic First Impression

2. Add the Title Text to the Front Cover
Your title text is the focal point of the cover—make it bold, legible, and stylistically consistent with the tone of the play. You can experiment with font choice, placement, and size to create visual interest. While titles are traditionally positioned at the top, you could creatively arrange them vertically, diagonally, or even in layered text blocks.
👉 Match the typography to the play’s style. For example, use a classic, serif, all-caps font for Julius Caesar or an art-deco font for a 1920s-themed musical. At the bottom of the cover, credit the director, playwright, songwriters, and choreographer.[5] Learn more about theatrical typography design here.
Subheading: Typography and Title Placement
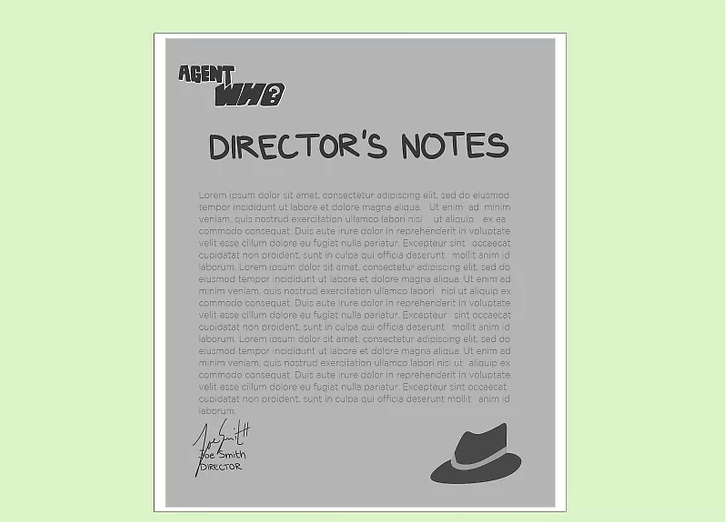
3. Lay Out the Inside Cover
The inside cover—visible on the left-hand page after opening the playbill—is often used for Director’s Notes or a schedule of showtimes and dates.[6][7] A Director’s Note helps audiences understand the artistic vision behind the production, while a schedule provides logistical details.
👉 If you include performance dates, list each show time clearly and concisely, as smaller theaters typically run a limited number of performances. See examples of Director’s Notes and layouts here.
Subheading: Informative and Welcoming Interior
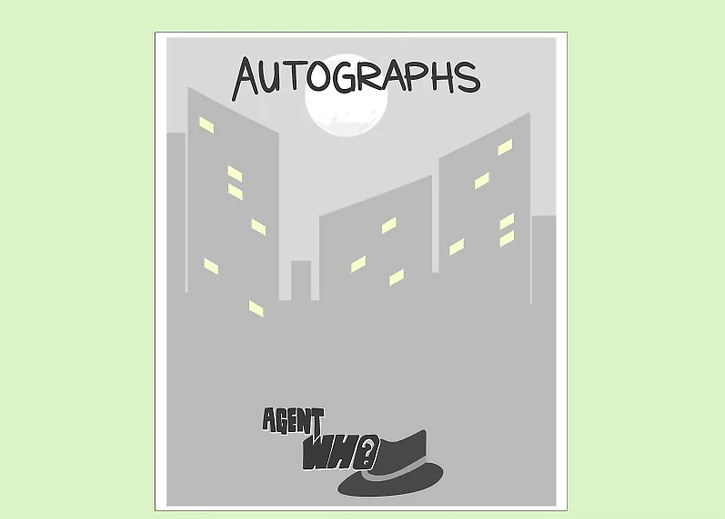
4. Design the Back Cover
The back cover can serve multiple purposes. Many theaters use it to feature advertisements or sponsor logos, helping fund the production. Alternatively, it can double as an “Autographs Page”, where audience members collect cast signatures after the show.
👉 If you choose the autograph option, simply label the page “Autographs” at the top and leave the rest blank for signatures. Remember—don’t sign it yourself! Explore creative playbill back cover ideas here.
Subheading: Finishing with a Functional or Interactive Touch
References
- Playbill. How to Design a Playbill Cover
- Canva. Playbill Design Inspiration
- Canva Learn. Typography Design Principles
- PrintingCenterUSA. How to Make a Program Booklet
- PosterMyWall. Playbill Templates for Theater Productions
Part3 Designing the Interior Pages
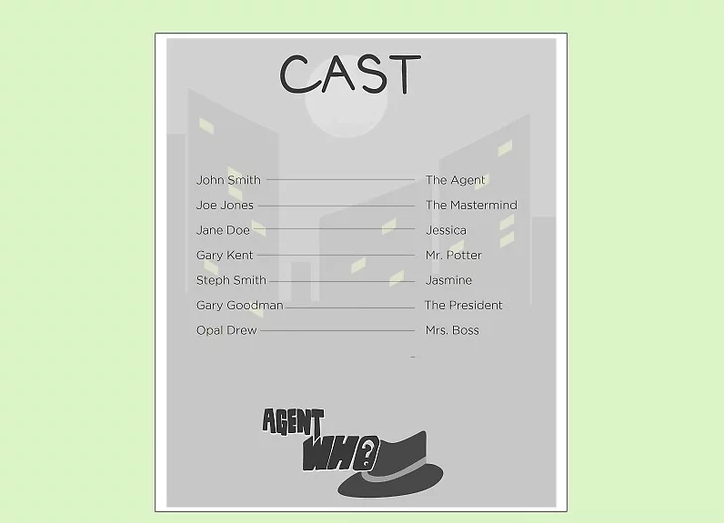
1. Fill Out the Cast Page
The cast page is typically the second page of a small playbill and serves to list the actors alongside the characters they portray.[8] Actor names are generally placed on the left-hand side, while their corresponding character names appear on the right-hand side. If you don’t already have this information, request it from the director or casting manager.
👉 The top of this page can be titled simply “Cast” or “Players.” Beneath the title, include a clarifying line such as “(in order of appearance)”, “(in order of speaking)”, or “(in alphabetical order),” depending on the director’s preference. Begin working on this page early, as last-minute casting changes or name corrections are common. Learn how to format a cast list here.
Subheading: Listing Actors and Roles Clearly
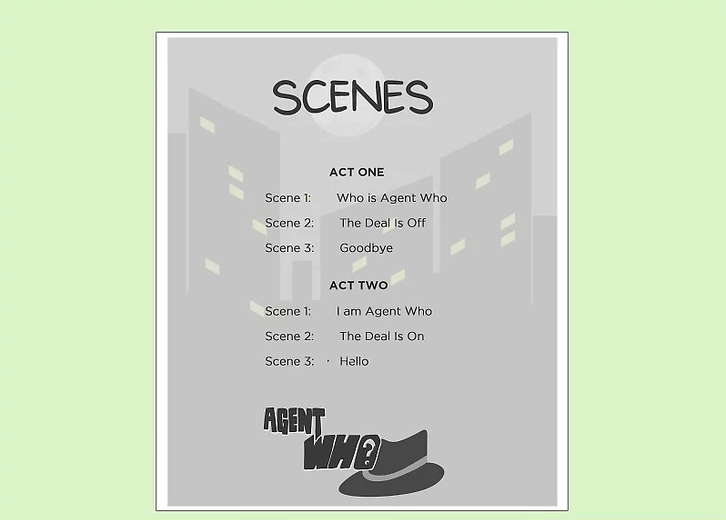
2. Create a List of Acts and Scenes
To help the audience follow along, include a list of acts and scenes structured like an outline. Label each act and its corresponding scenes or musical numbers.[9] For longer plays or musicals, this list may span two pages, particularly if there are multiple acts or songs to display.
👉 Each section should be clearly labeled, for example:
- Act I — Scene 1: The Village Square
- Act II — Scene 3: The King’s Banquet Hall
Explore examples of scene breakdowns here.
Subheading: Organizing Acts and Scene Lists
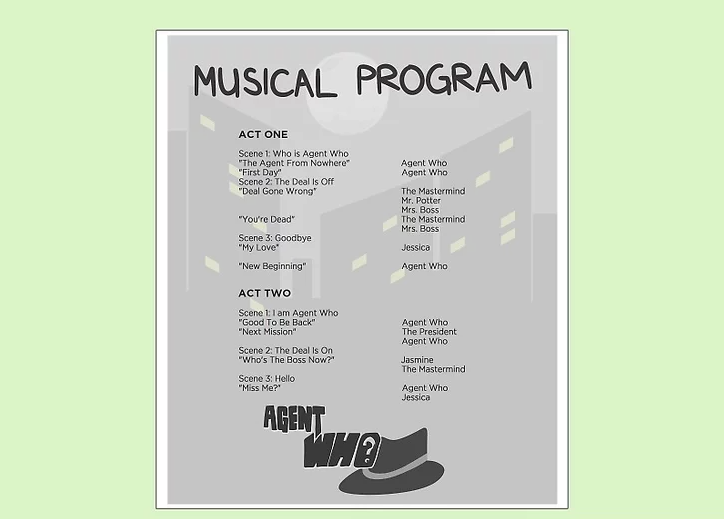
3. List Ensemble Members Within Each Song
In musicals, it’s customary to note which characters perform in each song. Under each act and scene heading, list all musical numbers vertically, and on the right side, include the names of the performers.
👉 For example, in Annie Get Your Gun, you might write:
Song: “Anything You Can Do” — Performers: Annie Oakley and Frank Butler.
This not only credits every performer but also helps audience members connect names to faces. See Broadway examples of ensemble listings here.
Subheading: Detailing Musical Numbers and Performers
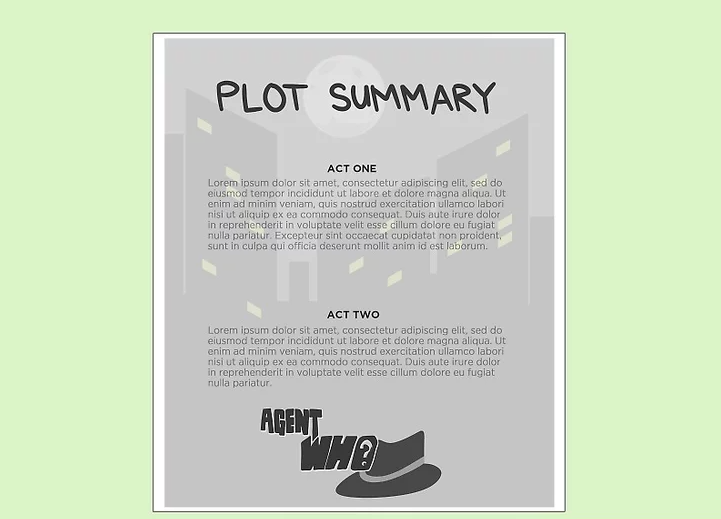
4. Provide a Brief Plot Summary for Each Act
If the director prefers, include short summaries of each act to give the audience context. These concise blurbs help viewers understand major story beats or character developments.
👉 For instance, in The Wizard of Oz, you could summarize the first act as:
“Dorothy’s house lands in Oz. The Munchkins celebrate and encourage her to follow the Yellow Brick Road to find the Wizard.”
Keep descriptions brief and spoiler-free—just enough to orient the audience. Find tips on writing plot summaries here.
Subheading: Adding Narrative Context for the Audience
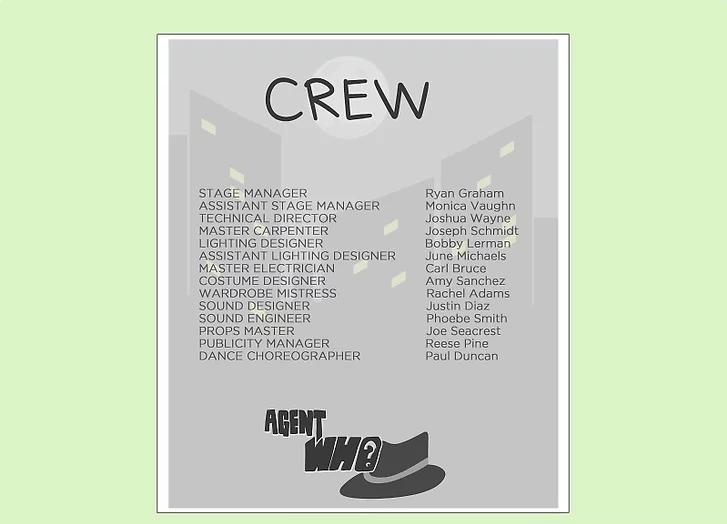
5. Add a Page Crediting the Crew
If you’re using an 8-page playbill, dedicate one full page to acknowledging the technical and production crew. This includes individuals responsible for lighting, sound, costumes, set design, props, and stage management.
👉 Recognizing behind-the-scenes contributors shows appreciation for the people who make the performance possible. See sample theater crew credits.
Subheading: Recognizing Behind-the-Scenes Talent
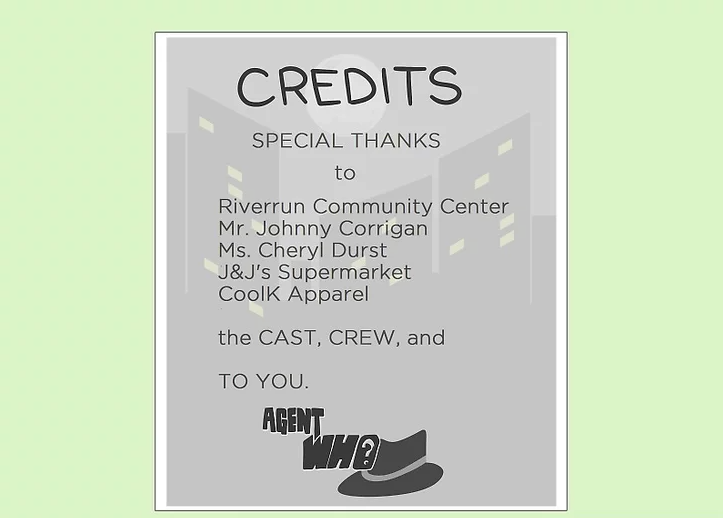
6. Add a “Credits” or “Thank You” Page
Finally, close the playbill with a “Credits” or “Thank You” page. Use this space to express gratitude toward financial sponsors, local partners, and the performance venue. You can also thank the director, choreographer, playwrights, and actors, as well as any volunteers or supporting staff.
👉 Don’t forget to include a short note of appreciation to the audience—after all, they’re part of the magic of live theater. See sample acknowledgment pages here.
Subheading: Expressing Gratitude and Giving Credit
References
- Playbill. Formatting and Listing Cast Members
- PrintingCenterUSA. How to Make a Program Booklet
- BroadwayWorld. Examples of Musical Playbill Listings
- Writers Helping Writers. How to Write a Clear Plot Summary
- Playbill. Theater Credits Formatting Guide
- Canva. Playbill Templates and Design Ideas