您的购物车目前是空的!
How to Paint Pebbles: Whether you’re in the classroom or relaxing at home, painting pebbles is an enjoyable and creative craft that you can do anywhere! Start by cleaning the rocks with soap and water to remove any dirt. After buffing away rough edges with sandpaper, sketch your design on some scrap paper using a pencil. Then, grab your paint and varnish to turn any pebble into a mini masterpiece!
Part1 Drawing Your Design
1. Wash and Dry the Pebbles to Remove Dirt
To begin, clean the pebbles by washing them to get rid of any dirt or grime. Find smooth stones from outside and bring them to your sink. Add a small amount of dish soap to a wet sponge and gently scrub each pebble. Focus on removing any dirt or debris from the surface. After washing, place the stones on a clean towel or surface to dry.
Tip: If you’re in a hurry, you can dry each stone individually. Any type of soap will work for cleaning the pebbles. For convenience, you can also buy pre-smooth stones from a craft store.
Cleaning Pebbles
2. Sand Down Rough Edges with Various Grit Sandpapers
Next, smooth out any rough edges on the pebbles using sandpaper with varying grits. Begin with a coarse 100-grit sandpaper to remove the jagged edges, then move to finer 150-grit and 220-grit sandpapers. Work your way down through each grit, ensuring the entire surface becomes smooth for easier painting.
Note: Sanding the stones smooth makes painting easier and more effective, as rough surfaces can lead to uneven results.
Smoothing the Pebbles
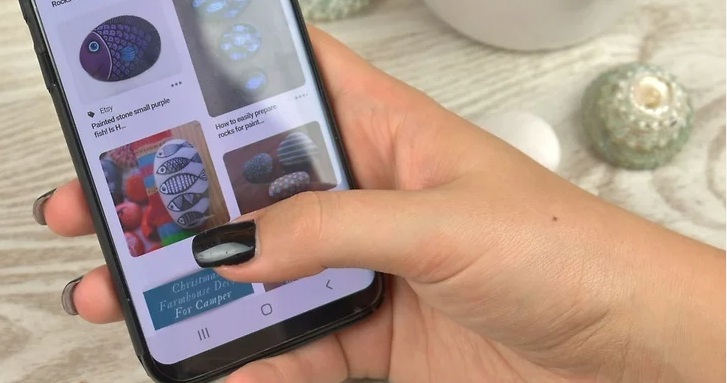
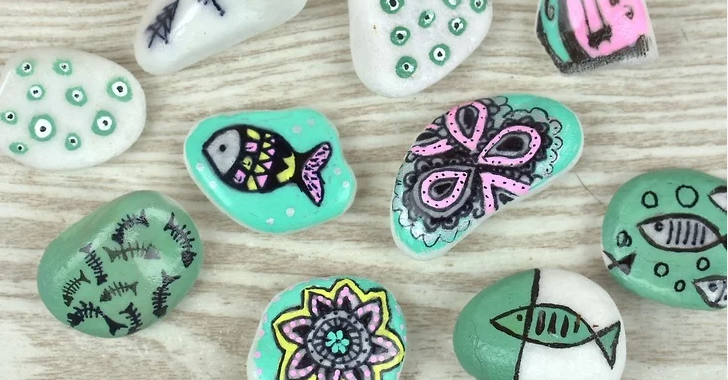
3. Choose a Design for Your Pebble
Now, it’s time to think about what you want to create! Consider the purpose of the pebbles after they’re painted. Whether you’re aiming to make labels for your garden or decorative items for your home, pick a design that suits your end goal. Simpler designs work well for garden labels, while more creative patterns can be used for home décor.
For example, you could paint a stone solid in one color and write a word on it for a garden label, or use a ladybug design for a cute decorative touch.
Deciding on a Design
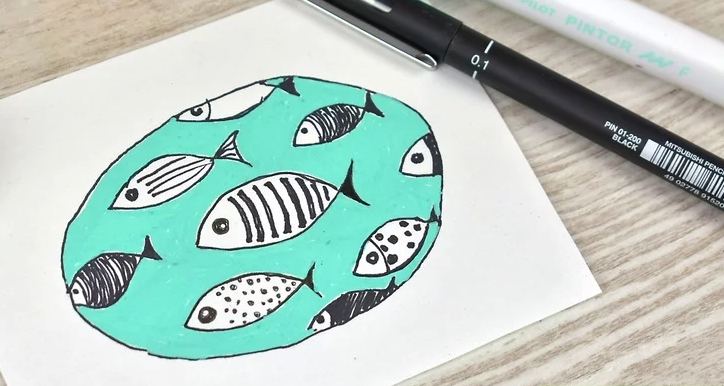
4. Draw Your Design Idea on Scrap Paper
Use a pencil to sketch your design on a piece of scrap paper. This helps to visualize your concept before drawing it on the pebble. Don’t worry about perfection—focus on exploring multiple ideas until you find one that feels right for your pebble.
Feel free to sketch as many designs as you like, and choose the one that suits you best.
Sketching the Concept
5. Sketch the Design onto the Pebble with Pencil
After finalizing your design, carefully transfer it to the pebble using a pencil. Gently trace your design, making sure the lines are smooth to make the painting process easier. If you make any mistakes, simply draw over them as the pencil lines won’t show through the paint once it dries.
If you’re confident in your drawing skills, feel free to skip the tracing step and draw directly onto the pebble.
Transferring Design to Pebble
Part2 Applying the Paint
1. Fill in Large Solid Areas with Acrylic Paint
Start by filling in the large sections of your design with acrylic paint. Use a thin paintbrush and dip it into the acrylic paint, then apply smooth, even strokes to cover the pebble’s surface. Begin with the background of your design, such as the base color, to create a foundation for your artwork.
Tip: If you’re working on a complex design, it’s best to paint from back to front. For instance, paint the sky first if you’re working on a tree in front of a sunset.
Acrylic paint is not only affordable, but also easy to clean. If you accidentally spill some paint, you can simply blot it off with dish soap!
Painting the Base Layers
2. Dry the Paint with a Blow Dryer
Once you’ve applied the paint, use a blow dryer to speed up the drying process. Set the hair dryer to low heat and move it back and forth over the painted surface. This will help dry the paint evenly and quickly. Continue using the blow dryer until the paint feels dry to the touch.
Alternatively: If you’re not in a rush, you can let the pebbles air-dry, checking them periodically to ensure they are fully dry.
Drying the Painted Pebbles
3. Add Fine Details with Thin, Tapered Brushes
For intricate details, switch to a thin, tapered paintbrush. Dip it into the desired acrylic paint color and carefully outline finer parts of the design. Use short, controlled strokes to add delicate features. Make sure to clean the brush between color changes to keep your artwork neat.
Reminder: If you’re working with multiple layers of paint, be sure to dry each layer before proceeding to the next.
Adding Fine Details
4. Enhance Your Design with Chalk Crayons and Markers
Once the base paint layer is dry, use chalk crayons or markers to add extra flair to your design. These materials are perfect for adding lighter, pastel tones, or softer details. Chalk markers and crayons are also great for achieving a chalk-like appearance on your painted pebble.
Tip: Always ensure the base paint is completely dry before using chalk markers or crayons to avoid smudging.
Adding Artistic Touches
5. Outline and Highlight with a Thin Black Pen
For a professional and clean finish, outline key parts of your design with a thin black pen. This will help to define the artwork and make certain elements stand out. Make sure all paint layers are fully dry before adding this final touch.
Note: Pens are especially useful for more detailed designs, such as outlining shapes like hearts or flowers on your painted pebble.
Final Outlining
Part3 Sealing the Finished Art
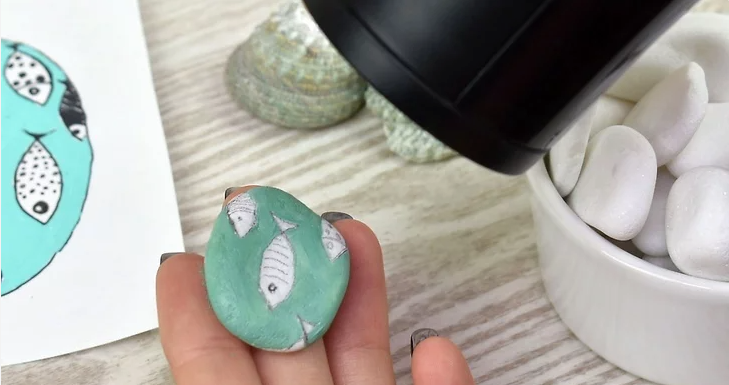
1. Dip a Clean Paintbrush into Clear Glue or Varnish
Begin by selecting a clear varnish, sealant, or PVA glue to protect your painted pebble. Dip a clean, thin paintbrush into your chosen clear product and coat the brush completely. This will ensure that your artwork is sealed and protected while maintaining its vibrant appearance.
Tip: Clear sealants and glue can be found at most hardware or home improvement stores.
Sealing with Clear Product
2. Apply a Thin Layer of Varnish Over the Dried Pebble
Next, use smooth and even strokes to apply a thin layer of varnish over the dried painted surface of the pebble. Ensure that the entire painted area is covered, but there’s no need to worry about applying it to the back of the stone. One layer of varnish or sealant is usually sufficient, but for extra protection, feel free to apply a second coat.
Tip: Applying varnish helps to protect your pebble from damage and ensures its longevity.
Applying Varnish
3. Use a Spray Sealant for More Coverage
If you prefer more coverage and an even finish, opt for a spray sealant. This method is quicker and can make the clear topcoat look smoother. Look for spray-on sealants available in cans at hardware or home improvement stores to achieve a uniform finish.
Note: Be sure to work in a well-ventilated area when using spray sealants to avoid inhaling fumes.
Spray Sealant for Smoother Finish
4. Allow the Sealant Layer to Dry Completely
Once the sealant is applied, leave the pebbles to dry completely. Set them on a flat, open surface, and check periodically to ensure that the surface feels dry. If the varnish feels dry when lightly tapped, the pebbles are ready to be displayed and admired.
Tip: Be patient and allow the stones to dry for several hours before handling them.